SECTION 5
DISASSEMBLY AND ASSEMBLY
109
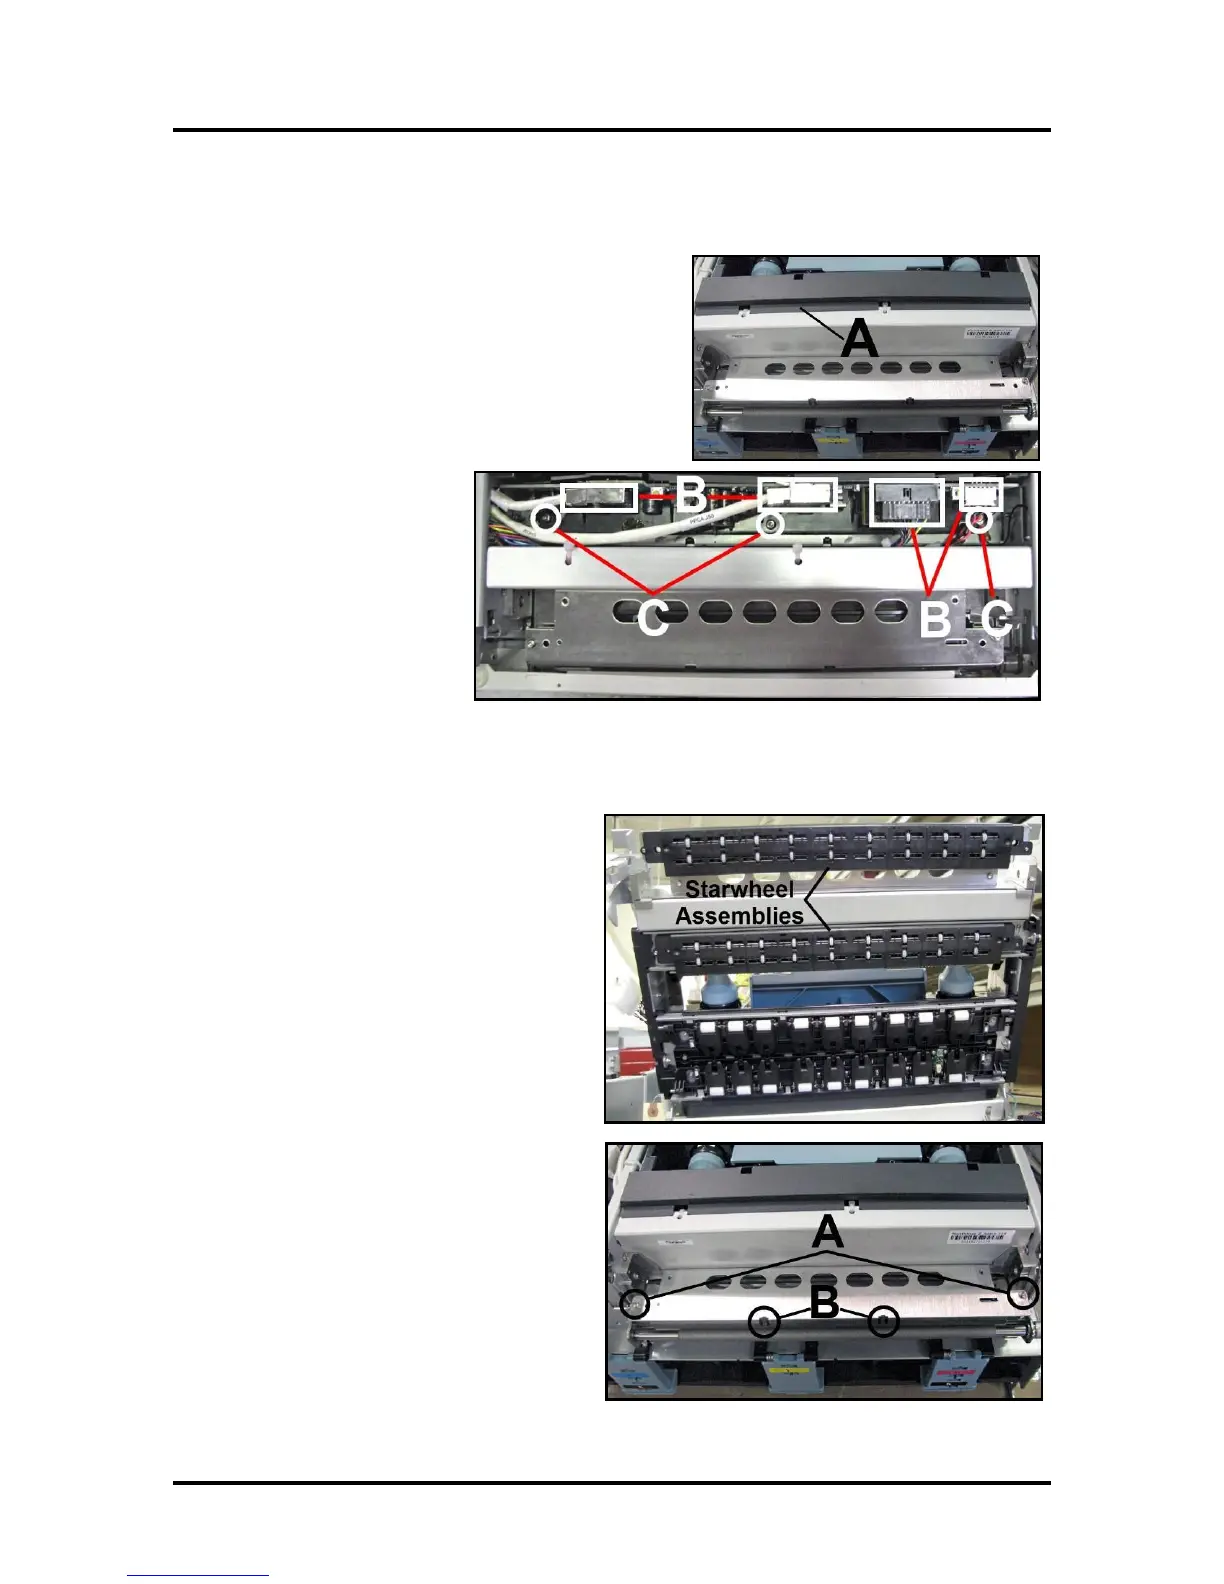
Removing the Pen Driver Printed Circuit Assembly (PCA)
Location: Upper Clamshell next to the Printhead Cartridge Bay.
[A] Remove the Pen Driver PCA Cover (lightly glued in
place).
[B] Disconnect the (2) Ethernet data cables, then unplug
the power connector and Main PCA harness connectors.
[C] Remove (3) screws holding the head board mount.
[D] Remove the Pen PCA
from the unit.
[E] Remove (2) screws
attaching the PCA to the head
board mount.
Install in reverse order.
Removing the Starwheel Assemblies
Location: Upper Clamshell. Open the Print
Engine Clamshell to access the two Starwheel
Assemblies. One is just inside the exit end of the
Clamshell, the other one is mounted externally on
the Clamshell Frame over the Exit Center Plate
Assembly. The removal procedure is similar.
External:
[A] Remove (2) screws from top of Exit
Wheel Bracket.
[B] Carefully release the locking tabs holding
the Starwheel Assembly to the Clamshell.
NOTE: Locking tabs break easily! Remove
the Starwheel Assembly.
Install in reverse order.

 Loading...

