SECTION 5
DISASSEMBLY AND ASSEMBLY
129
Replacing Paper Path Motor or Drive Belt
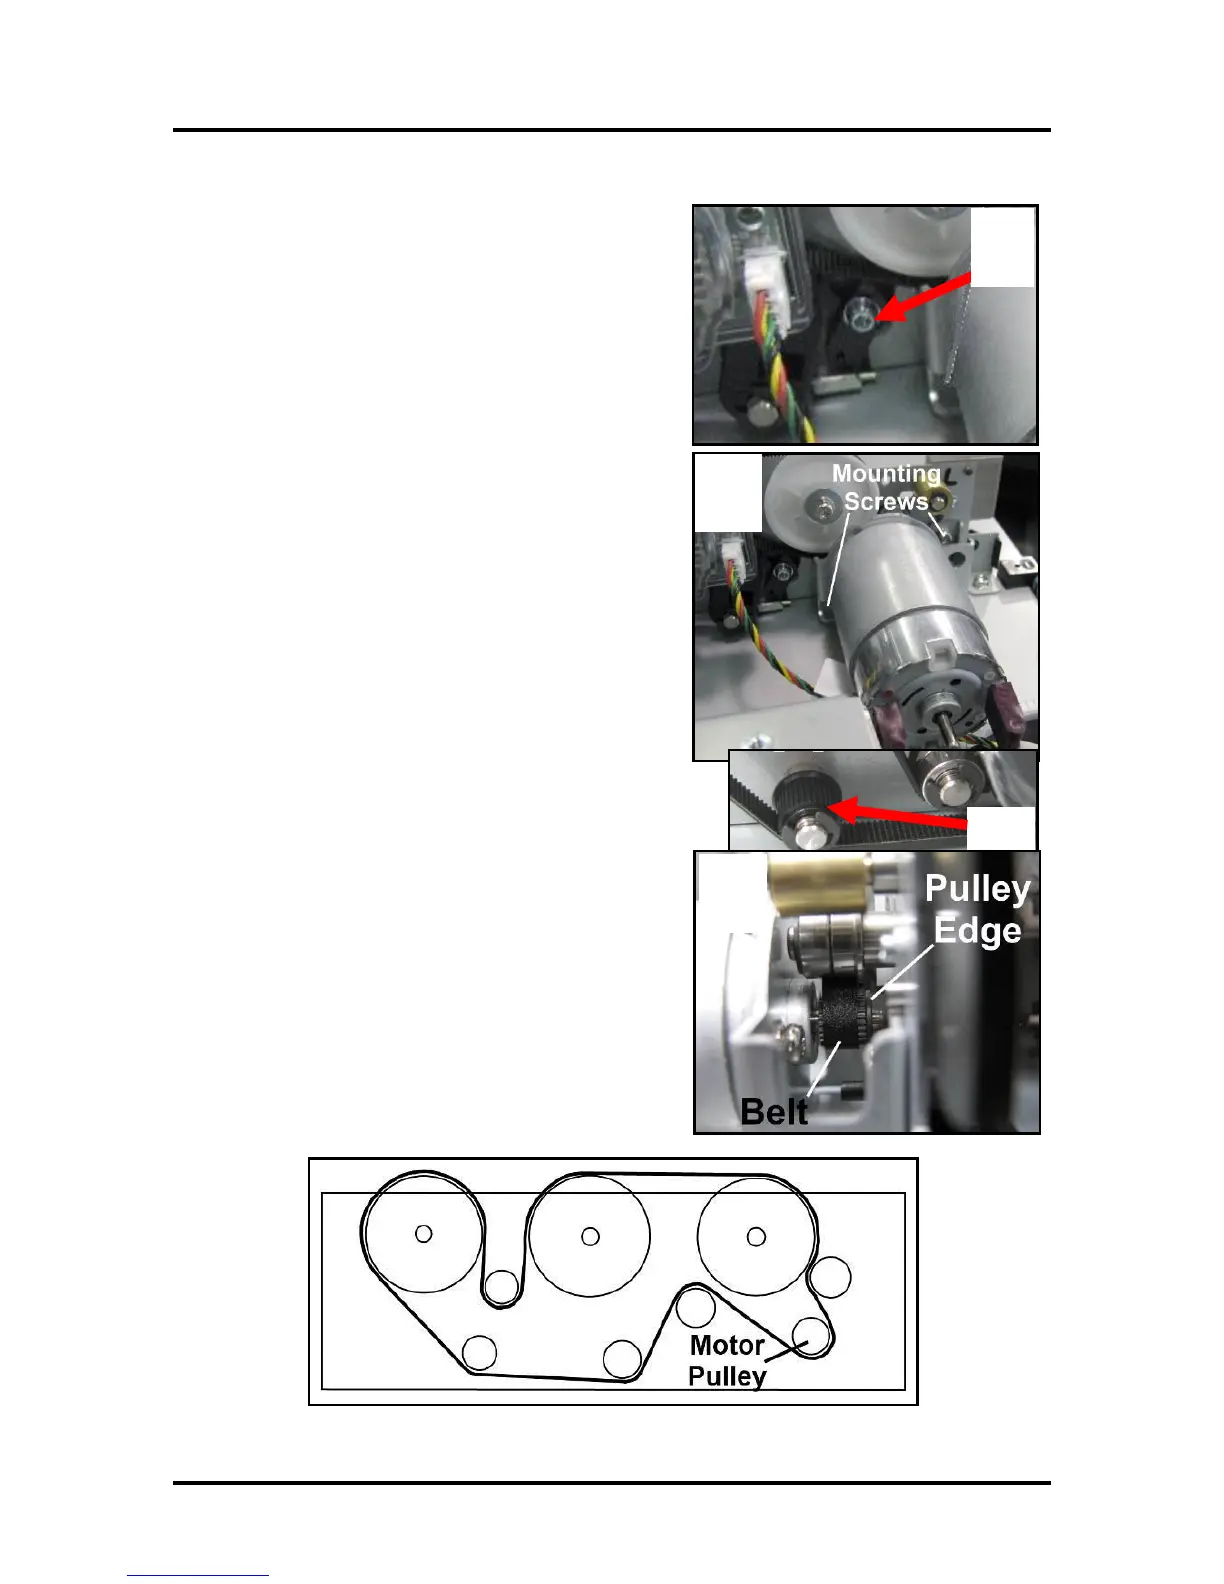
16. Loosen (do not remove) the screw that secures the Belt
Tensioner [A]. Pivot the Belt Tensioner “clockwise”, to
release the belt tension. While holding it in this position,
secure the screw.
17. Remove (2) screws that attach the Motor Assembly [B]
to the lower Print Engine Clamshell. Pull the Motor
straight out so the Motor Pulley clears the drive belt.
NOTE: If replacing the Motor, unplug the two wire
connectors from the motor.
18. If replacing the drive belt on a Z3/Z4/MR Print
Engine (with enclosed encoder), follow the steps on the
previous page for removing the Encoder Cover (steps A-
C only). See “Replacing Encoder or Encoder Sensor",
“Printers with Z3/Z4/MR Print Engines”.
Then remove the drive belt.
Tip: This would be a good opportunity to remove each
of the black plastic idlers [C]; to clean and lubricate their
inner hubs and shafts. Inspect and replace worn idlers.
19. Install the drive belt and/or Motor in reverse order.
NOTE: Make sure that the belt stays inside the raised
edges of the motor pulley and roller studs [D].
20. Loosen (do not remove) the screw that secures the Belt
Tensioner. Allow the Belt Tensioner to rotate “counter-
clockwise”, by itself. Spin the transport to center the
belt. Then tighten the screw to secure the Belt
Tensioner’s position.
Belt Routing Diagram

 Loading...

