SECTION 2
TROUBLESHOOTING
33
Jams in the Printer
When the printer detects a media feed problem, it will stop automatically.
Depending on where the media stops; the message “PAPERPATH_PAPERJAM” or
“PAPERPATH_FEED_TIMEOUT” will be displayed in the Toolbox.
Once the jam has been removed from the system and the print engine is closed; press the PAPER/RESUME
button on the control panel or press the Clear Error button in the Toolbox to continue printing.
TIP: If the printer will not “resume” after a “PAPERPATH_PAPERJAM” is detected (Toolbox System
Status changes to “ONLINE” and the Mech State changes to “PREP”, but it will not continue printing); this
is normally an indication that one or more of the media sensors is still interrupted. Please be sure to remove
media from and check/clean the Paperpath sensors and the Feed Sensor.
Some possible causes for jamming are:
1. Feeding more than one piece of media at a time (double-feeding), due to improper sheet separation
adjustment, improper media loading, or nested media (envelopes that are caught under the flap of
another envelope or stick to one another).
2. Damaged media, such as dog-eared (turned down corners), curled or bowed media.
3. Media that is not stiff enough may not be usable. Media that meets Postal stiffness requirements for
automated feeding is acceptable in the Digital Color Printer.
4. Media that is too thick for the printer.
5. Media that is too wide for the printer or media that skews as it travels through the printer.
Removing Jammed Media
Clearing a jam depends on where the jam occurred.
From the Feed Section: Remove media stack. Loosen and lift the sheet
separators to clear the jam. Then re-adjust the sheet separators as described in
this manual.
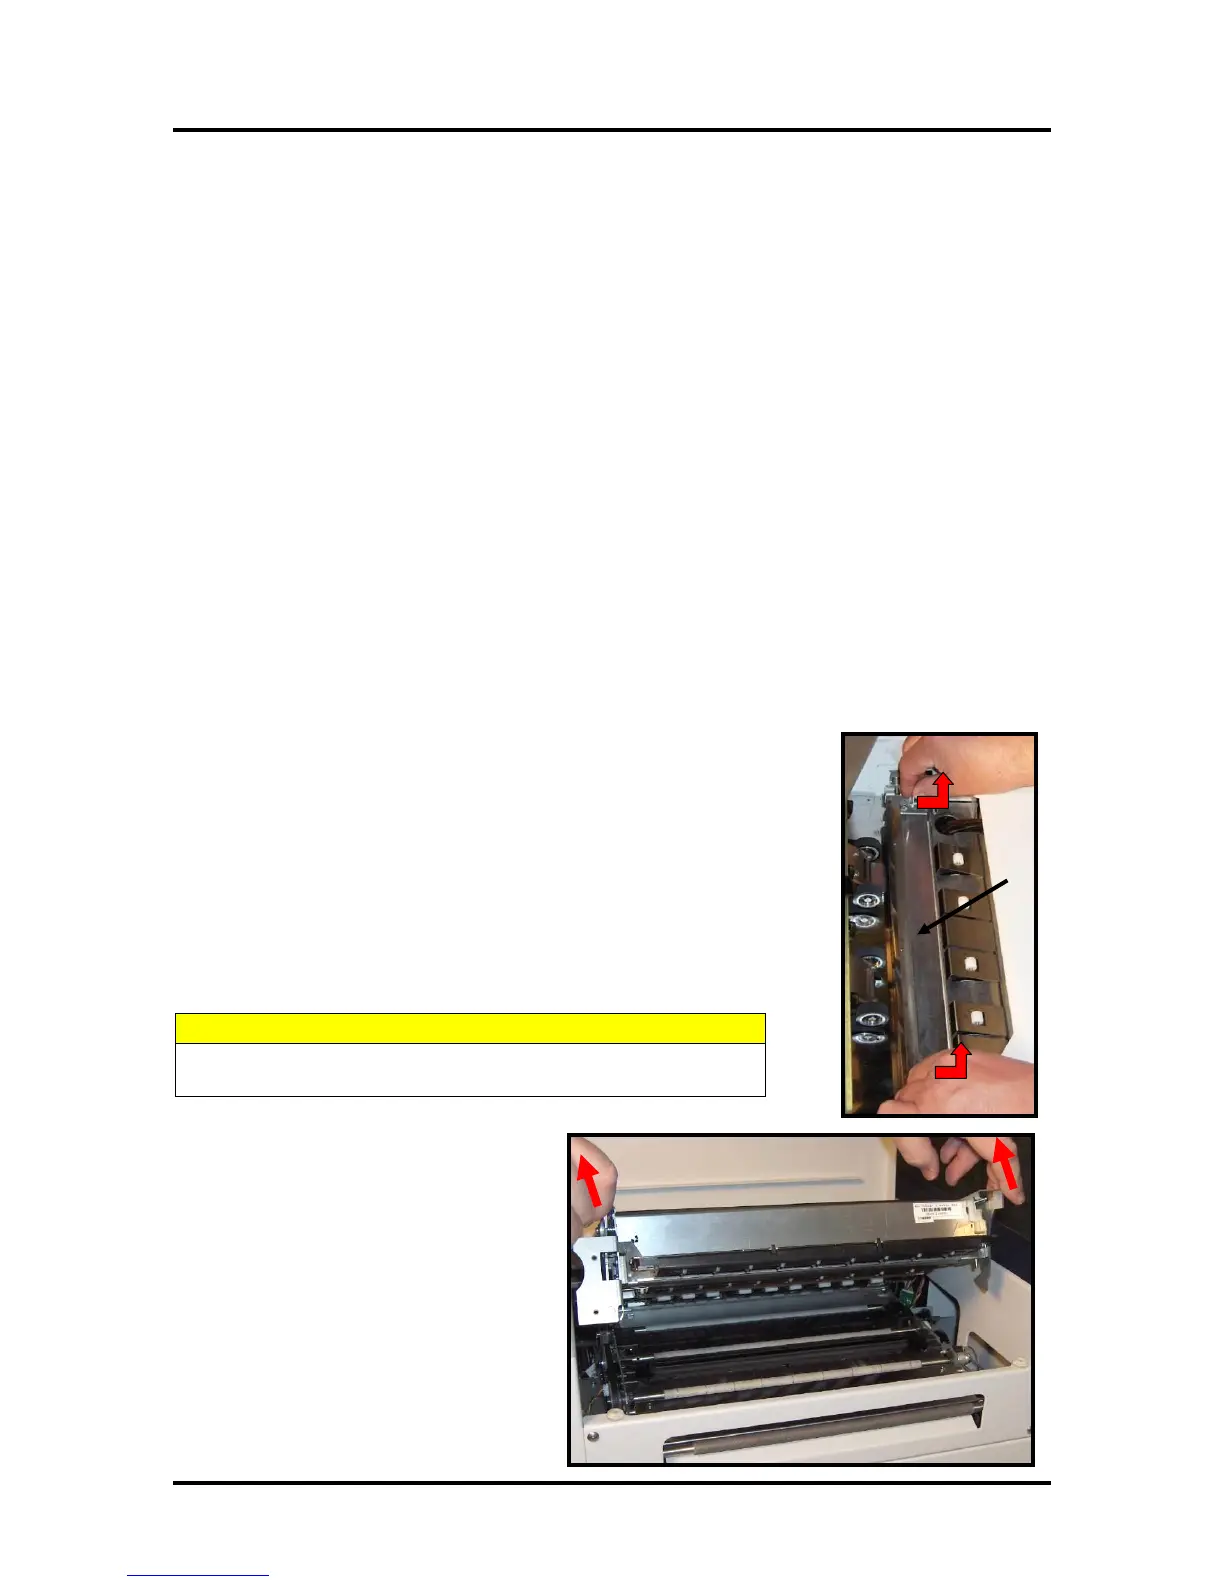
Under the Antistatic Brush Assembly: If necessary, remove the Antistatic
Brush Assembly [A] to access jammed material. Unlatch the two latches (one
on either side of the Assembly) and lift the assembly off the four mounting pins
as shown. Do not bend the guide fingers! Clear the jam, and then carefully
reinstall the Antistatic Brush Assembly. Make sure brush assembly is correctly
reinstalled and aligned before starting to print. Assembly should sit flat on
transport area surface
BE CAREFULL NOT TO PINCH OR CUT THE INK HOSES
WHEN RE-INSTALLING THE ANTISTATIC BRUSH ASSY.
From the Print Engine Area: Open the Top
Cover. Lift up on the two latches (one on
each side of the print engine assembly) and
raise (swing open) the Print Engine
Assembly [C]. Clear the jam, then lower and
re-latch the Print Engine Assembly. Then
close the Top Cover.
CAUTION: Do NOT open the Print Engine
Assembly to an angle greater than 60º.
Damage to the ink color tubes and other
issues will result.

 Loading...

