SECTION 6
MAINTENANCE
145
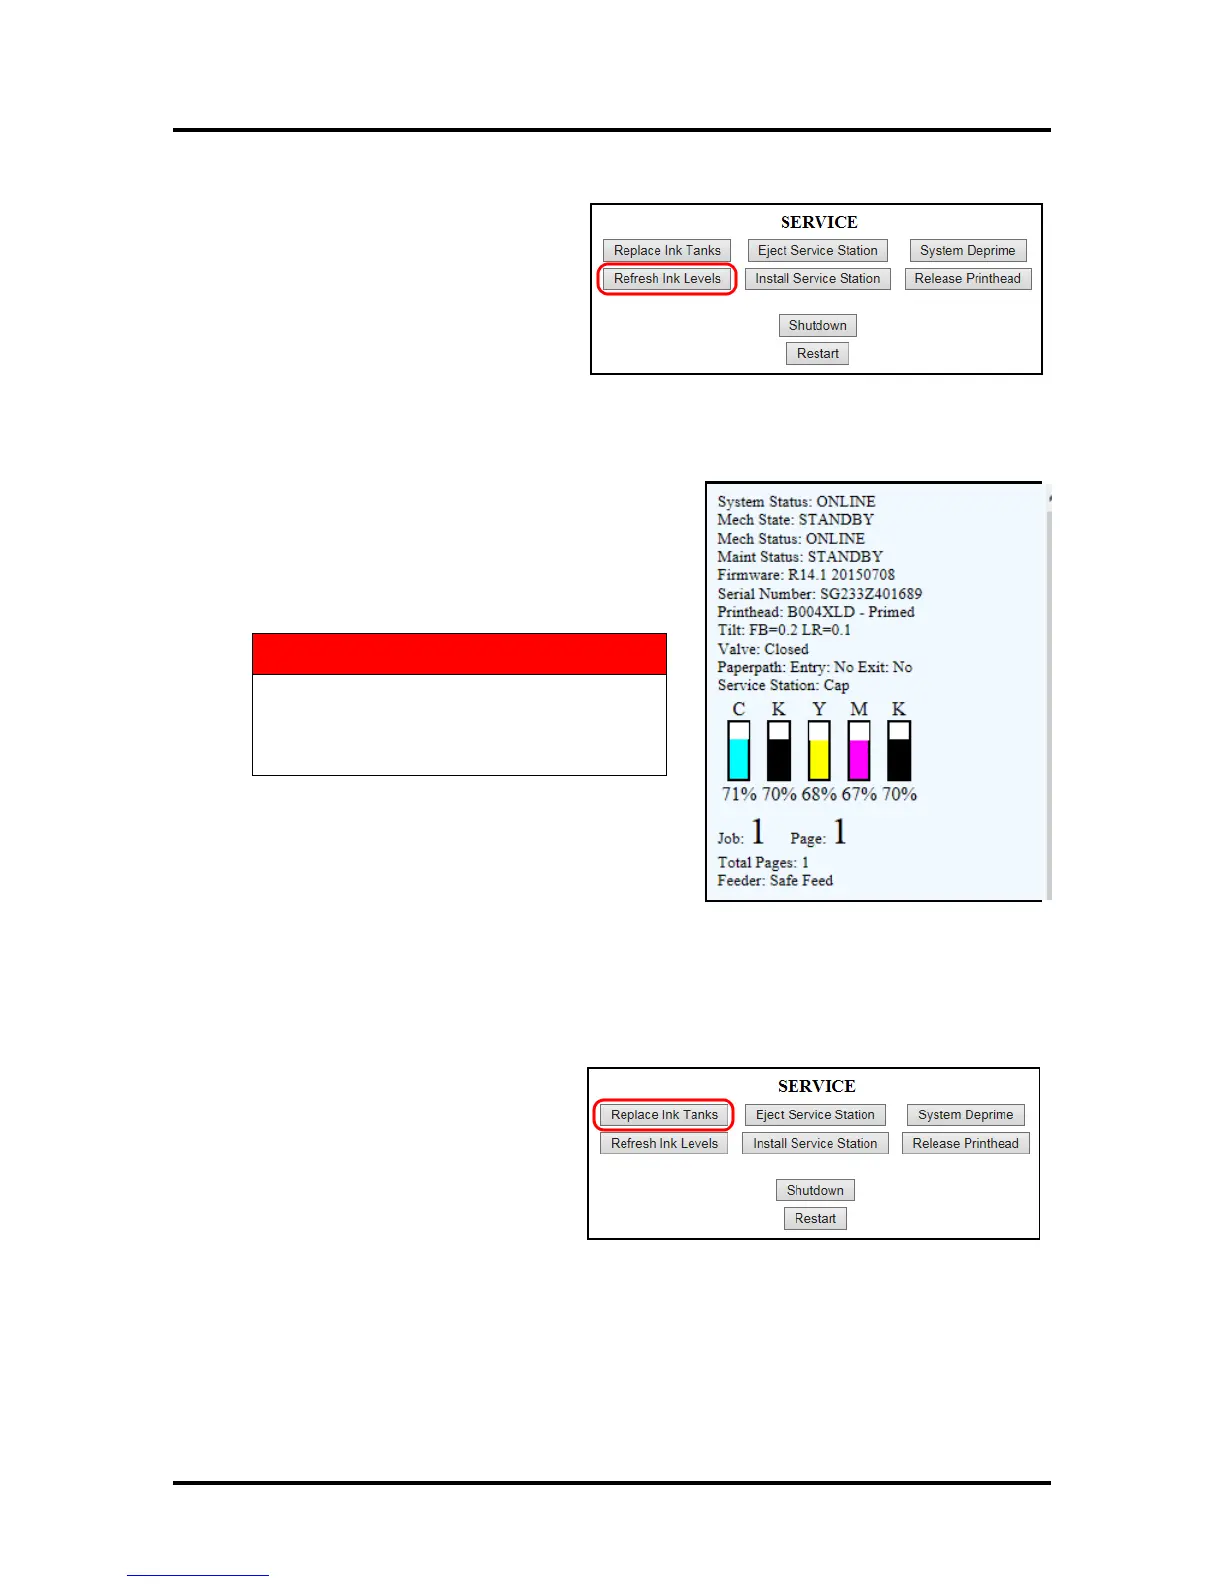
6. Click “Continue” on the Confirm
screen, then “Refresh Ink Levels” on
the User Interface screen. The ink
colors fill in as the Ink Tanks are
installed. If the ink colors do not fill in
after a few seconds, click “Replace Ink
Tanks” again and reinstall the Ink
Tank(s).
NOTE: If the Ink Tank is installed, but the Ink Tank indicator still does not refresh, see
“Cleaning Ink Tank Contacts” below.
7. When the Printer stops processing and all the fields in
System Status are black, the Printer is ready for use.
8. Close the Ink Tank Door.
The ink in the Ink Tanks may be harmful
if swallowed. Keep new and used Ink
Tanks out or reach of children. Discard
empty Ink Tanks immediately.
Cleaning Ink Tank Contacts
When reinstalling or replacing Ink Tanks, the Ink Level indicator in the Toolbox may not refresh. This may
be due to a dirty Ink Tank Level Prism and/or QA Chip contacts on that Ink Tank(s). You can clean the
contacts as follows:
1. Remove the Ink Tank(s). Open the
Toolbox. Click “Replace Ink Tanks”.
Once the “Confirm” window opens, it
is safe to remove the Ink Tanks.
IMPORTANT: DO NOT press
“Continue” until after you have
removed and replaced the Ink
Tank(s) and closed the Ink Tank Latches.
”

 Loading...

