SECTION 5
DISASSEMBLY AND ASSEMBLY
113
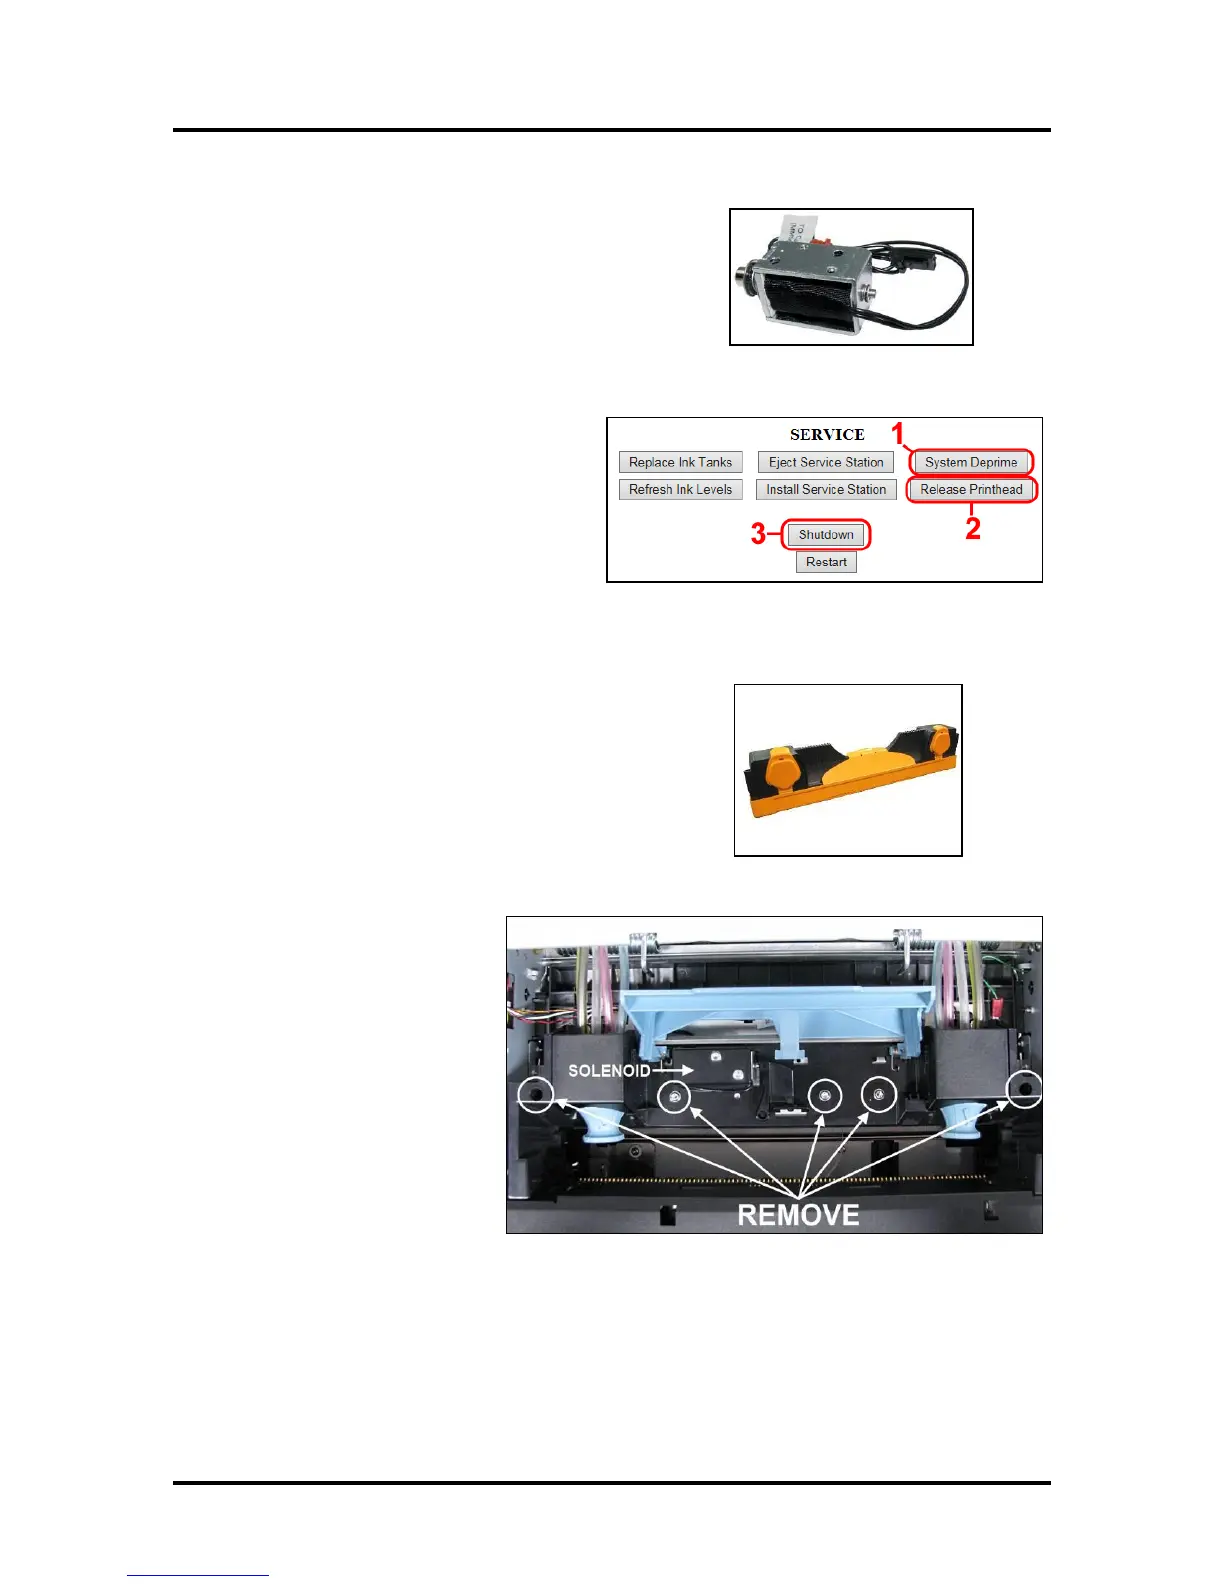
Replacing the Printhead Lever Latch Solenoid
Follow the steps below to replace the Lever Latch Solenoid:
Remove the Printhead Latch Solenoid
1. Go to the Printer Toolbox User Interface
screen and click “System Deprime”.
2. Click “Release Printhead” to release the
Printhead Latch.
3. Once the Latch pops up, click
“Shutdown” to shut down the Printer.
4. Lift the Latch manually to access the Solenoid and Latch
Support Base.
5. Remove the Printhead Cartridge by tilting it toward the
ink lines, then carefully lifting it out of the Printhead
Compartment. Place in a moistened packaging cap to
avoid dehydration.
6. Remove the five (5) screws
securing the Latch Support
Base Assembly to the Print
Engine frame.

 Loading...

