SECTION 5
DISASSEMBLY AND ASSEMBLY
67
Replacing Feed Rollers
1. Unplug the Printer from power.
2. Follow the instructions above and remove the Right-
hand Side Cover, Drive Belt and Clutch before
beginning the replacement of the Feed and Forwarding
Rollers.
3. Remove the Rear Left-hand Side Cover and set aside.
4. Remove the Side Paper Guides and the Rear Paper
Support.
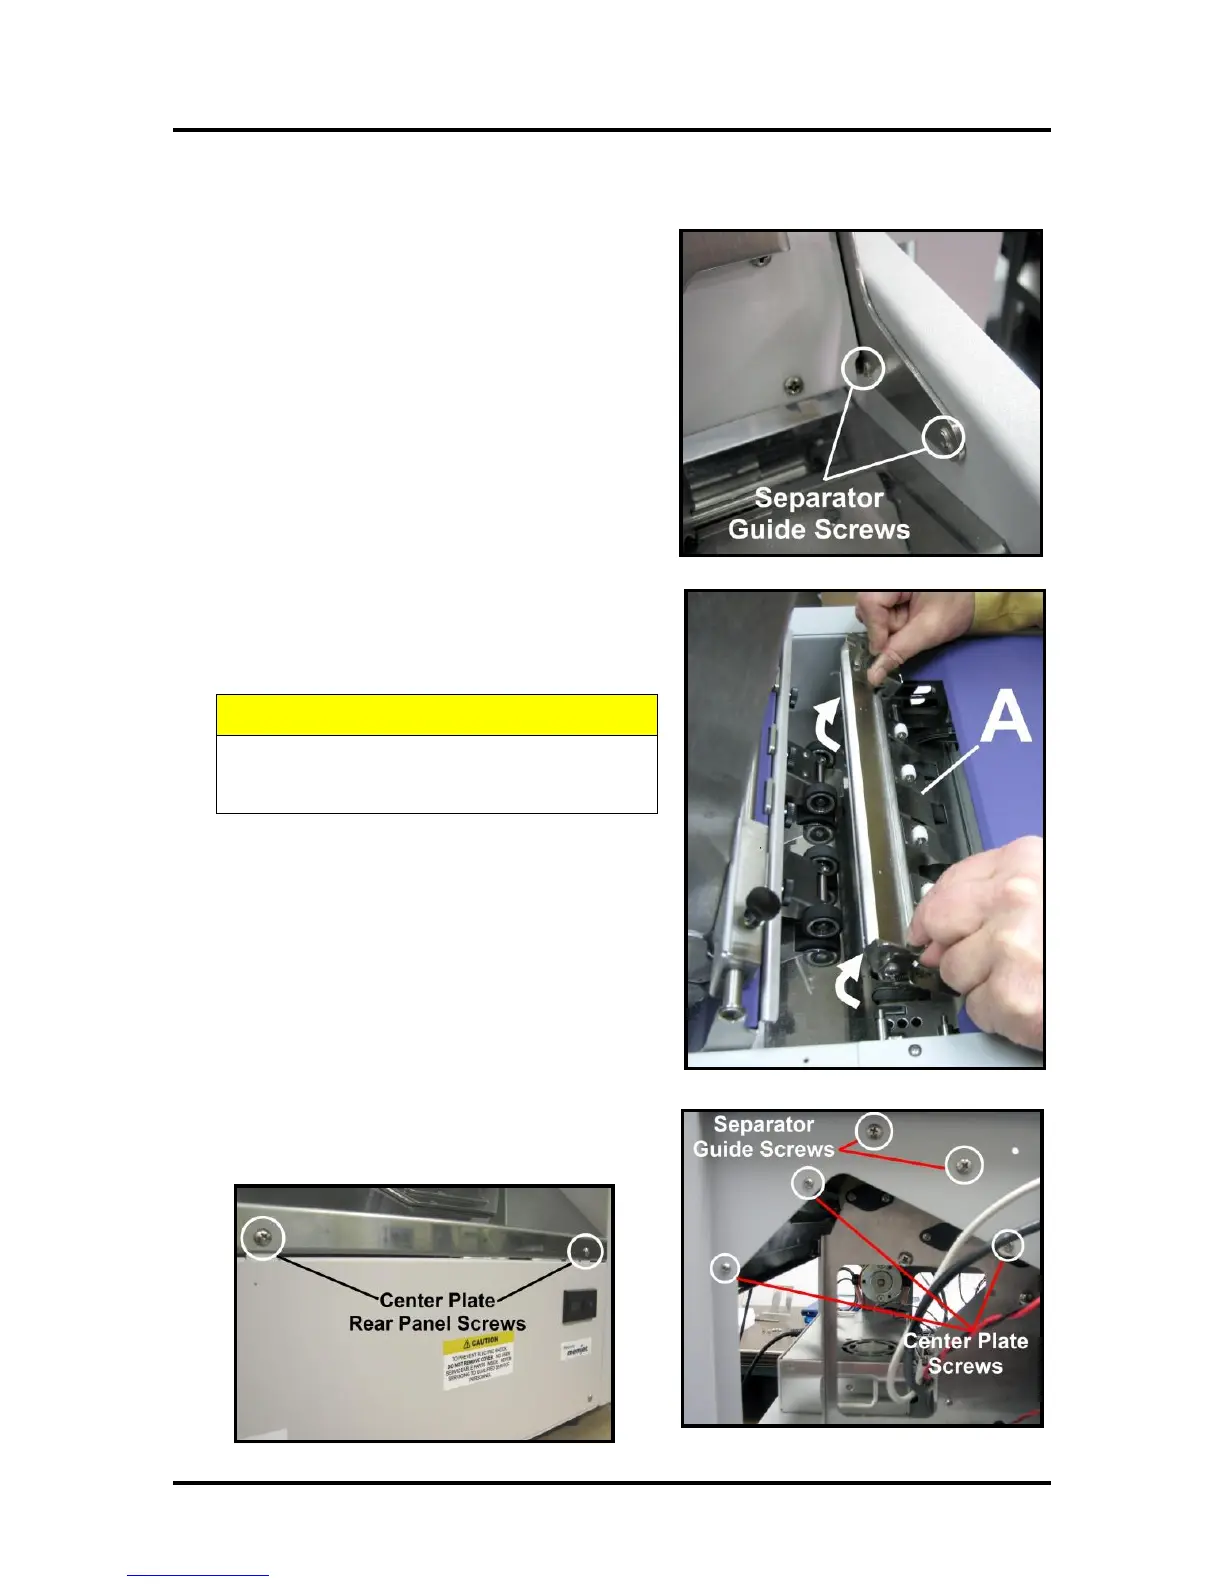
5. Move the Sheet Separators to the up position. Remove
two screws from each side of the Separator Guide
Assembly and remove it from the machine.
6. Remove Antistatic Brush Assembly [A] from mounting
studs. Unlatch the two latches (one on either side of the
Assembly) and lift the assembly off the four mounting
pins as shown. Do not bend the brushes!
DO NOT BEND, PINCH OR CUT THE INK
LINES LOCATED DIRECTLY IN FRONT OF
THE BRUSH ASSEMBLY.
NOTE: Make sure Brush Assembly is correctly
reinstalled and aligned before starting to print. Assembly
should sit flat on transport area surface.
7. Remove the (3) screws on each side of the machine that
hold the Center Plate in place. Then remove the (2)
screws on the Rear Panel.

 Loading...

