SECTION 5
DISASSEMBLY AND ASSEMBLY
110
Internal:
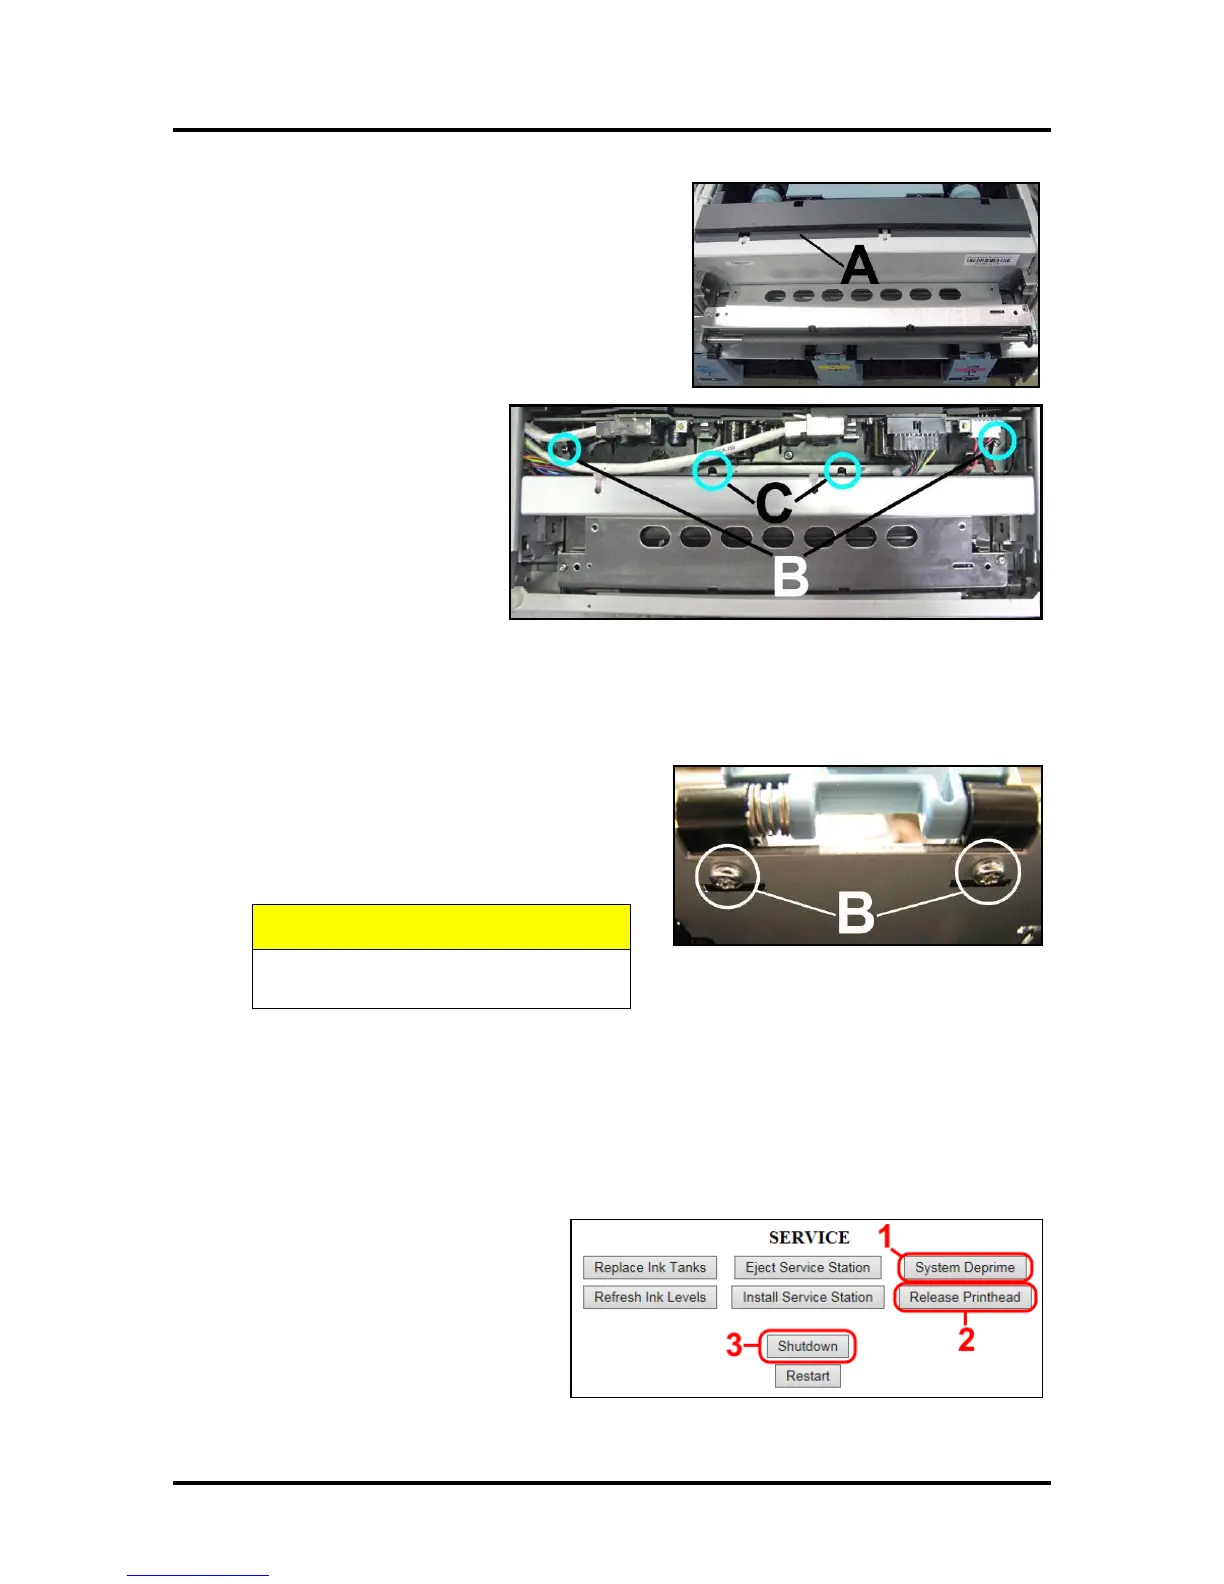
[A] Remove the Pen Driver Printed Circuit Board Cover.
[B] Remove (2) screws from bottom of Pen Driver
Printed Circuit Board Bay.
[C] Locate and carefully release the (2) black locking
tabs holding the Starwheel Assembly to the metal
bracket. NOTE: Locking tabs
break easily! Remove the
Starwheel Assembly.
Install in reverse order.
Replacing the Ink Tank Latches
Ink Tanks must be removed prior to replacing latches. See “Replacing Ink Tanks” in the Maintenance
Section. Printer must be flat on a level surface.
[A] Lift the latch.
[B] Remove (2) screws located on underside of
the latch hinge block. (May require a mirror to
find the screw heads.) Remove the Latch
Assembly.
Latches are spring-loaded, watch that
springs don't fly off.
Replacing the Printhead Lever Latch
Note: There is a “service video” available for this procedure.
The Printhead Lever Latch is easily broken if forced open manually.
Tools & Supplies needed: nitrile powder-free gloves, needle nose pliers or tweezers, small flathead
screwdriver.
Follow the steps below to replace the Latch:
Remove the Printhead Latch
1. Go to the Printer Toolbox User
Interface screen and click “System
Deprime”.
2. Click “Release Printhead” to
release the Printhead Latch.
3. Once the Latch pops up, click
“Shutdown” to shut down the Printer.

 Loading...

