SECTION 5
DISASSEMBLY AND ASSEMBLY
111
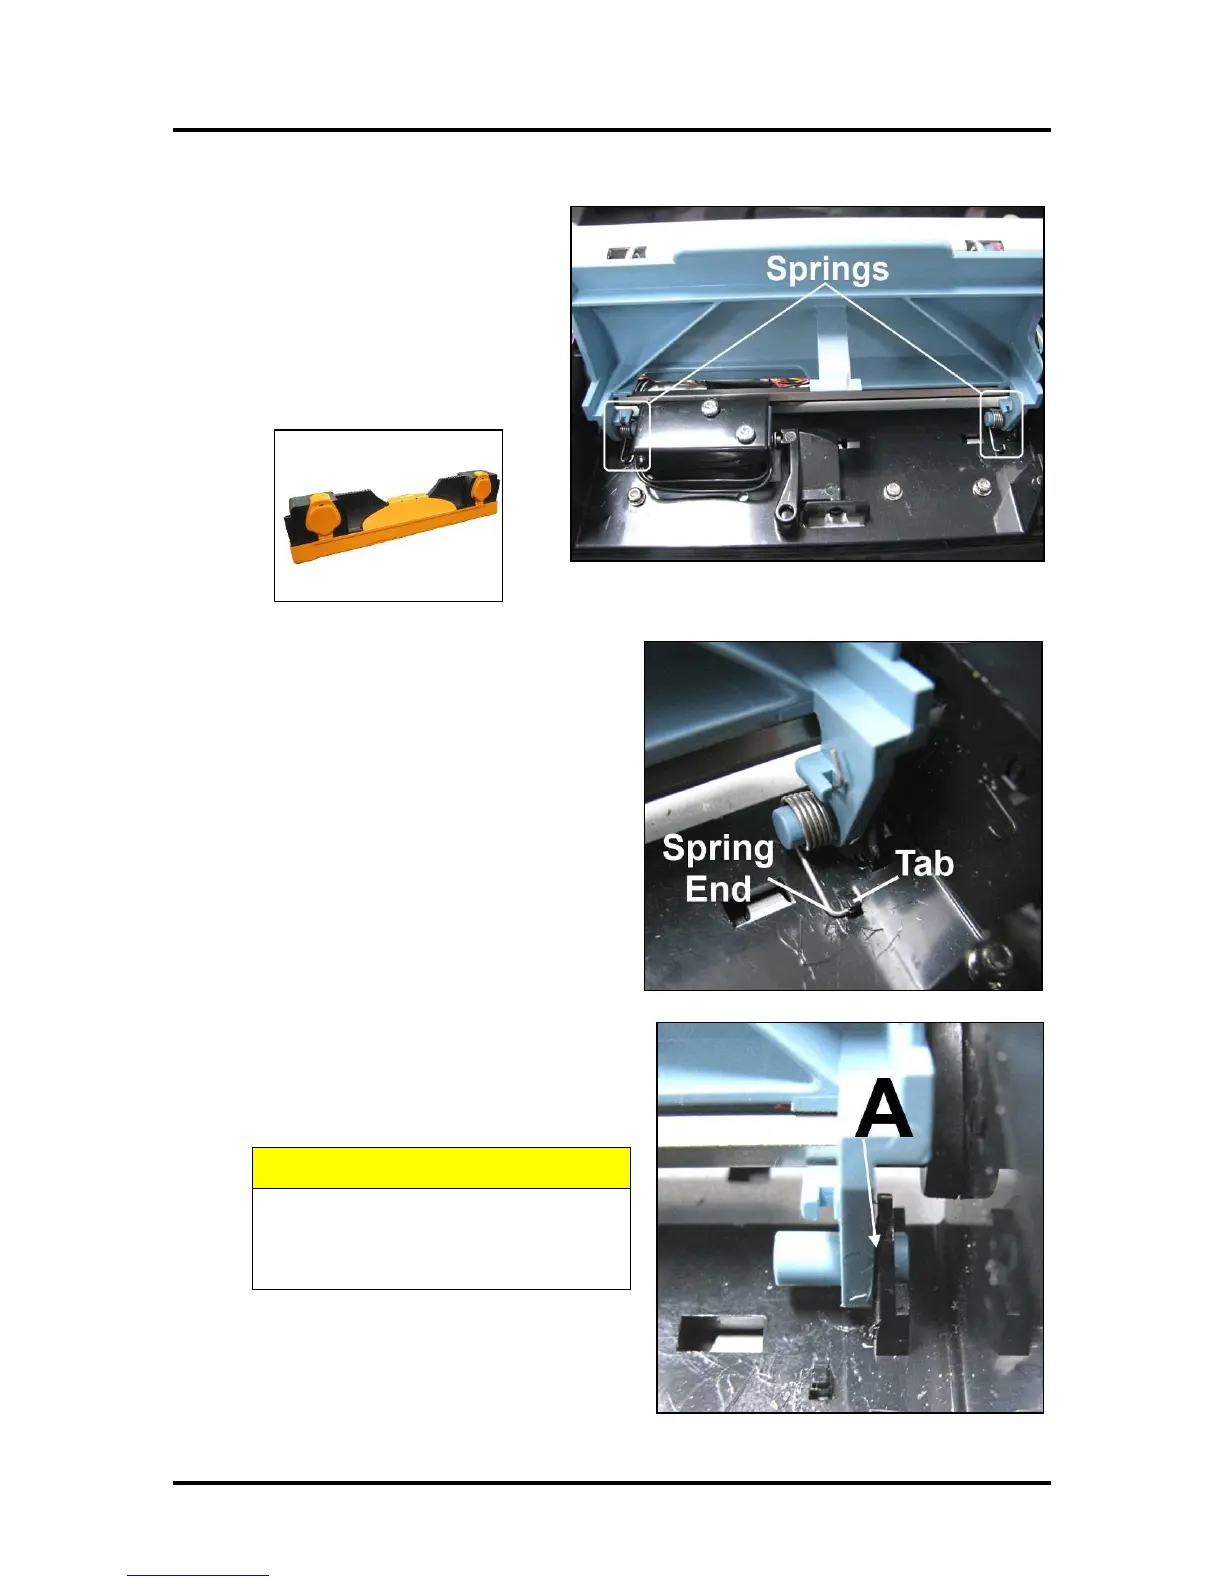
4. Lift the Latch manually to access the
(2) Latch Springs.
5. Remove the Printhead Cartridge by
tilting it toward the ink lines, then
carefully lifting it out of the
Printhead Compartment. Place in a
moistened packaging cap to avoid
dehydration.
6. Use needle-nose pliers or tweezers to gently
pull the rounded end of the Spring out from
beneath the plastic tab in the housing and
remove the Spring. Repeat the procedure to
remove the second Spring.
7. Gently insert a small, flathead screwdriver
between the blue Printhead Latch Pin and the
black plastic hinge [A] and rotate to pop the
Printhead Latch out of the hinge without
damaging either piece.
BE CAREFUL. Black Plastic Hinge
breaks easily. Use only gentle
pressure when removing/installing
the Printhead Latch Pin.
8. The other side should easily slide out of the
hinge.
9. Discard the Printhead Latch according to local
regulations.

 Loading...

