INSTALLING A MAINBOARD INSTALLING HARDWARE
2-35
Installing a Mainboard
1. Remove the new mainboard module from its anti-static protective package.
2. Align the rear I/O ports with the chassis openings.
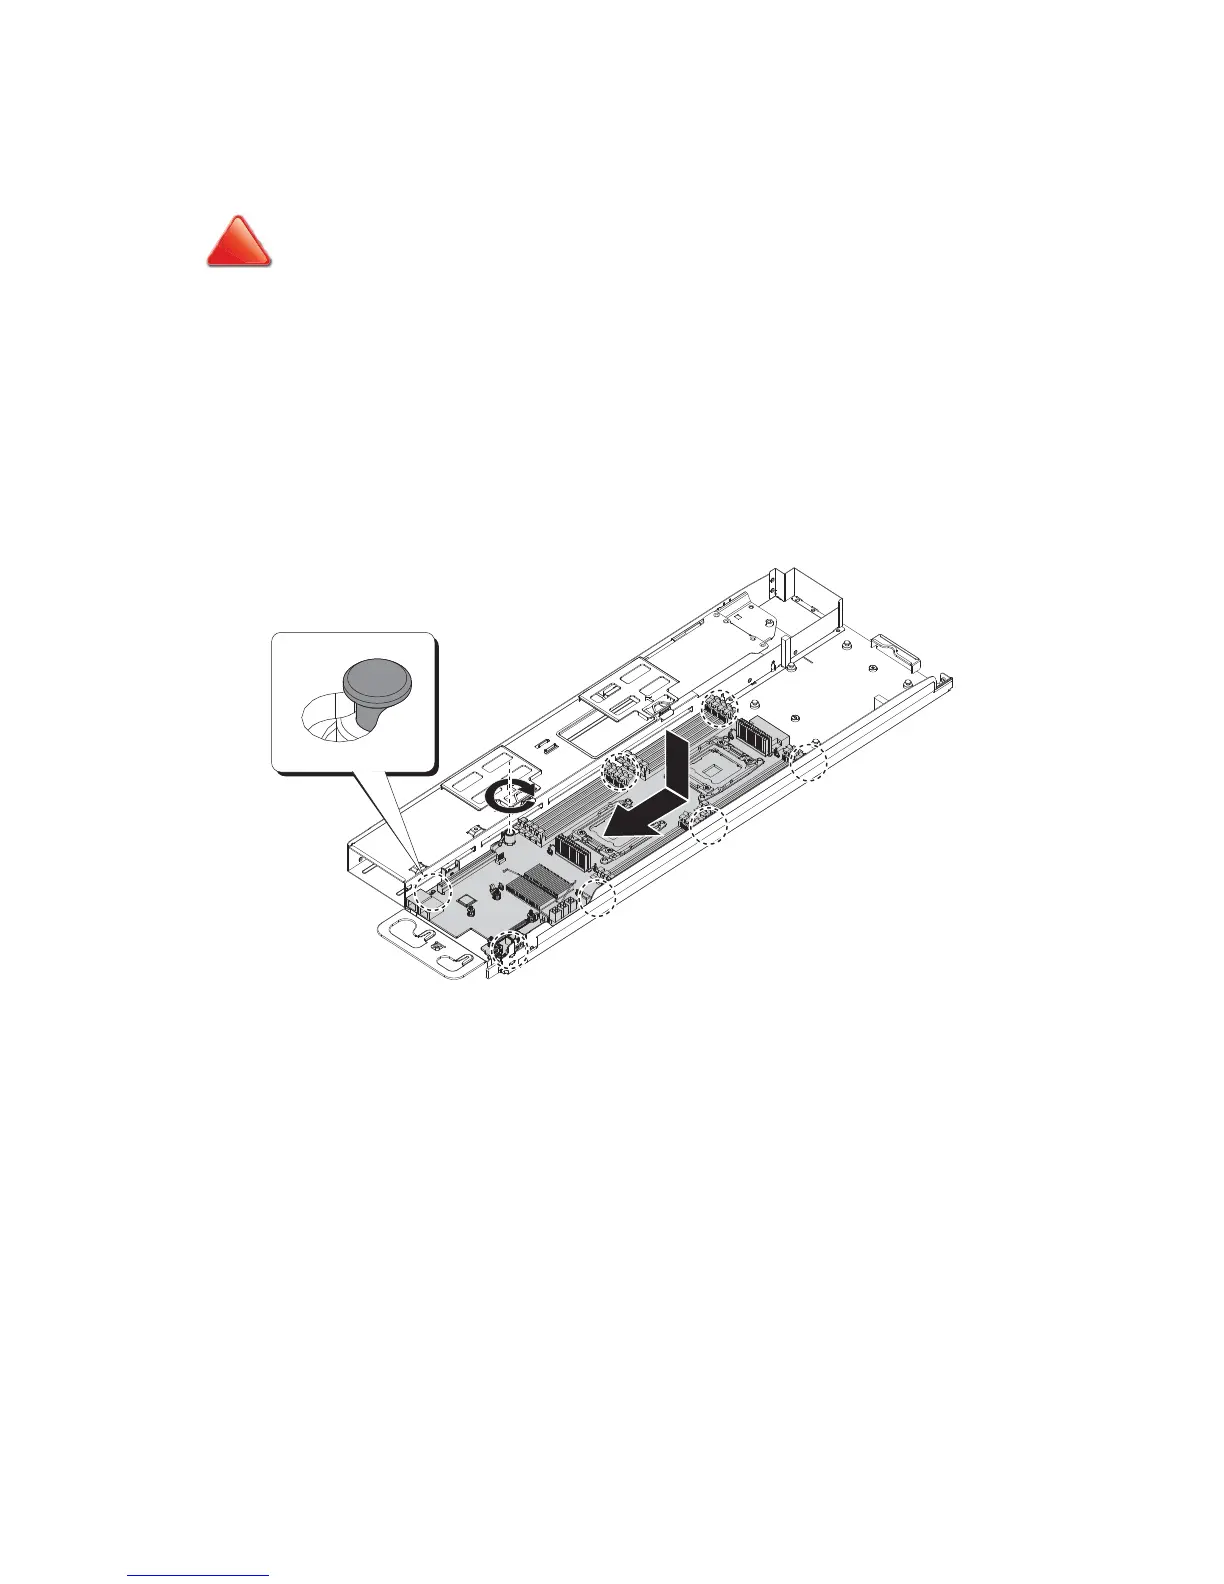
3. Lower the mainboard module onto the chassis and make sure the holes on the
mainboard are aligned with the guide pins on the chassis.
4. Slide the mainboard toward the front of the chassis until the mainboard is secured
by the guide pins.
5. Secure the mainboard to the chassis with the provided screw(s).
Figure 2-48. Installing the Mainboard
6. Replace the memory modules. See Installing a Memory Module on page 2-18.
7. Replace the processors. See Installing a Processor on page 2-27.
8. Replace the heat sinks. See Installing a Processor Heat Sink on page 2-24.
9. Replace the air duct. See Removing an Air Duct on page 2-5.
10. Lift the sled tray and align it with the chassis bay.
11. Slide the sled tray in the chassis. See Securing a Sled Tray on page 2-2.
 Loading...