Software v3.0.11065
© Satmap Systems Ltd 2017
12
Theprimarypurposeofthe"GPSMap"screenis
to displayyour ownlocation inthecentreof the
screen(bluecircle)andthemappingaroundyou.
ButtonsFunctions(fromLtoR):
Togglemaps(The Icon represents three layers of
stacked mapping) Toggle between available maps at
the same zoom level by pressing this button.
Databoxes. Toggle between none, 2 or 4 data
boxes on-screen. Keep on toggling and the GPS
MAP/ELEV dynamic elevation screens will appear.
North Up/Trail Up. Map display cycles through
North Up, Trail Up (Centred), and Trail Up (Low)
Primary Screens. Scroll through the 8 Primary
Screens
ZoomIn/Out.Map scale is displayed monentarily
after zooming
Note: Moving the rocker pad in the GPS
MAP screen will take you into PLANNING mode. To
avoid this, lock your keypad.
A successful satellite lock (a ‘fix’) is indicated at the
top left of the screen by the red cross changing to a
green or blue signal icon. The number of green or
blue crescents denotes the signal strength. A weak
lock is indicated by a single crescent plus a ‘2D’
caption.
The unit is EGNOS/WAAS enabled. This means
users in Europe and North America are able to
benefit from ‘differential’ GPS when one of the
EGNOS/WAAS satellites is in view. When this
service is available, the green signal crescents turn
blue and accuracy is enhanced.
Your position is shown as a blue dot in the centre of
the screen. Once moving, a small pointer appears
4.1.1 ScreenDataCapture
Screenshots may be captured as jpeg files and
accessed in SatSYNC, listed with time/date details.
This might be useful in a variety of circumstances. For
example, sending a screenshot of a particular location
to another person or using a series of screenshots
in conjunction with timed digital photos for use in a
presentation.
Press and hold either the StatusBar or the Backlight
Toggle button for 2-3 seconds; a camera icon briefly
replaces the icons next to the battery (i.e. Stop/
Record icon, toggle icon). A beep sounds to indicate
a successful screenshot capture, depending on your
BeepAlertCount setting.
Toaccessyourscreenshot:
Connect your Active 20 to the computer via a USB
cable. Open either a Windows Explorer / Finder
or SatSYNC. Screenshots are found in Internal
Storage/Screenshots. Select the screenshot and
either Drag & Drop (or Press Export SatSYNC)
transfer it to your computer.
4.1.2 GPSMAPScreen
For best results in achieving a satellite lock;The
Active 20 should be pointed at clear sky. The unit
can also acquire a lock through glass, i.e. windows/
car windshield.
Getting a GPS whilst moving may take longer. From
a cold start, very large MapCard may also slow the
GPS lock time slightly.
From start-up, the progress of the GPS lock can
be seen on the GPS STATUS screen, using the
PrimaryScreens (page foward) button.
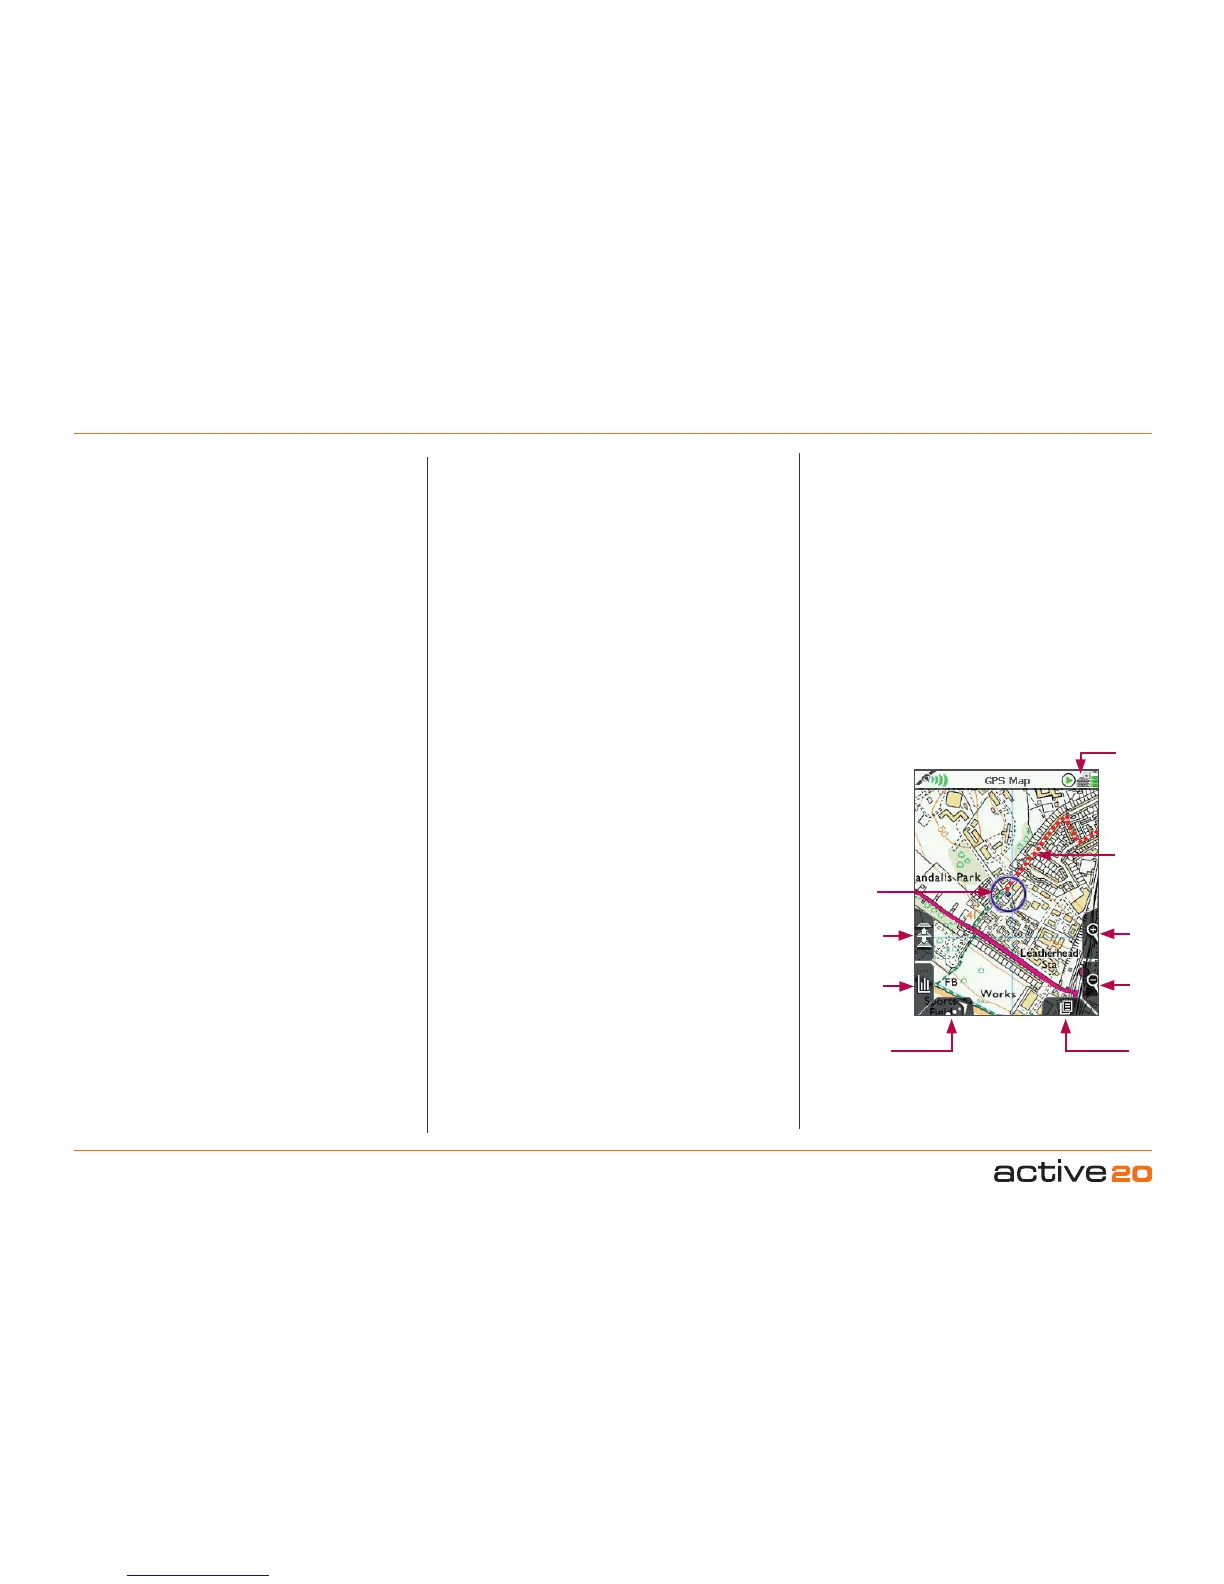
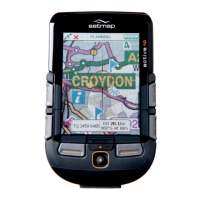
4.1 Screen1:GPSMAP
GPS MAP screen with function
buttons
Togglemaps
Blue"You
AreHere"
pointer
Zoom
In
Snail Trail
NorthUp/
TrailUp
Databoxes/
Elevation
Graph
Primary
Screens
Zoom
Out
Toggle
icon
on the blue circle, indicating the current
direction of travel. As you move, a snail
trail of red dots is laid down, indicating the
path you have taken, aslongasyouhave
started the trip log. To change the red
trail dot size may changed in the Settings
Menu.
The Active 20 logs your position once
every second. The rate at which red dots
are displayed depends on the map scale
and the speed of travel. Dots are laid down
so an appropriate distance is rendered
between them to create a clear track. A
power saving option (in AdvancedPower
Control), allows screen data to be set to
update once every 4 or 8 seconds.