Software v3.0.11065
© Satmap Systems Ltd 2017
59
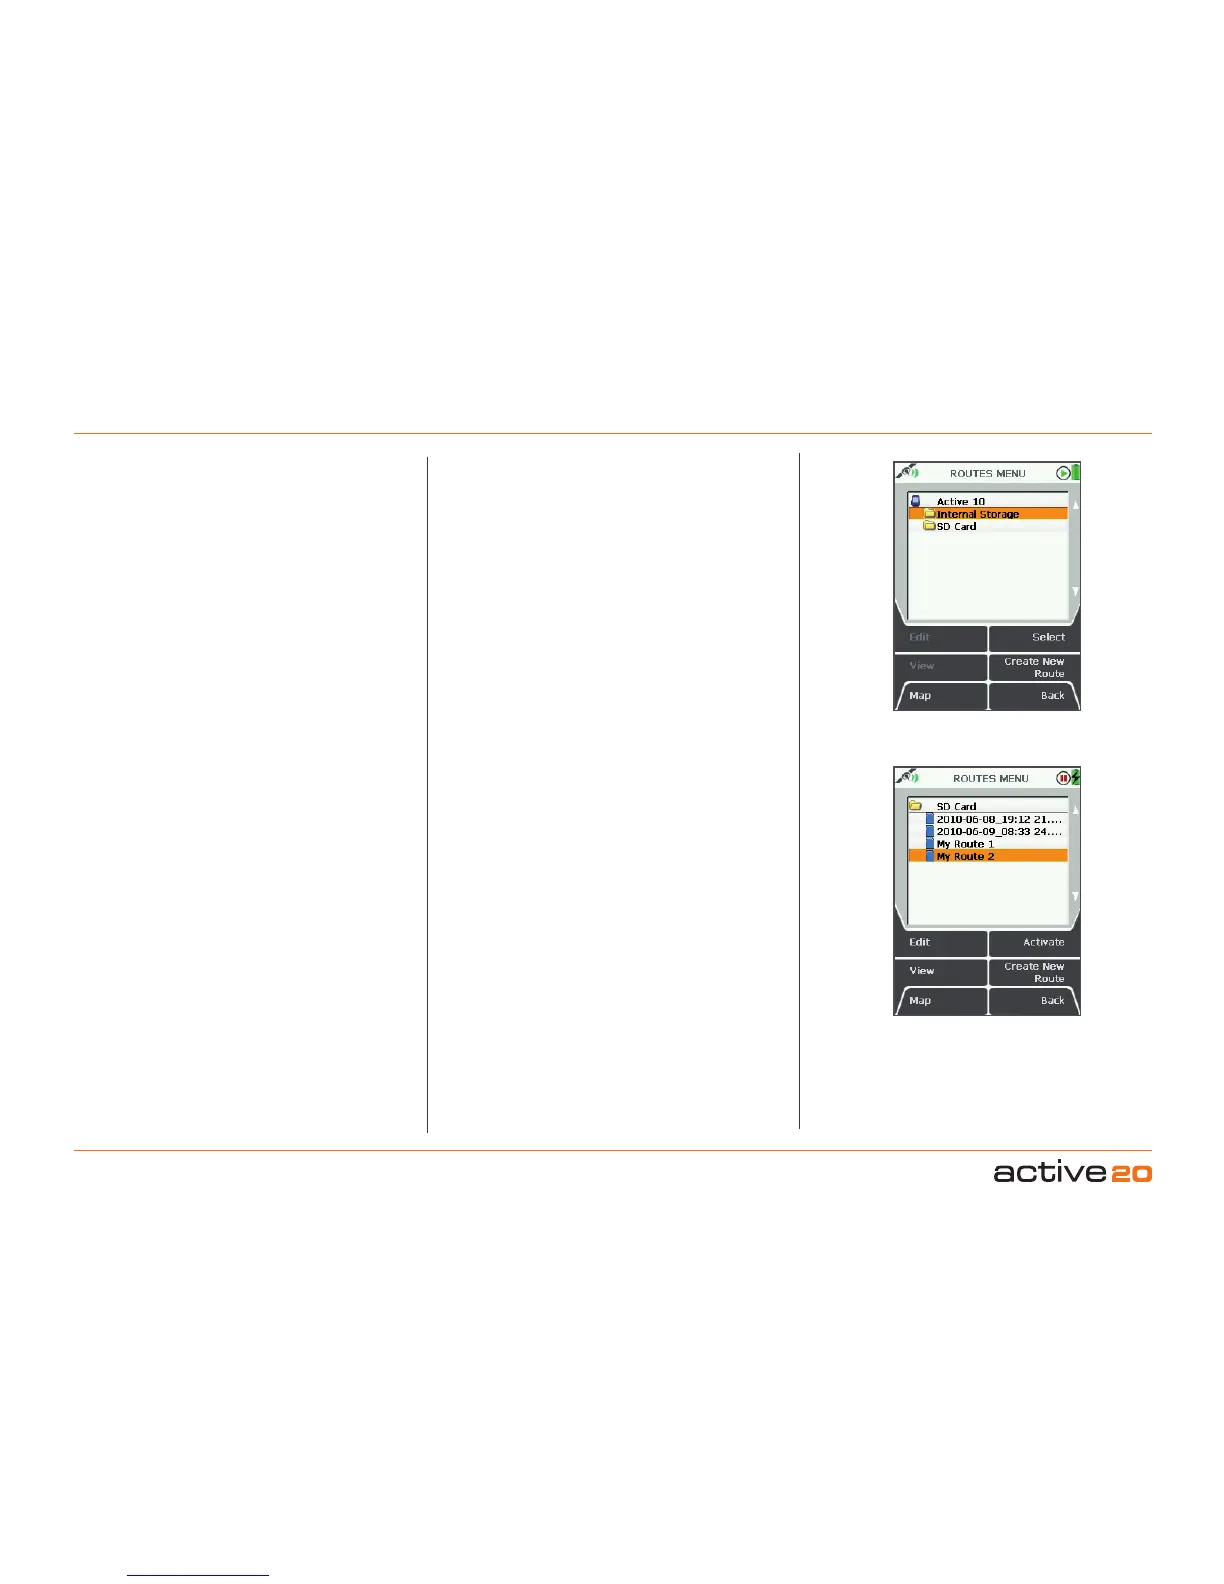
7. MAINMENU:RoutesMenu
7.1 ROUTESMENUScreen
(MAIN MENU → ROUTES MENU)
The
ROUTESMENU contains the listing of
routes, stored in a series of folders.
By default, the first route created is entitled ‘My
Route 1’. The routes following are titled in numerical
order, i.e. 'My Route 2', (unless you have imported
a prenamed route to your unit from an external
mapping system). You can rename the title of your
route via the Edit button.
When a trail is converted to a track it is also saved
in the ROUTESMENU and is allocated a default title
including the year, month, day, time and distance
(e.g. 2010-08-14_16:35 15.6km). A track is a route
derived from a trail that has already been made.
Buttons:
Edit. Go to ROUTEEDIT screen
View. Go to ROUTEMAP screen
Map.Return toGPSMAP screen
Upfolder/Select/Activate/Norouteactive.
Move up to a higher level folder, or when a route
is highlighted, toggle between activating it and
selecting no route active.
Create New Route. Go to CREATE ROUTE
(section 8.01)
Back. Return to MAINMENU
Route listing
Acceleratedscrolling: If you have several routes in
one folder you are able to scroll quickly by holding the
rocker pad up/down. Keep the rocker pad pressed up/
down until you reach the le you are looking for.
7.2 ActiveandInactiveRoutes
There are three ways to 'activate' a route:
• Highlight the route in the ROUTES MENU and
press Activate. An active route is indicated by a
tick next to the route name. To deactivate, highlight
the ticked route name and press Norouteactive.
• Alternatively you can go to the ROUTESMENU
,
press View and then Start, which activates the
route automatically.
• If you can see the route on the GPS MAP or
PLANNING screen, centre press the rocker pad
anywhere on the route. This will bring up the
ChooseInformationType window (section 11.00).
Select the route, and then move the rocker pad
left/right to highlight the green tick.
An activate route has relevant data choices
available for display on the GPS MAP screen
in either 2 or 4 data box overlays. Refer to MAIN
MENU → Settings → Set Trip Data to control whether
changing an activated route during a trip will reset
the log data. When active, the route is shown as a
yellow or blue highlighted line with red arrowheads
indicating the direction of travel. Inactive routes are
shown as gray highlighted lines when displayed.
Inactive routes may be hidden or have just their
start points displayed.
Note: Showing your inactive routes will take up
operating memory.
Two storage areas