31
Names and Functions of Parts of the Control Panel
Chapter 2 Menus and Control Panel
c Transition execution section
This section is used to carry out a transition and check the
progress of the transition.
d Wipe direction selection buttons
When a wipe or DME wipe is selected as the transition
type, you can press to light these buttons to select the wipe
direction.
e TRANS PVW (transition preview) button
When this button is lit, you can check in advance the video
changes during the transition, on the preview output from
the M/E or PGM/PST bank.
During the preview, you can use the fader lever, [AUTO
TRANS] button, and [CUT] button. One of the following
functions of this button can be selected in a Setup mode.
• When the transition completes, the system returns to the
normal mode.
• The transition preview mode is maintained while this
button is pressed.
• Switching is made between the transition preview mode
and normal mode every time this button is pressed.
f Pattern limit buttons
The following buttons are used to set a pattern limit.
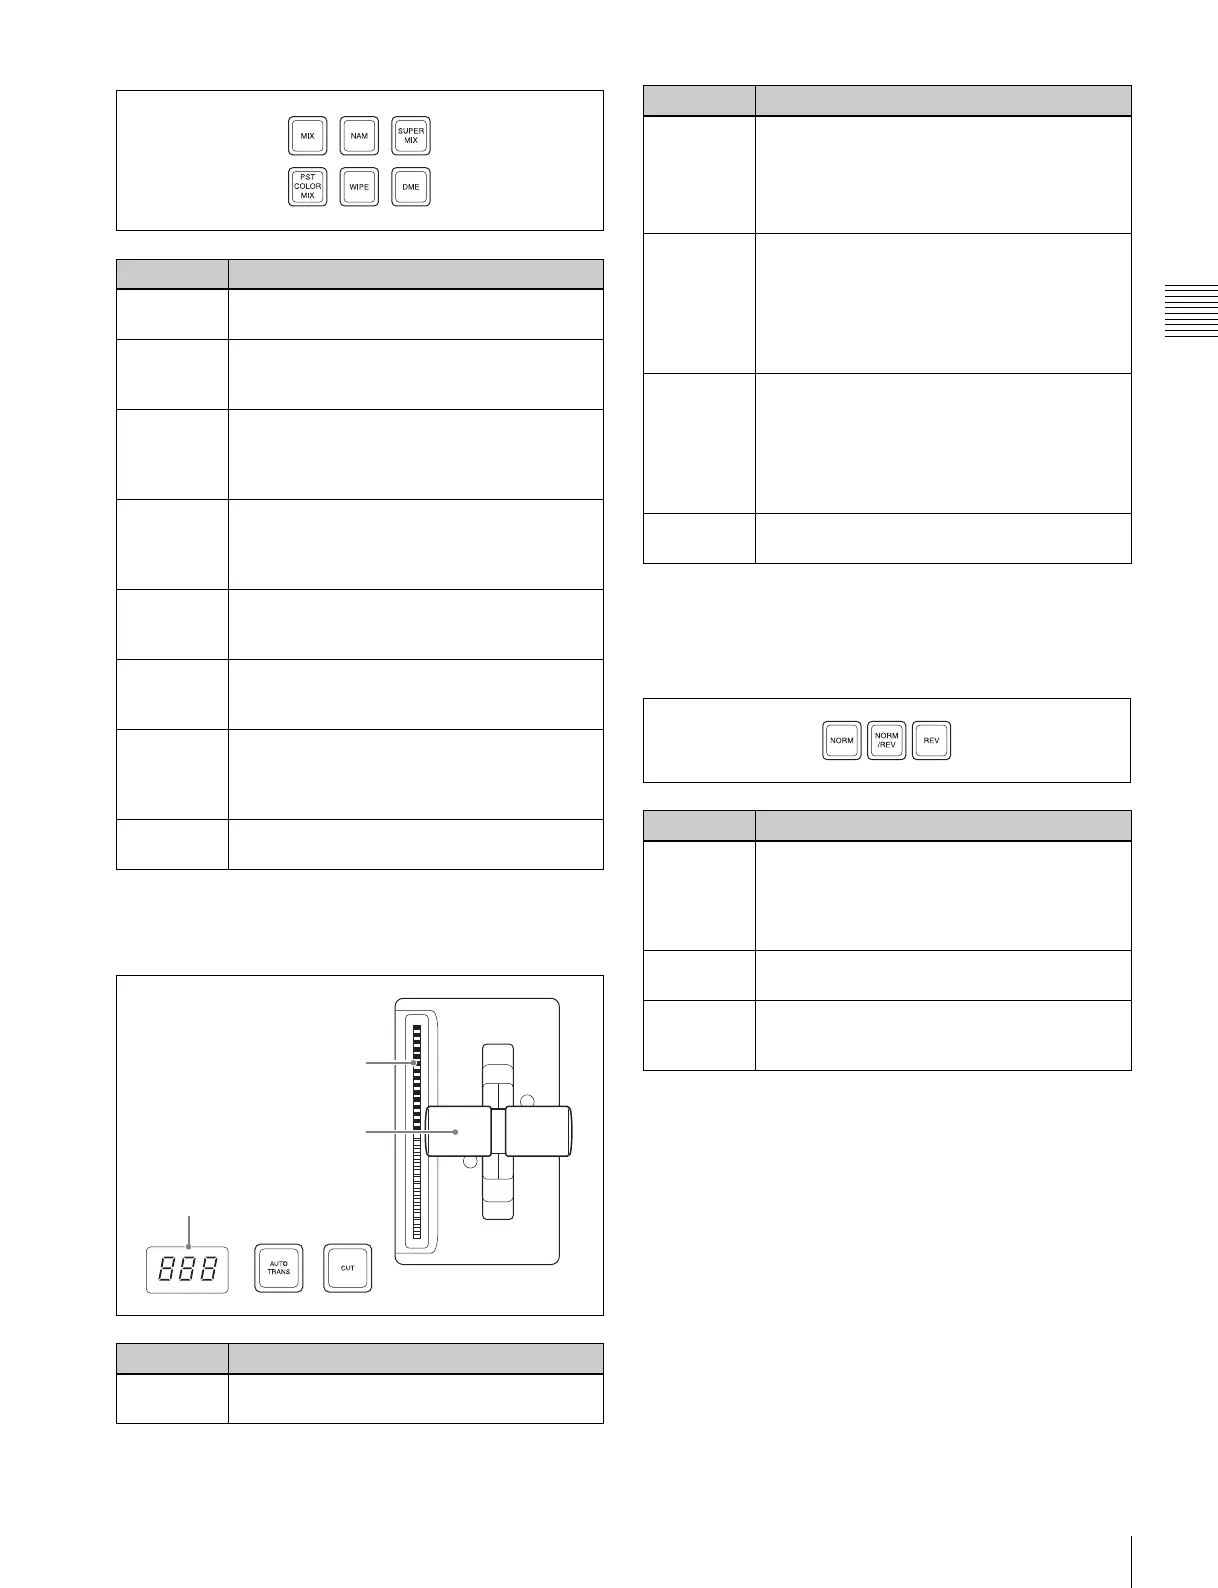
Name Description
MIX In a background transition, the new video
fades in as the current video fades out.
NAM (non-
additive mix)
The current and new video signals are
compared, and the signal with the higher
luminance level is given priority in the output.
SUPER MIX The current video is maintained at 100%
output for the first half of the transition as the
new video is mixed while increasing
progressively to 100%.
PST
(preset)
COLOR
MIX
The color matte (unpatterned display) is
inserted during transition, replacing the
current video by the color matte, and then
replacing the color matte by the new video.
WIPE The current video is replaced by the new
video, using the wipe pattern selected in the
Wipe menu.
DME (DME
wipe)
A wipe type of transition is carried out, using
the DME effect selected in the DME Wipe
menu.
FM1&2CLIP,
FM3&4CLIP,
FM5&6CLIP,
FM7&8CLIP
A recorded clip is played back together with
the transition. At this point, you can also carry
out a transition (wipe or mix (dissolve))
simultaneously together with the clip.
KF
(keyframe)
Press this button, turning it on, to enable
using the fader lever as a keyframe fader.
Name Description
Tra ns it ion
indicator
This comprises multiple LEDs, which show
the progress of the transition.
Transition indicator
Transition rate display
Fader lever
Fader lever • Move up or down to carry out the transition.
• When the [KF] button or a transition type
selection button to which the KF button
function has been assigned is lit, you can
use this as a keyframe fader.
Tra ns it ion
rate display
• This shows the “transition rate” (the time
from the beginning of a transition to its
completion) set for an auto transition, in
frames.
• You can set the transition rate using the
numeric keypad control block or menu.
AUTO
TRANS
(transition)
button
• Pressing this button carries out an auto
transition of the set transition rate
(duration). The transition starts
immediately, and the button lights amber.
• When the transition completes, the button
goes off.
CUT button Pressing this button carries out the transition
as a cut (i.e. instantaneously).
Name Description
NORM
(normal)
The wipe proceeds in the direction from black
to white as shown on the pattern in the lists of
patterns see“Wipe Pattern List” (page 308)
and “DME Wipe Pattern List” (page 312), or in
the direction of the arrow.
REV
(reverse)
The wipe proceeds in the opposite direction to
that when the [NORM] button is pressed.
NORM/REV
(normal/
reverse)
The wipe direction alternates between normal
and reverse every time a transition is
executed.
Name Description
 Loading...


