www.stryker.com 280C-009-002 REV B 1-57
Return To Table of Contents
English
AUTO CONTOUR MICRO SWITCH REPLACEMENT
Tools Required:
• Bungee Cord (or equivalent)
• #1 Phillips Screwdriver
Procedure:
1. Raise the bed to the highest position and apply the brakes.
2. Raise the thigh section. Remove the plastic litter cover (if equipped) of the fowler section. Lift and fold the foot
section back toward the head end of the bed. Secure it using a bungee cord.
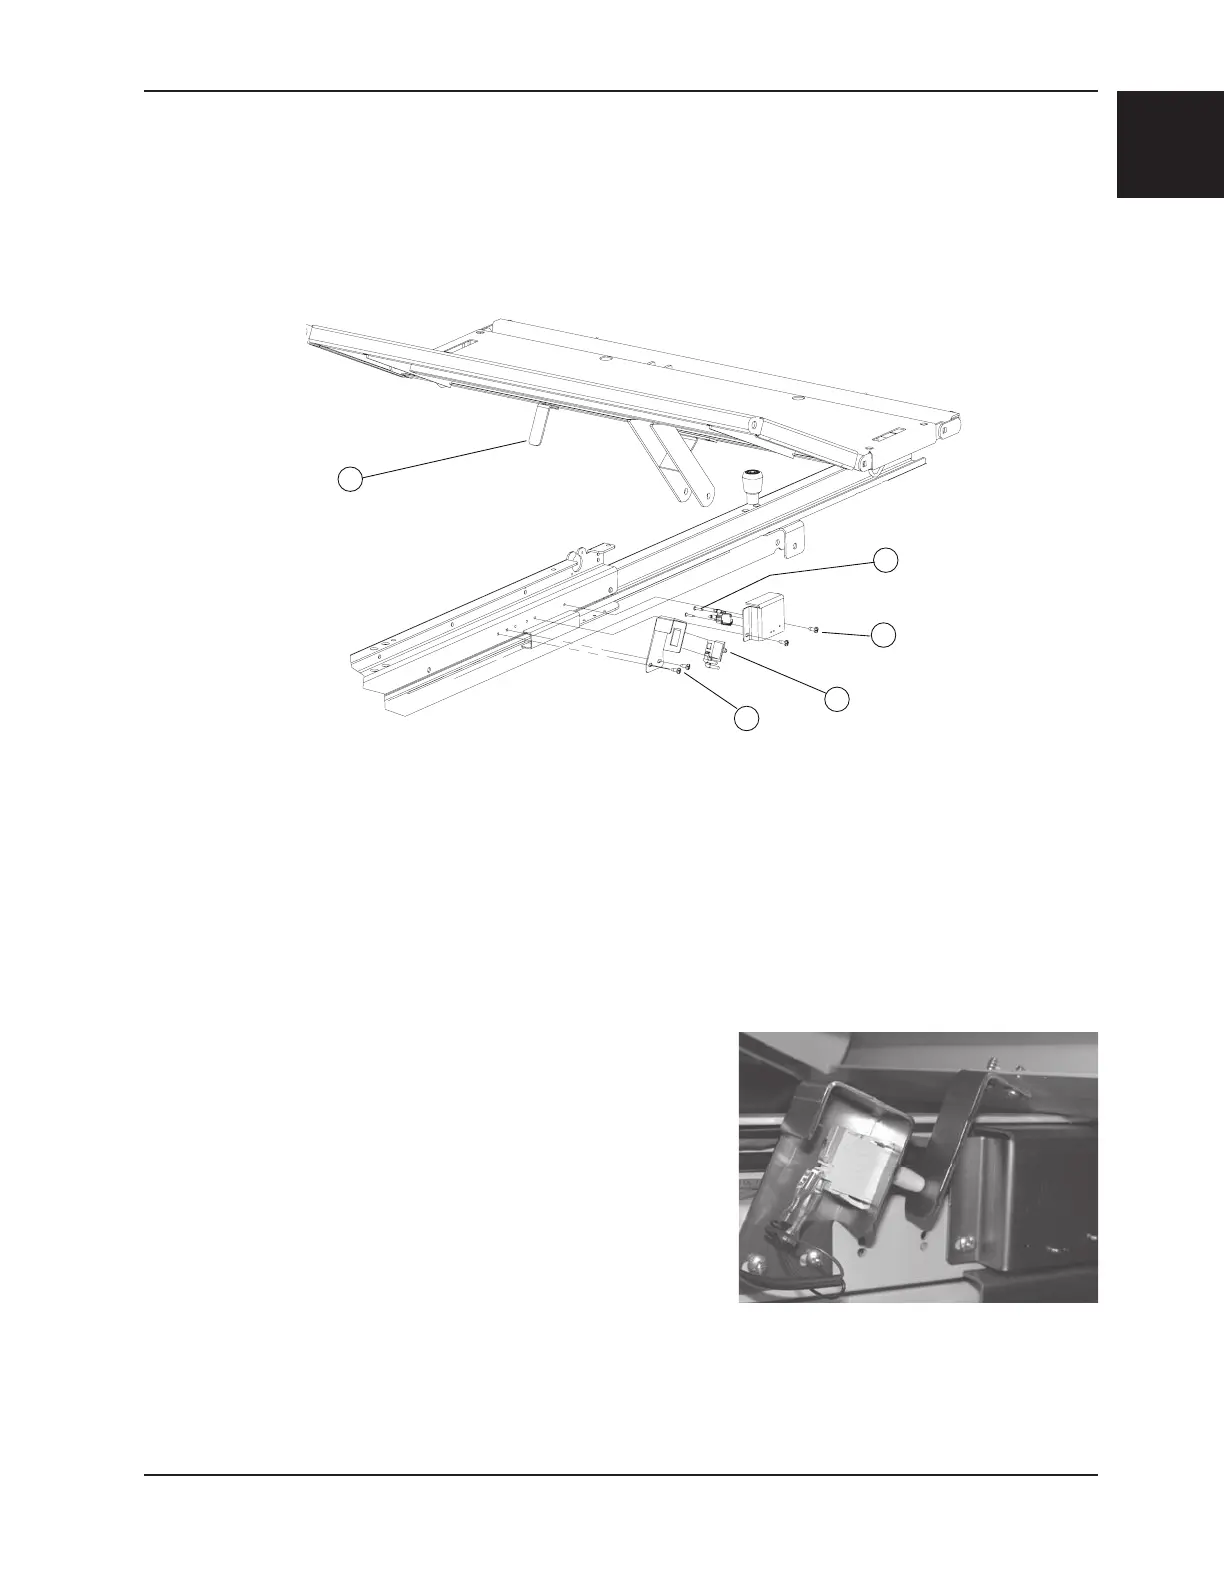
1ST AUTO CONTOUR MICRO SWITCH
This switch tells the control board that the Gatch has reached the preset angle for the Auto Contour position.
3. Remove the cables from the switch. Note the cable locations
in order to properly reconnect them to the new switch.
4. Using the Gatch down control, slowly lower the thigh section
until only light contact remains between the activator (A)
attached to the knee section and the push-button switch (B).
The replacement procedure will start from this position (see
opposite illustration).
5. Unplug the bed power cord from the wall outlet.
6. Using a #1 Phillips screwdriver, remove the two screws (C)
holding the support to the frame.
7. Press the two clips on each side of the switch to remove it from
the support.
8. Reverse the above steps to install the new micro switch.
9. Test the Auto Contour positioning for proper operation before
returning the bed to service.
B
C
E
D
Figure 16
Service Information

 Loading...