Chapter 5 Maintaining the Workstation 5-41
5.13.2 Installing the Power Supply
Perform this procedure to install the power supply.
1. Remove the new power supply from its package.
2. Locate where the power supply is to be installed, then place the power supply
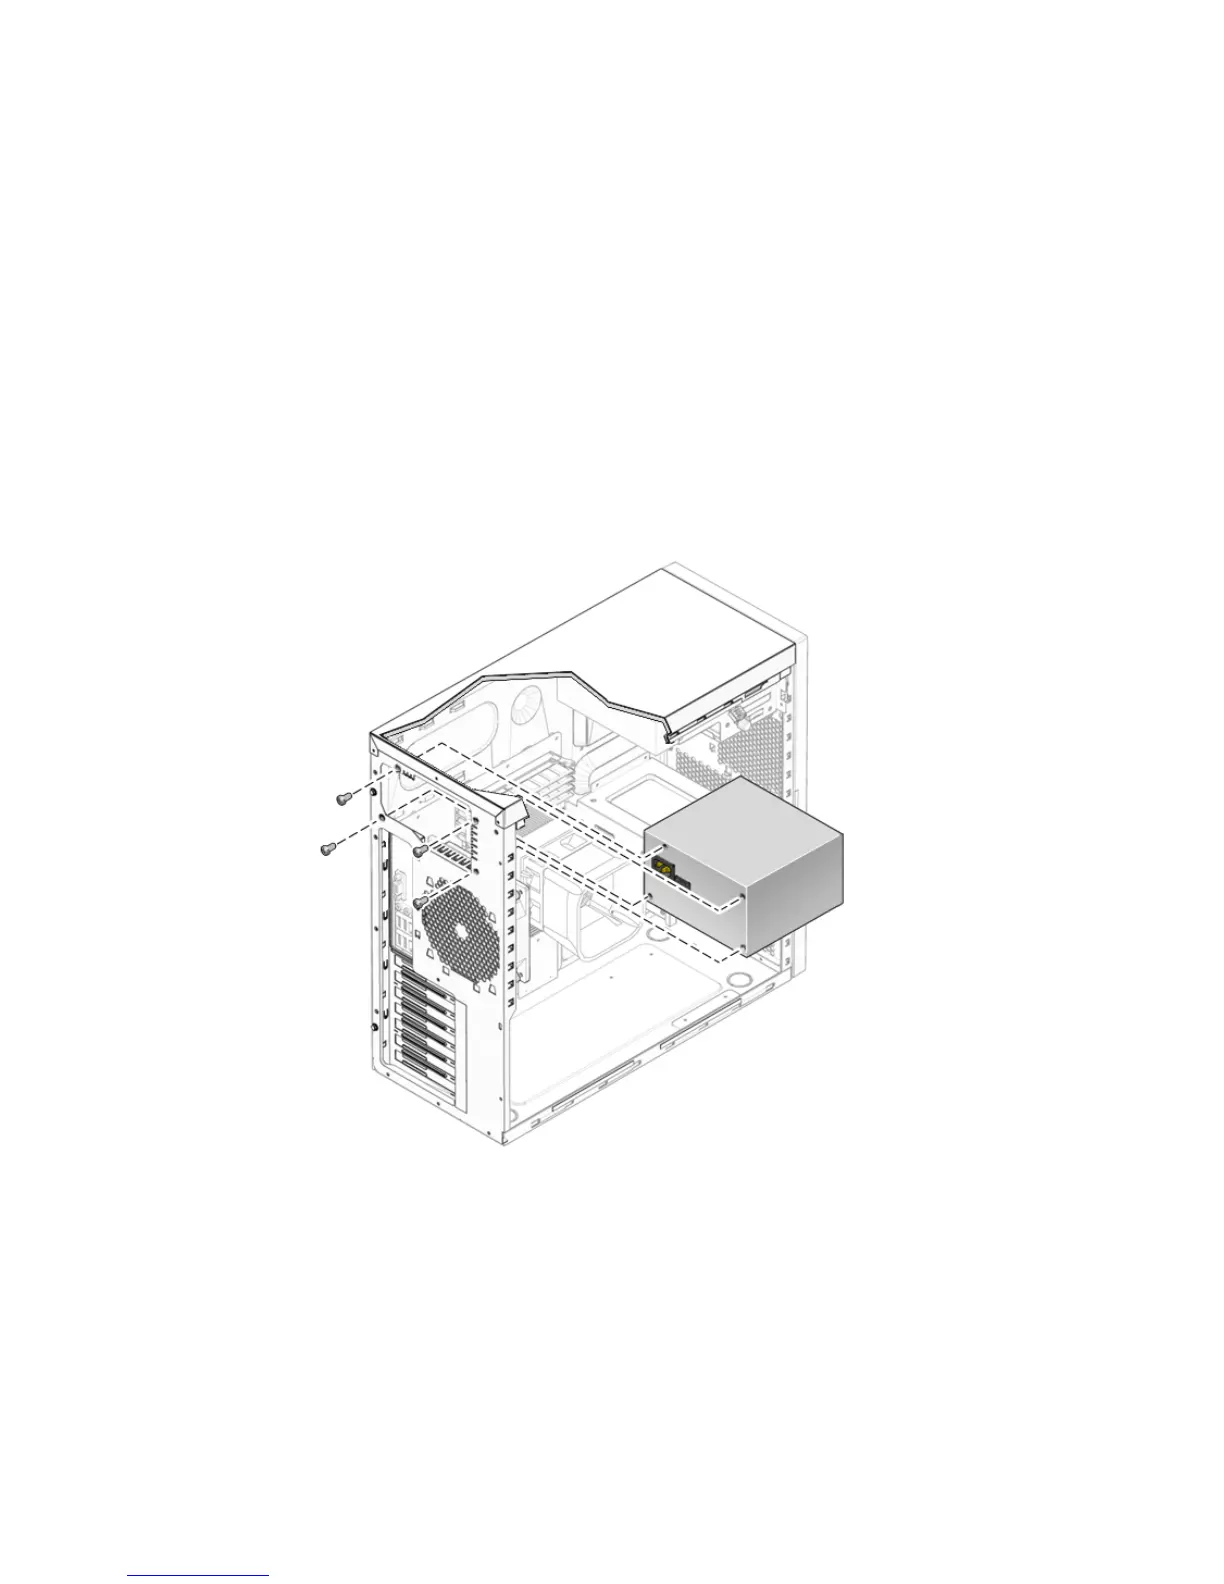
inside the chassis (see
FIGURE 5-28).
a. Align the power supply IEC-320 connector (power cord socket) and fan with the
chassis back-panel opening.
b. Position the power supply with the chassis power supply brackets.
c. Rotate the power supply down and into the chassis.
FIGURE 5-28 Installing the Power Supply Into the Chassis
3. Fasten the four mounting screws on the back of the chassis to secure the power
supply to the chassis.
4. Reconnect the power supply cables (see
FIGURE 5-26 and TABLE 5-2), and then secure
them with the cable management straps.