Chapter 5 Maintaining the Workstation 5-17
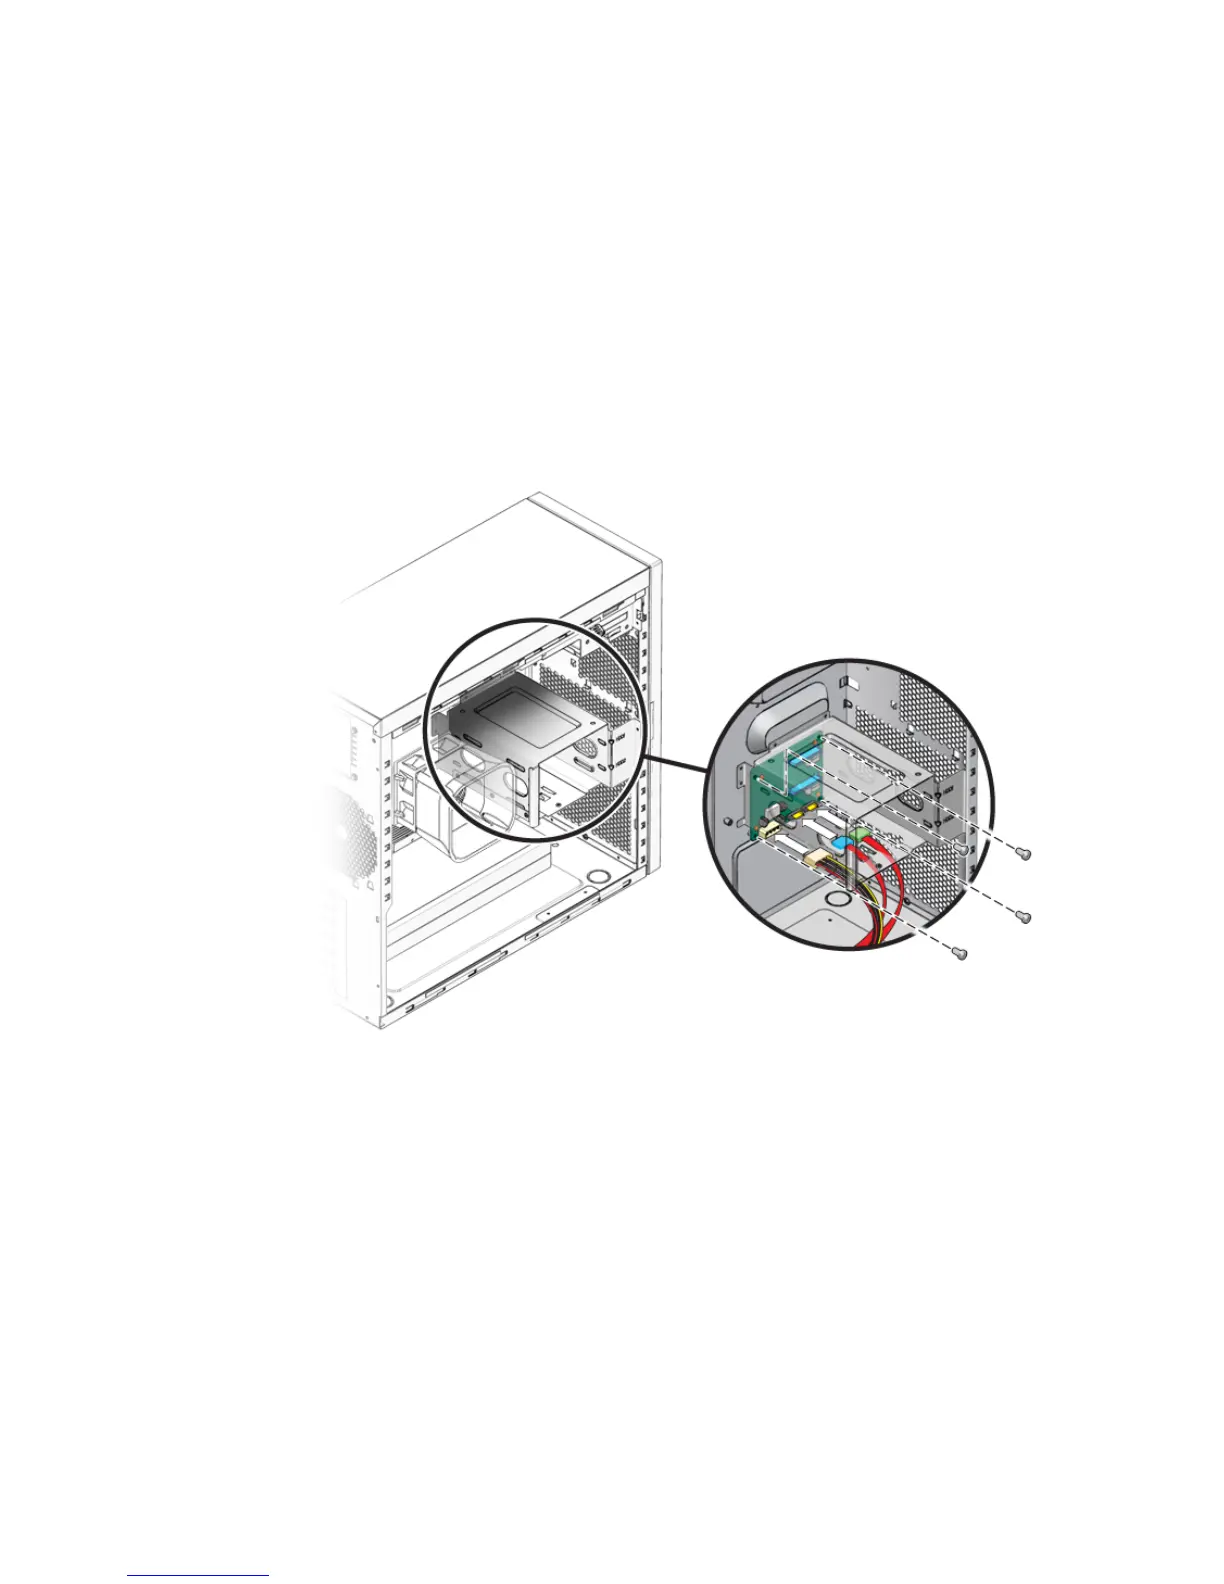
5.6.2 Installing the Storage Backplane
Perform this procedure to install a storage backplane.
1. Ensure that the power switch on the back panel is in the Off position ( 0 ), and
that the system is lying on its side with the left side access panel removed.
2. Remove the new storage backplane from its packaging.
3. Slide the storage backplane under the hard drive cage.
Position the screw holes over the holes in the chassis.
FIGURE 5-10 Installing the Storage Backplane
4. Fasten the storage backplane to the hard drive cage.
Using a #2 Phillips screwdriver, install the four screws to secure the storage
backplane to the hard drive cage. Torque the screws to 8- to 9-inch pounds.
5. Connect and route the cables (see
FIGURE 5-10).
a. Connect the storage interface cables to the storage backplane connector.
b. Connect the power supply power cable to disk backplane power connector.
Refer to the cabling diagram in the service label on the side of the chassis for
information on cable routing.