Premier Elite Series Installation Manual UDL & Digi Options
INS176-15 103
Control Panel Programming
Now the ComIP is enabled on the network, the Control Panel needs
to be configured to allow communication.
• Enter Engineer mode on the keypad.
• Press then y/ (UDL/Digi Options).
• Press then y/ for (Setup Modules).
• Press then y/ for (Setup IP data).
• V3 or later only then select which Com Port the IP details
apply too.
• Press n/ and enter the IP address of the ComIP you
noted in the previous steps. Pressing y/ when complete.
Pressing the / key twice will enter a dot. For Example
192.168.0.150
• Scroll down once to change the port number. This is required if
you wish to setup port forwarding through the router. The port
can be left as 10001.
• Scroll down and enter the Gateway address assigned to the
ComIP.
• Scroll down once and enter the subnet mask assigned to the
ComIP
• Press N/ twice.
• Press then y/ (Comport Setup).
• Scroll to the comport you have the ComIP plugged onto.
• Press n/ and y/ for ComIP module.
The settings will be sent to the ComIP. After a minute the unit will be
ready to use.
Exit Engineers mode on the control panel.
Port Forwarding
WARNING: Care should be taken when opening ports as this can
leave the router vulnerable to malicious attacks.
To allow the system to communicate with the outside world, and
vice versa, port forwarding must be enabled on the router for the
ComIP. The below example is typical, however please check you
routers documentation or the manufacturers website for more
information. This will be required in order to use the app remotely.
To setup Port Forwarding do the following.
• Connect to the Router
• Look for settings for "Forwarding”, or "Port Forwarding" these
could be under advanced settings, or in the Firewall settings.
Each manufacturer is different.
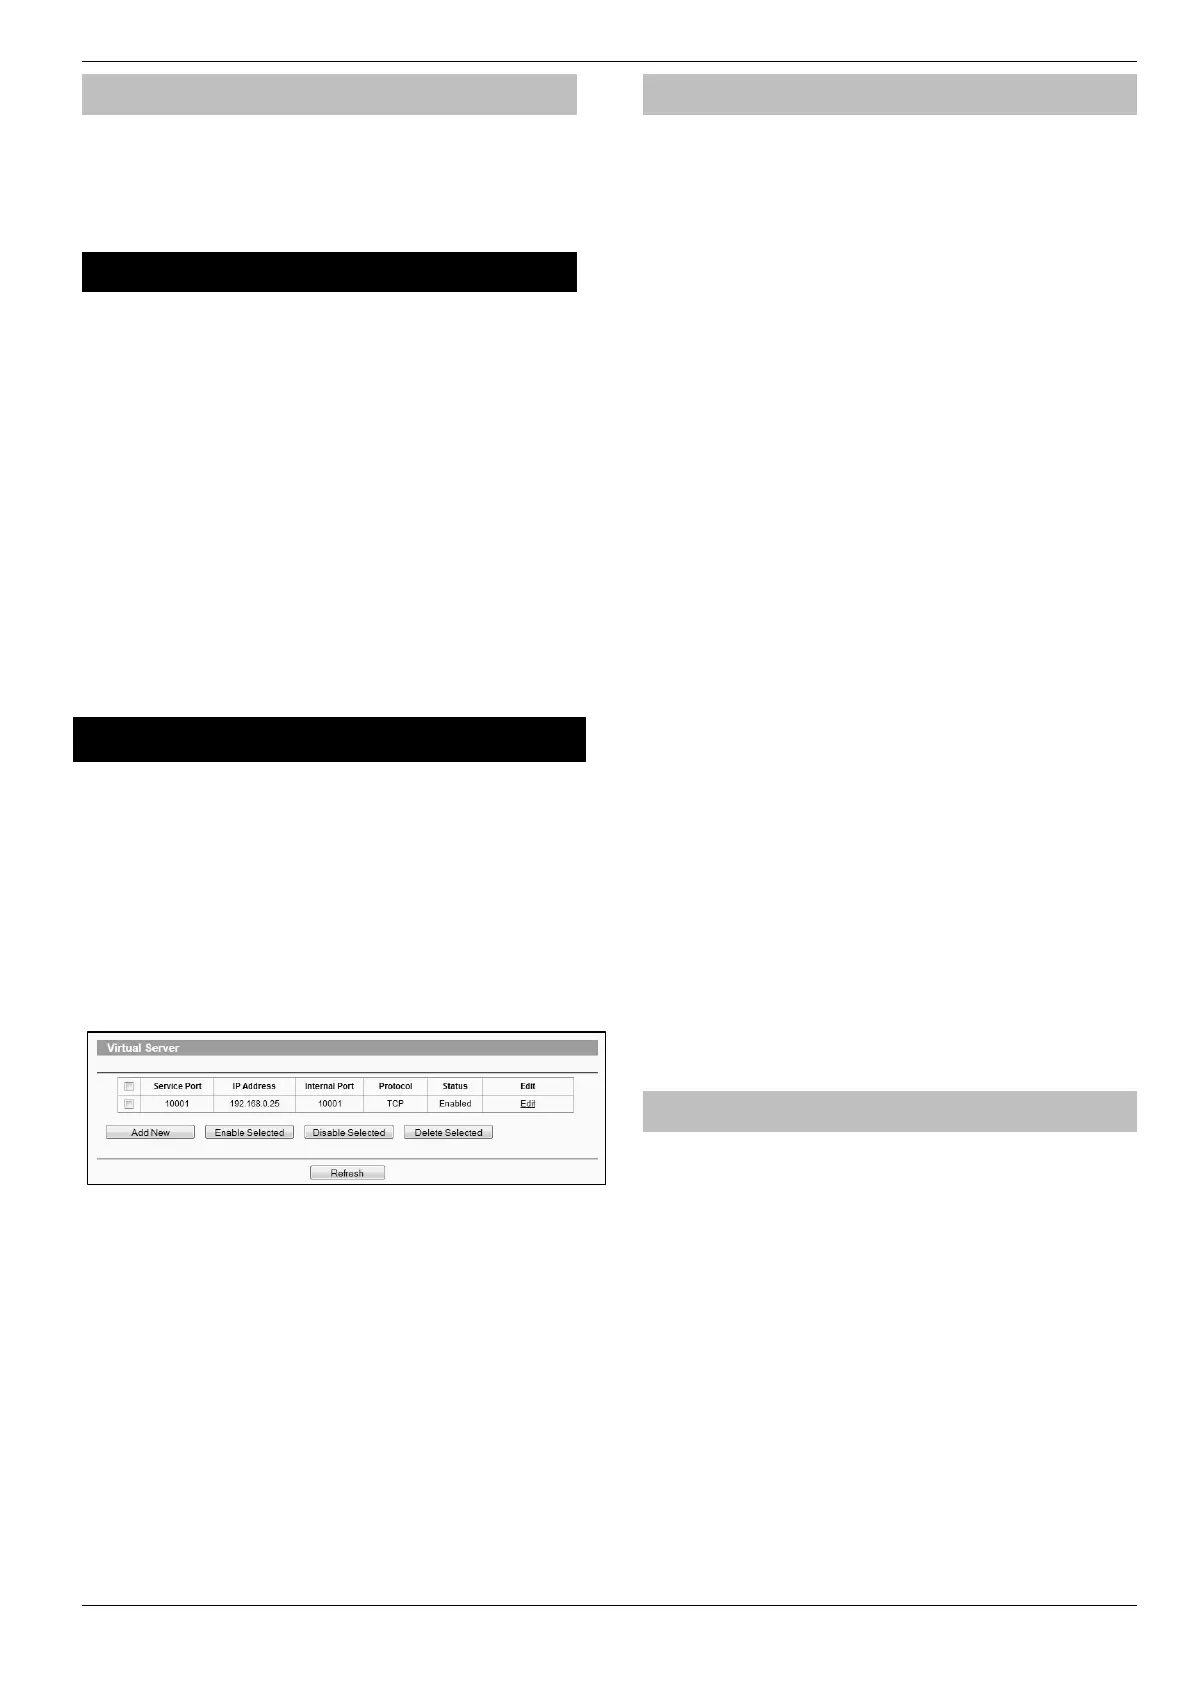
Once you have found the option you will have something like this.
• Add a new rule using the ComIP IP address and Port Number
you used earlier.
Some routers may require use of the MAC address to allow
port forwarding. Please check with the manufacturer’s
documentation or website for details.
Wintex setup
Local Connections (LAN)
In Wintex do the following:-
• Click New
• On the Customer Details page enter an Account Reference
• On the Panel Details page
o Choose the Panel Type & Software Version.
o Ensure the UDL Password matches what is in the
panel.
The UDL password is found in UDL/Digi Options UDL Options. This should be setup before
connecting.
o Enter the IP Address of the ComIP into the Host
Address field
o Enter the port number from the panel into the Host
Port field.
• Click ADD
You have now configured Wintex for a local connection to the
control panel. To access the panel do the following:
• In Wintex click on Connect
• Scroll down and choose Click via Network (192.168.0.100 on
port 10001)
• Once connected the status (bottom left of the Wintex screen)
will change to Online Ready.
Remote Connections (WAN)
Before attempting to connect to the system from a remote location,
please read the section on Port Forwarding, this will need to be
done to allow access from outside of the LAN.
Fixed IP address (Uncommon)
If you have a fixed IP address internet connection, complete all of
the details above, BUT replace the Host Address with the Fixed IP
address provided by the Internet Service Provider.
Dynamic IP Address (most common)
It is most likely that you have a Dynamic IP address assigned by the
service provider. This basically allows the Local system to connect
to the outside world (Internet WAN), and can change frequently.
Because of the nature of Dynamic addresses you will need a third
party service to manage the IP address to ensure you can always
connect to the system.
You should search for a Dynamic DNS service provider, who may
or may not charge a fee for the service. Once you have the service
the Host Address will be replaced by the details given to you by the
DDNS provider. Without this service Wintex will not work remotely.
Texecom mobile app's (Not Connect)
Texecom mobile apps can be used to access the system either
remotely or locally. The apps are supported on iOS & Android
devices and can be downloaded from the respective app stores. All
three apps are configured identically for access.
Detailed information regarding all of the app settings can be found
in the Help file and instructions provided with the app. The following
sections only deal with the connection setup, and enabling Push
Notifications. The app instructions also include a pictorial guide
and can be found in the App under Settings>Help
Local Connection
Once the app is installed do the following:
• Click to Open
• Login the default User Name and Password are Master &
123456 respectively.
• You will be asked if you want to use the New Layout, choose
yes
• Choose My Sites
o A warning box will appear saying you have No Site
Settings, take note of the instruction and press OK
• Swipe Left (iOS) or hold (Android) on the Site Name and
choose Edit

 Loading...