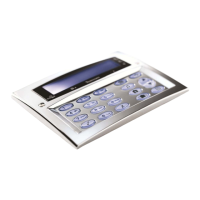
Keypad Setup Premier Elite Series Installation Manual
80 INS176-15
Keypad Areas
Keypads can be assigned to any number of areas, assigning a
keypad to an area determines:
• Which areas the sounder and speaker output in the keypad will
generate tones for i.e. if the keypad is assigned to areas A and C,
the sounder/speaker will only operate when areas A or C are in
alarm, entry, exit etc.
• Which areas can be armed or disarmed from that
keypad when using codes that have the ‘Local Arming’ or ‘Local
Disarming’ attributes (see page 126 for details)
• Which areas will cause a Tamper alarm when the keypad cover
is removed
Keypad Zone Mapping
The zones in the keypad need to be mapped to a valid zone number
before they can be used as part of the system i.e. Keypad 1 Zone 1
could be mapped to Zone 5 (panel) and Zone 2 could be mapped to
Zone 25 (expander 3) etc.
Until mapped, the zones in the keypads will not work.
A keypad zone can be mapped to any zone number on the
system, however, when mapped to a zone number that already
exists i.e. Zone 5 (panel), that zone can no longer be used, on
the 12-W Zones 5-8 should be used for keypad zone mapping.
If a zone is mapped to a zone number not already on the
system i.e. Zone 25 (expander 3) and expander 3 is then
added, that zone on the expander (Zone 25) cannot be used. If
you wish to use the zone on the expander, the keypad zone
must be remapped to a different number.
If a zone is remapped to a different number, the new zone
number must be treated as a new zone on the system and
therefore needs to be programmed accordingly (the zone
programming will NOT automatically follow the mapping).
Keypad Options
These 8 options control various keypad functions:
Select options by pressing keys 1 to 8 (a letter on the display means
the option is selected, a Dot on the display means the option is not
selected).
P - PA Enabled
Pressing keys 1 & 3 together will cause a PA alarm.
F - Fire Enabled
Pressing keys 4 & 6 together will cause a Fire alarm.
M - Medical Enabled
Pressing keys 7 & 9 together will cause a Medical alarm.
T - Tamper Enabled
Removing the keypad cover will cause a Tamper alarm.
A - PA is Audible
A keypad PA (1 & 3) will cause an audible PA alarm.
D - PA is Delayed
When the keypad PA buttons (1 & 3) are pressed, the ‘Keypad PA
Delay’ timer starts, if a User code is entered before the timer expires,
no PA alarm will occur. If a User code is not entered before the timer
expires, a PA alarm will occur (see page 69 for details).
Q - Quick Arm is Enabled
Pressing the Area or Part keys will Arm or Part Arm the areas that the
keypad is assigned to without the need to enter a User code first.
O - Info.LED> Output
The ‘Info.’ LED on the keypad comes on when the keypad output
activates and goes off when the keypad output deactivates.
Keypad Speaker Volume
This option controls the volume level of advisory tones from
loudspeakers connected to the keypads. Advisory tones consist of
‘Entry/Exit’ and ‘Warning’ type tones. 1 = minimum; 8 = maximum.
Alarm tones are always full volume.
Keypad Sounder Options
The sounder and speaker output in the keypad can be programmed
so that certain types of tones are not generated. When deselected,
Fire, Alarms, Fault, Service, Entry, Exit and Chime tones will not be
heard.
Select tones by pressing keys 1 to 8 (a letter on the display means
the tone is selected, a Dot on the display means the tone is not
selected).
F - Fire Tones On
Fire alarm tones will be generated by the keypad sounder/speaker.
A - Alarm Tones On
Intruder alarm, Tamper alarm and PA alarm tones will be generated
by the keypad sounder/speaker.
F - Fault Tones On
Fault tones will be generated by the keypad sounder/speaker.
S - Service Tone On
Service and Warning tones will be generated by the keypad
sounder/speaker.
E - Entry Tones On
Entry tones will be generated by the keypad sounder/speaker.
X - Exit Tones On
Exit tones will be generated by the keypad sounder/speaker.
C - Chime Tones On
Chime 1, 2 and 3 tones will be generated by the keypad
sounder/speaker.
K - Use Keypad Areas
When selected, the keypad sounder and arming control is
determined by the area that the keypad is assigned to.
When deselected, the keypad becomes an ‘Area Arm Suite’ controller
(see page 62 for details). This allows different combinations of areas to
be armed or disarmed depending on which keypad is used and
operates as follows:
• Keypad 1 = Area Arm Suite 1, Keypad 2 = Area Arm Suite 2,
Keypad 3 = Area Arm Suite 3 etc.
• When a User code is entered at a keypad, one of the ‘Area Arm
Suites’ is selected (depending on which keypad was used) and the
areas contained within that suite arm using the arming mode for that
suite, the keypad sounder will also follow the areas defined by the
suite.

 Loading...