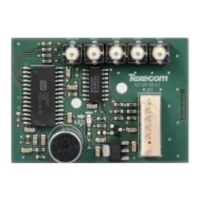
PCB Layout
1. 5 way harness connection to control panel
2. LED Indicators (see table below)
a. Hardware flow control (CTS) (for future use)
b. Signal Strength
c. Hardware flow control (DTR) (for future use)
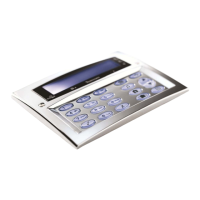
3. Antenna/Antenna connection
Installation
The ComWiFi module requires some initial setup that cannot be
done through the control panel or Wintex. This step by step guide will
allow you to achieve the following and should be carried out in the
order detailed in the manual.
• Installation
o Initial Module Setup
o Change Default Account Settings
• Dynamic IP address
• Assign an IP address manually
o Reserve the IP address
o Set the DHCP Pool
• Setup Port Forwarding on the Router
• Setup Push Notifications
• Programme the Control Panel
Changing other settings within the setup pages may cause incorrect operation of the
ComWiFi and you will be advised to return the unit to factory settings.
Initial Module Setup
These steps MUST be carried out FIRST.
• Connect the ComWiFi onto the comport of the control panel
using the lead provided.
• Using a Wi-Fi enabled computer, tablet or mobile device scan
for new wireless networks.
• Select the 'Com WiFi' network.
• Enter the network key password texecom2015 and press
connect.
• On the same device open the Web browser and type the IP
address 10.10.100.254 into the address bar.
• You will need to enter the user name as master and the
password as 123456.
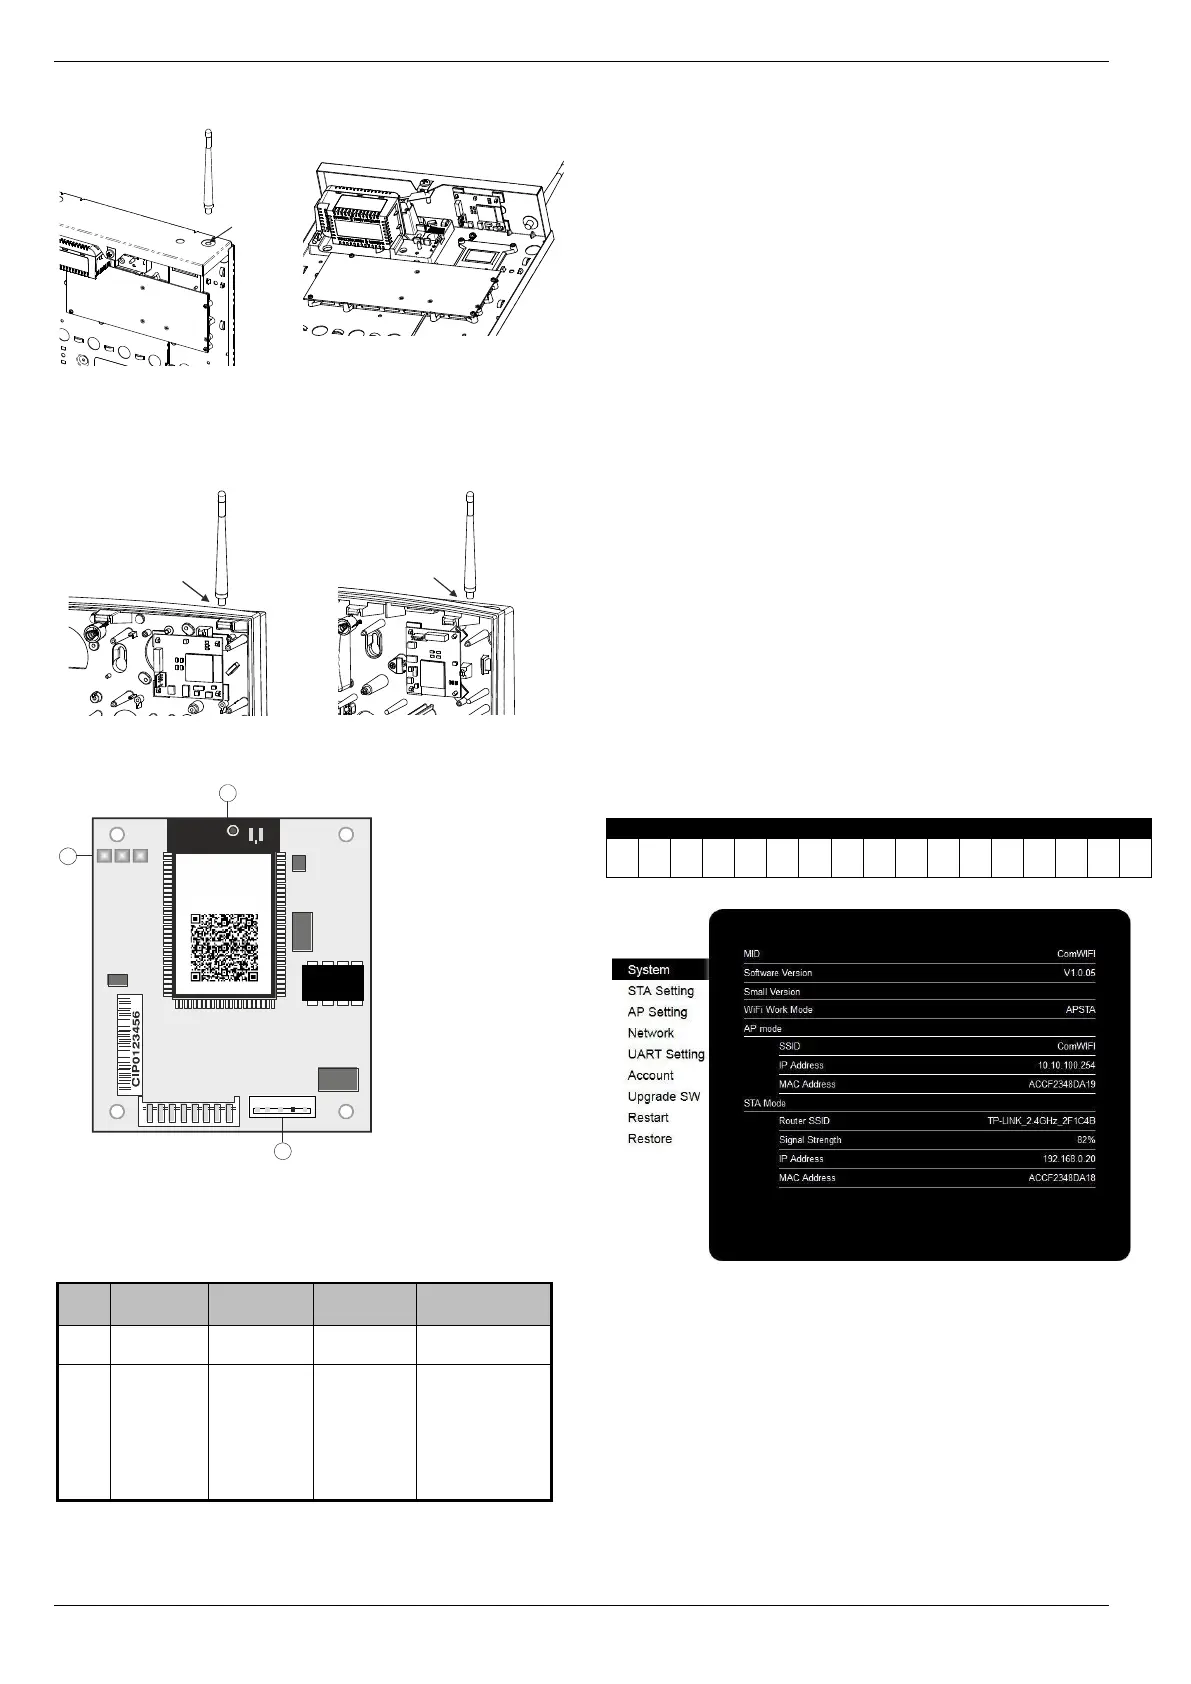
• You are now online with the ComWiFi module, and should see
the system image shown on the following page.
• Take a note of the STA Mode MAC Address.
Change Password & User Name
Before proceeding it is important to change the User Name and
Password in order to keep the ComWiFi secure. Click on Account
on the left side of the screen and then enter a new User Name and
Password followed by Save. You will be prompted to Restart the
unit.
Once the unit has restarted reconnect if required and continue.
Please note it is NOT possible to retrieve the User Name & Password once it has been
changed. You will have NO access to the device without it. It is not possible to default
the unit without the User Name & Password.

 Loading...