RemovingtheSteeringCylinder(continued)
9.Removethecotterpins(item13inFigure145)andslottedhexnutsthat
securethesteeringcylindertotheaxle.
10.Separatethesteeringcylinderballjoint(item3inFigure145)androdend
fromtheaxleassembly.Removethesteeringcylinderfromthemachine.
11.Iftheballjointistoberemovedfromthecylinder,notethedirectionthatball
jointisinstalledinthecylinder.Removetheretainingringandthenusea
presstoremovetheballjointfromthesteeringcylinderbarrel.
12.Ifnecessary,removetherodend(item11inFigure145)fromthesteering
cylindershaft.
13.Ifnecessary,removethehydraulicttingsfromthesteeringcylinderand
discardtheO-rings.
InstallingtheSteeringCylinder
1.Ifthehydraulicttingswereremovedfromthesteeringcylinder,lubricate
newO-ringswithcleanhydraulicuid,positiontheO-ringstothettings,
andinstallthettingsintothesteeringcylinderports;refertoInstallingthe
HydraulicFittings(SAEStraightThreadO-RingFittingintotheComponent
Port)(page4–9).
2.Ifremoved,presstheballjoint(item3inFigure145)intothebarreland
securetheballjointwiththeretainingring.
g037251
Figure147
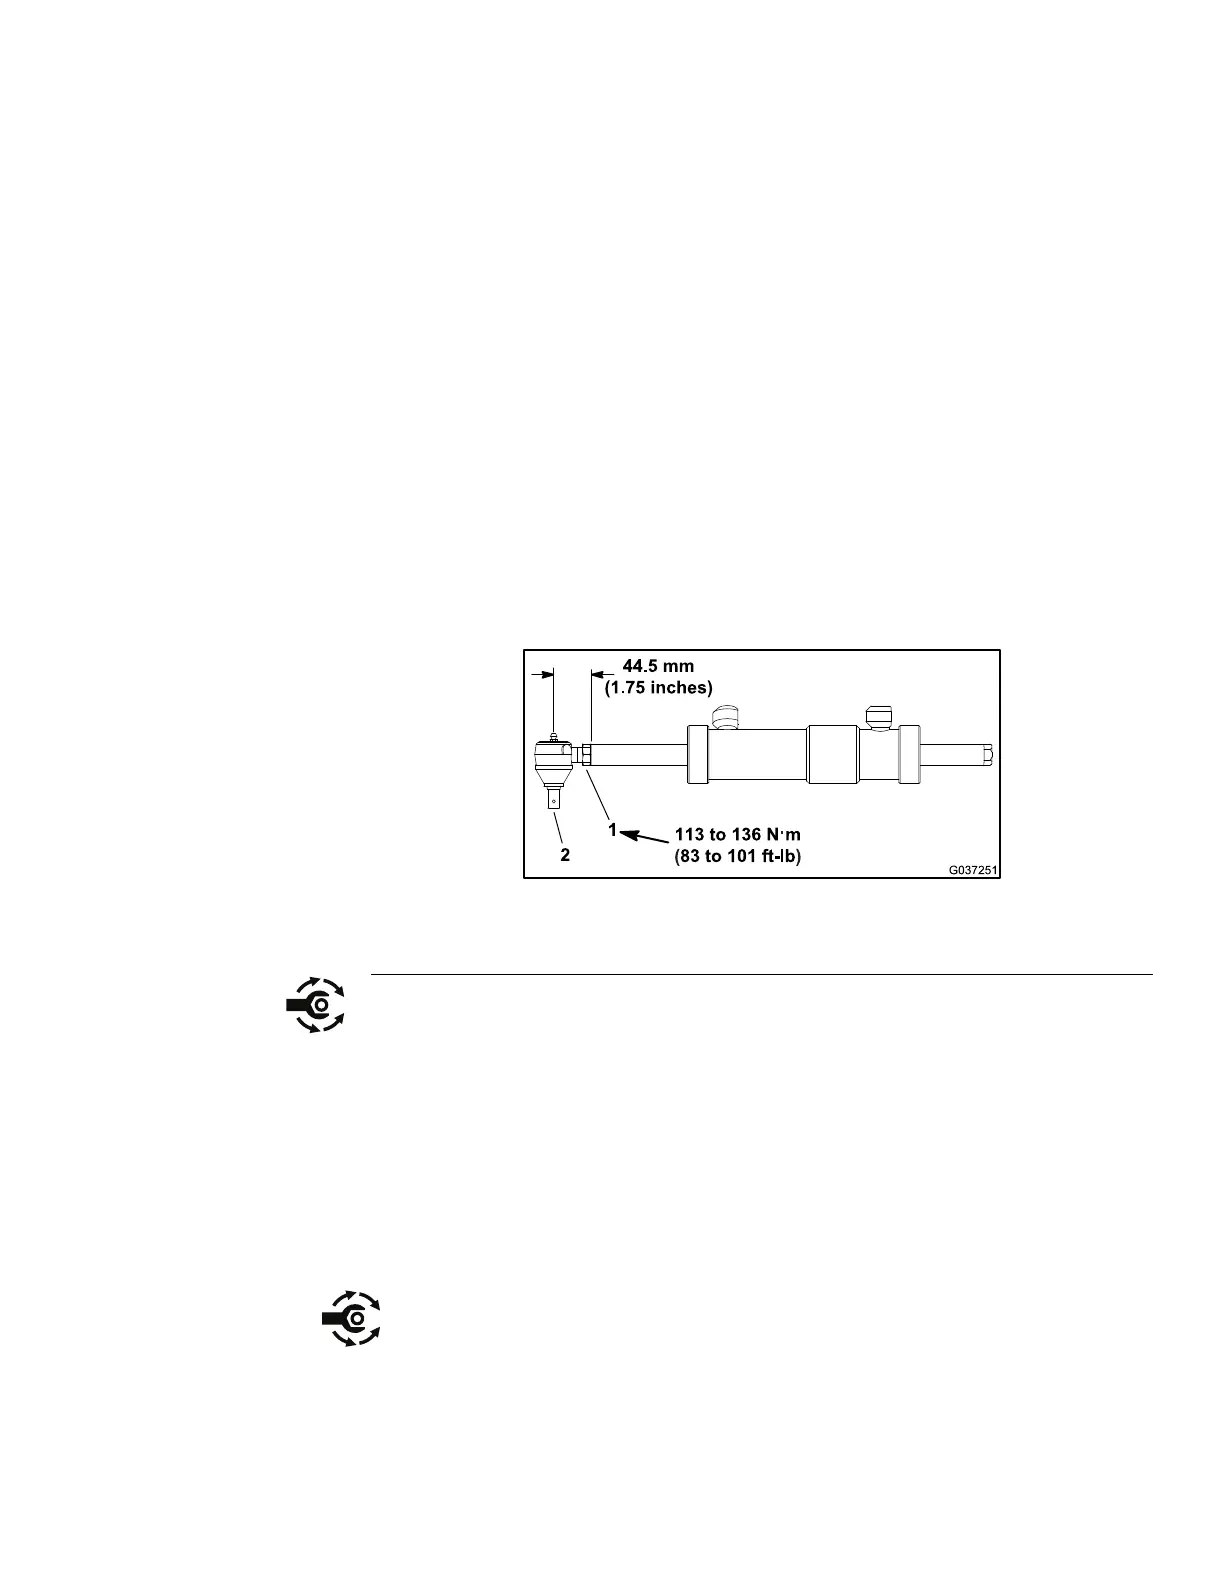
1.Jamnut2.Rodend
3.Iftherodend(item11inFigure145)wasremovedfromthesteeringcylinder
shaft,threadtherodendintotheshaftsothatthedistancefromendofthe
shafttocenterofthegreasettingintherodendis44.5mm(1.750inches)
(Figure147).T orquethejamnutto113to136N∙m(83to101ft-lb).
Note:Ensurethatthedistancefromtheendoftheshafttothecenterofthe
greasettingdoesnotchangeduringthejamnuttightening.
4.Cleanthetapersontheballjoint,rodend,andaxleassembly.
5.Positionthesteeringcylindertothemachine.
6.Securethesteeringcylindertothemachinewiththeslottedhexnuts(items
12and15inFigure145).
A.Onboththefrontandrearaxlesteeringcylinders,torquetherodend
slottedhexnut(item15inFigure145)to78to101N∙m(57to75ft-lb).
Ifnecessary,continuetotightenhexnuttoallowcotterpininstallation.
B.Onboththefrontandrearaxlesteeringcylinders,torquethebarrelend
slottedhexnut(item12inFigure145)to109to122N∙m(80to90ft-lb).
Ifnecessary,continuetotightenthehexnuttoallowcotterpininstallation.
Groundsmaster360
Page4–151
HydraulicSystem:ServiceandRepairs
16225SLRevC

 Loading...


