Floor Position & Leveling Magnet Adjustment Adjustment Section
©Vertical Express 2-34 Printed in USA April 2020
Floor Position & Leveling Magnet Adjustment
Before proceeding with the floor leveling adjustments, the valve must be fully
adjusted.
1. Perform a floor survey to determine if the car is level at each floor.
a. Run the car into one landing, and use the UIT to verify that the POS: and REF: DPP
counts are the same.
UIT: Real Time Motion > Motion/Position
b. Verify that the car sill is level with the hoistway sill for that landing. If the DPP
counts and the sills are not level, correct the 8" leveling magnet's position.
c. Repeat step 1 for each landing.
2. If any floor leveling magnet been repositioned, perform a new hoistway scan and
repeat step 1.
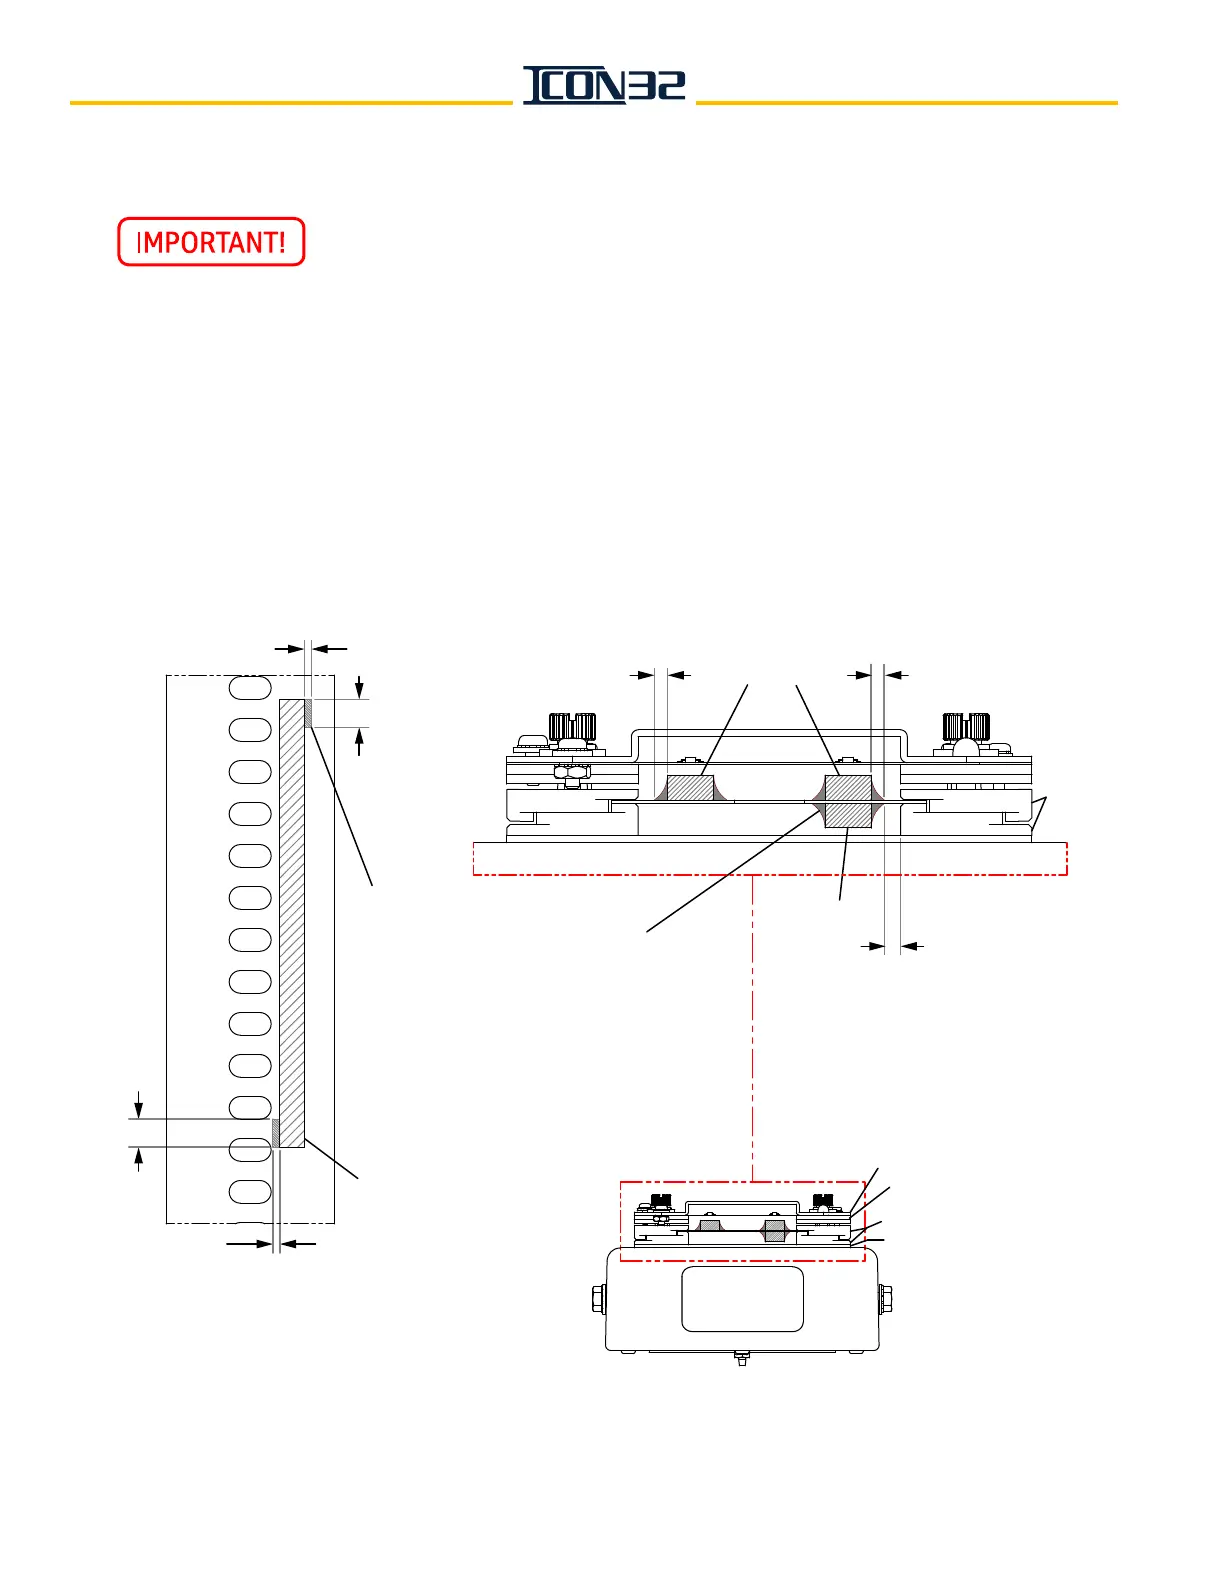
3. When the floor leveling magnet placement is correct, attach each magnet with two
small beads of silicon caulk. See Figure 10.
Figure 10 - Glue the Floor Magnets
½"
ЯΗ
8" Magnet
Attach all magnets
by gluing each magnet
with two small applications of silicon caulk.
Note: When applying the silicon caulk, be
careful not to extend more than
Я"
past the
magnet. This provides running clearance
between the glue and the tape guides to
prevent the glue from touching the guides.
Cover
TSMC Card
Selector Tape Guides
TSAC Card
Car Side
Top Down View Showing Ta
pe Selector Assembly with Ta
pe, Magnets, and Magnet Glue
Tape
Guides
Magnet
Magnet
½"
ЯΗ
ЯΗ
ЯΗ
ЯΗ