Bottom: DC12V RGB60 lamp L=200mm
Both sides: DC12V RGB60 lamp L=100mm
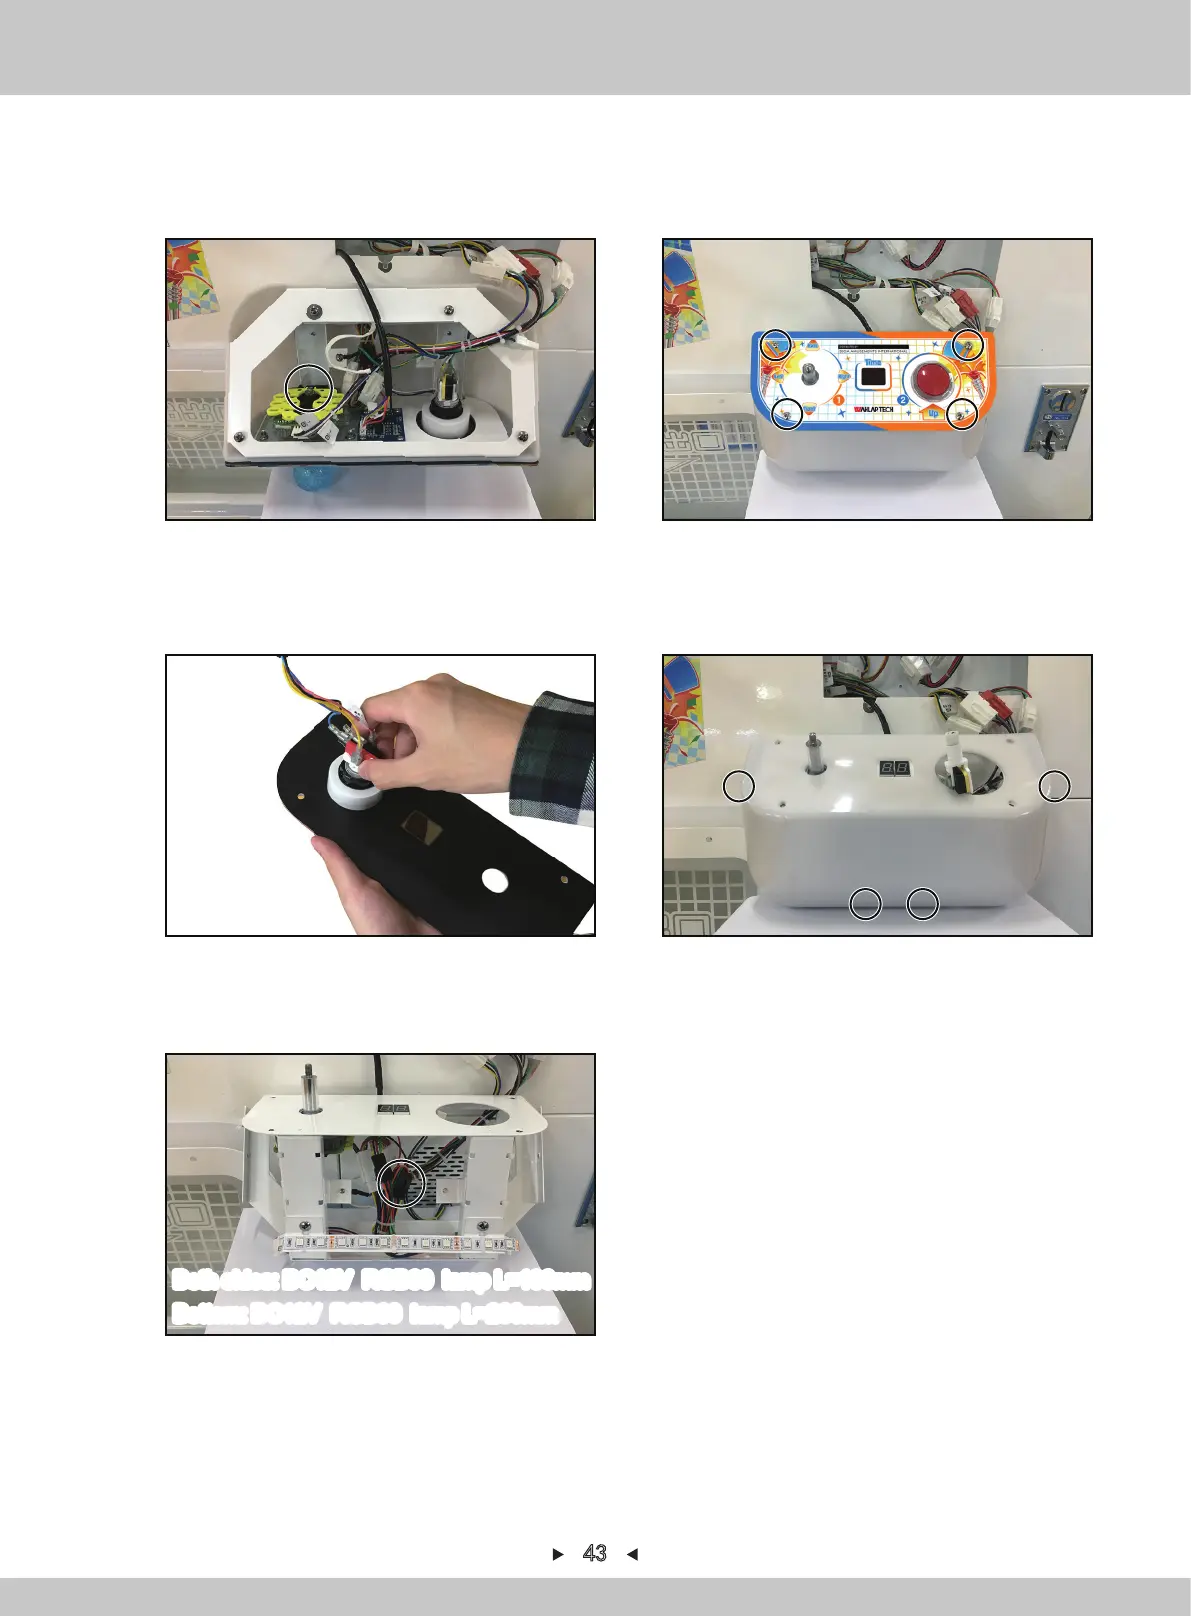
3. Use the slot-type screwdriver to fix the joystick. At the same time, rotate the joystick-ball
counterclockwise and take out the black plastic sheeting.
4. Remove 4 screws to fix the acryl.
5. Turn the acryl on the other-side, pull out the corresponding terminal and remove the acryl.
6. Remove 4 screws that fix the control-panel plastic-cover and remove the control-panel
plastic-cover.
43
7. Cut off the cable-tie, pull out the corresponding terminal and remove the soft light-bar, reinstall
in a reverse order after replacing.