1. The service-panel can be seen when the right access door is opened.
2. Turn on [TEST]. The various data will be displayed and the test-mode can be entered.
3. By pressing
[↑] and [↓]
, the arrow will point to “
I/O TEST
”. Press [SETTING] to confirm.
4. By pressing
[↑] and [↓]
, switch to the following page.
1. The service-panel can be seen when the right access door is opened.
2. Turn on [TEST]. The various data will be displayed and the test-mode can be entered.
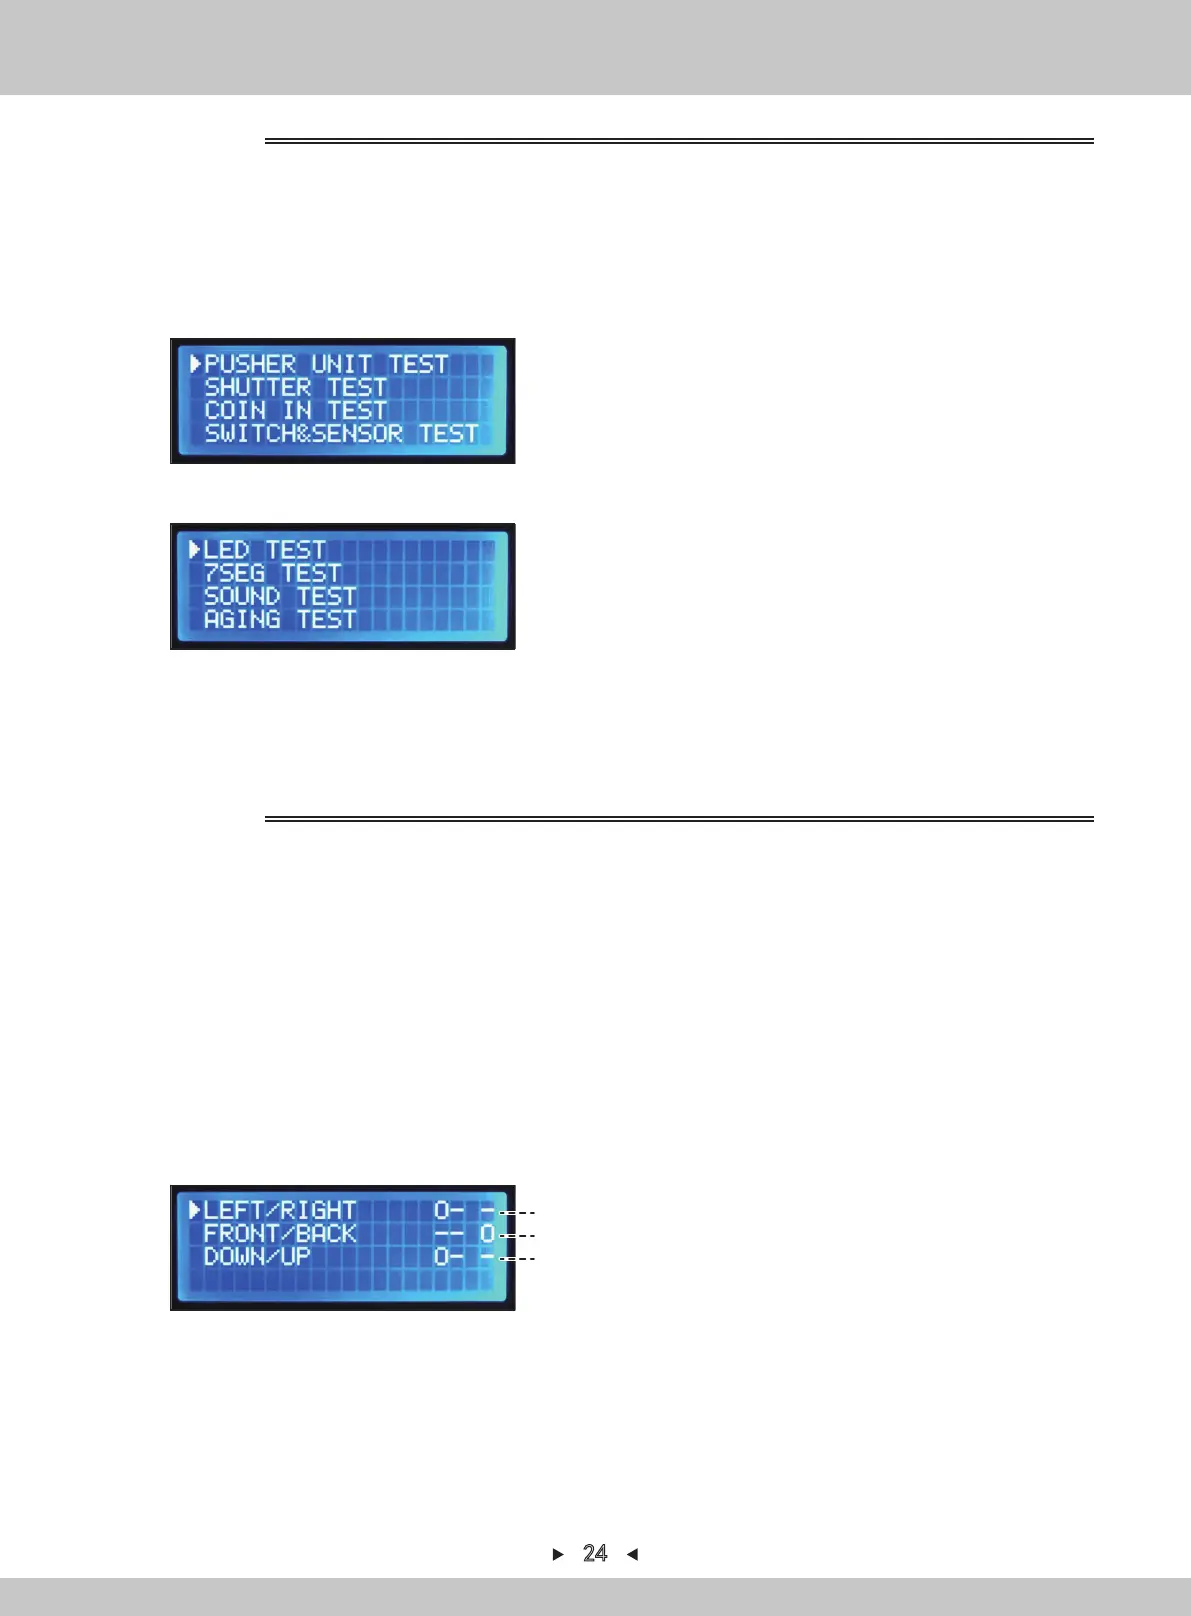
3. By pressing [↑] and [↓] , the arrow will point to “PUSHER UNIT TEST”. Press [SETTING]
to confirm.
4. Use
[←] or [→]
to start the action.
(If the arrow is in line 1 or line 2, the direction can be moved by using the joystick on the
control panel)
(If the arrow is in line 3, the jacking-rod will move up and down by using the joystick on the
control panel)
5. The jacking-rod can be changed between line 1 and line 3 by using the button on the
control panel.
5.
Return to the main menu by pressing [BACK].
For I/O test, refer to P1
(a)
(b)
(c)
For I/O test, refer to P2
4.1.1.6 I/O TEST
Jacking-rod test interface
4.1.1.6.1 PUSHER UNIT TEST
24