5.2.29 Replacement of PVC
5.2.30 Replacement of moving components
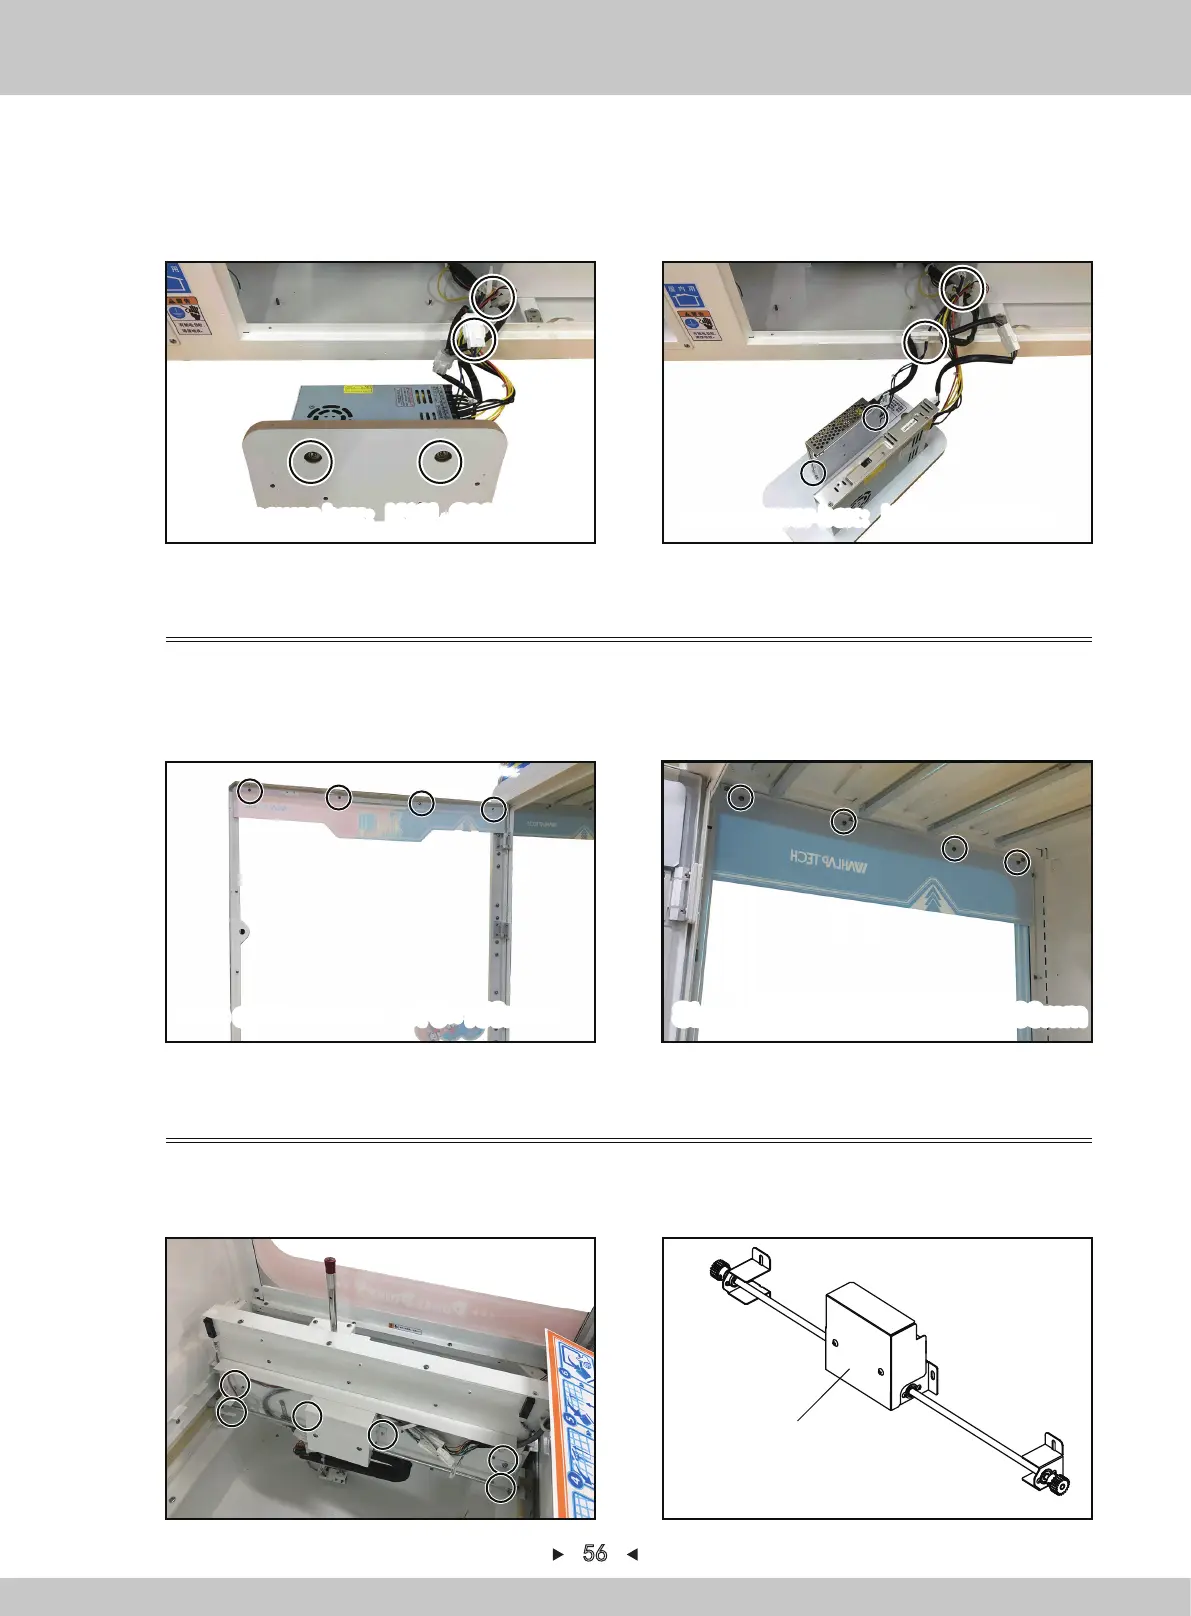
4. Remove 2 nuts to fix the large 12V+5V power-box (remove 2 screws to fix the small 24V
power-box), pull out the terminal corresponding to the power-box and remove the power-box,
reinstall in a reverse order after replacing. (according to the label, insert the terminal back and
then insert the terminal back according to the size of the pin seat.)
Large power-box:K10L-S300D12+5 Small power-box:K06L-U100S24
1. Open the acrylic door with the key, remove 4 screws to fix the front PVC and remove the
front PVC, reinstall in a reverse order after replacing.
2. Open the acrylic door with the key, remove 4 screws to fix the left/right PVC and remove the
left/right PVC, reinstall in a reverse order after replacing.
56
1. Turn off the game-machine. Open the acrylic door with the key, remove the screen,Remove 6
nuts that fix the horizontally-moving motor.
2. Remove the horizontally-moving motor, reinstall in a reverse order after replacing.
Horizontally-moving motor
Size of front PVC:970×150mm Size of left/right PVC:635×133mm