Maintenance
3303−4/A1
Winterthur Gas & Diesel Ltd.
3/ 5
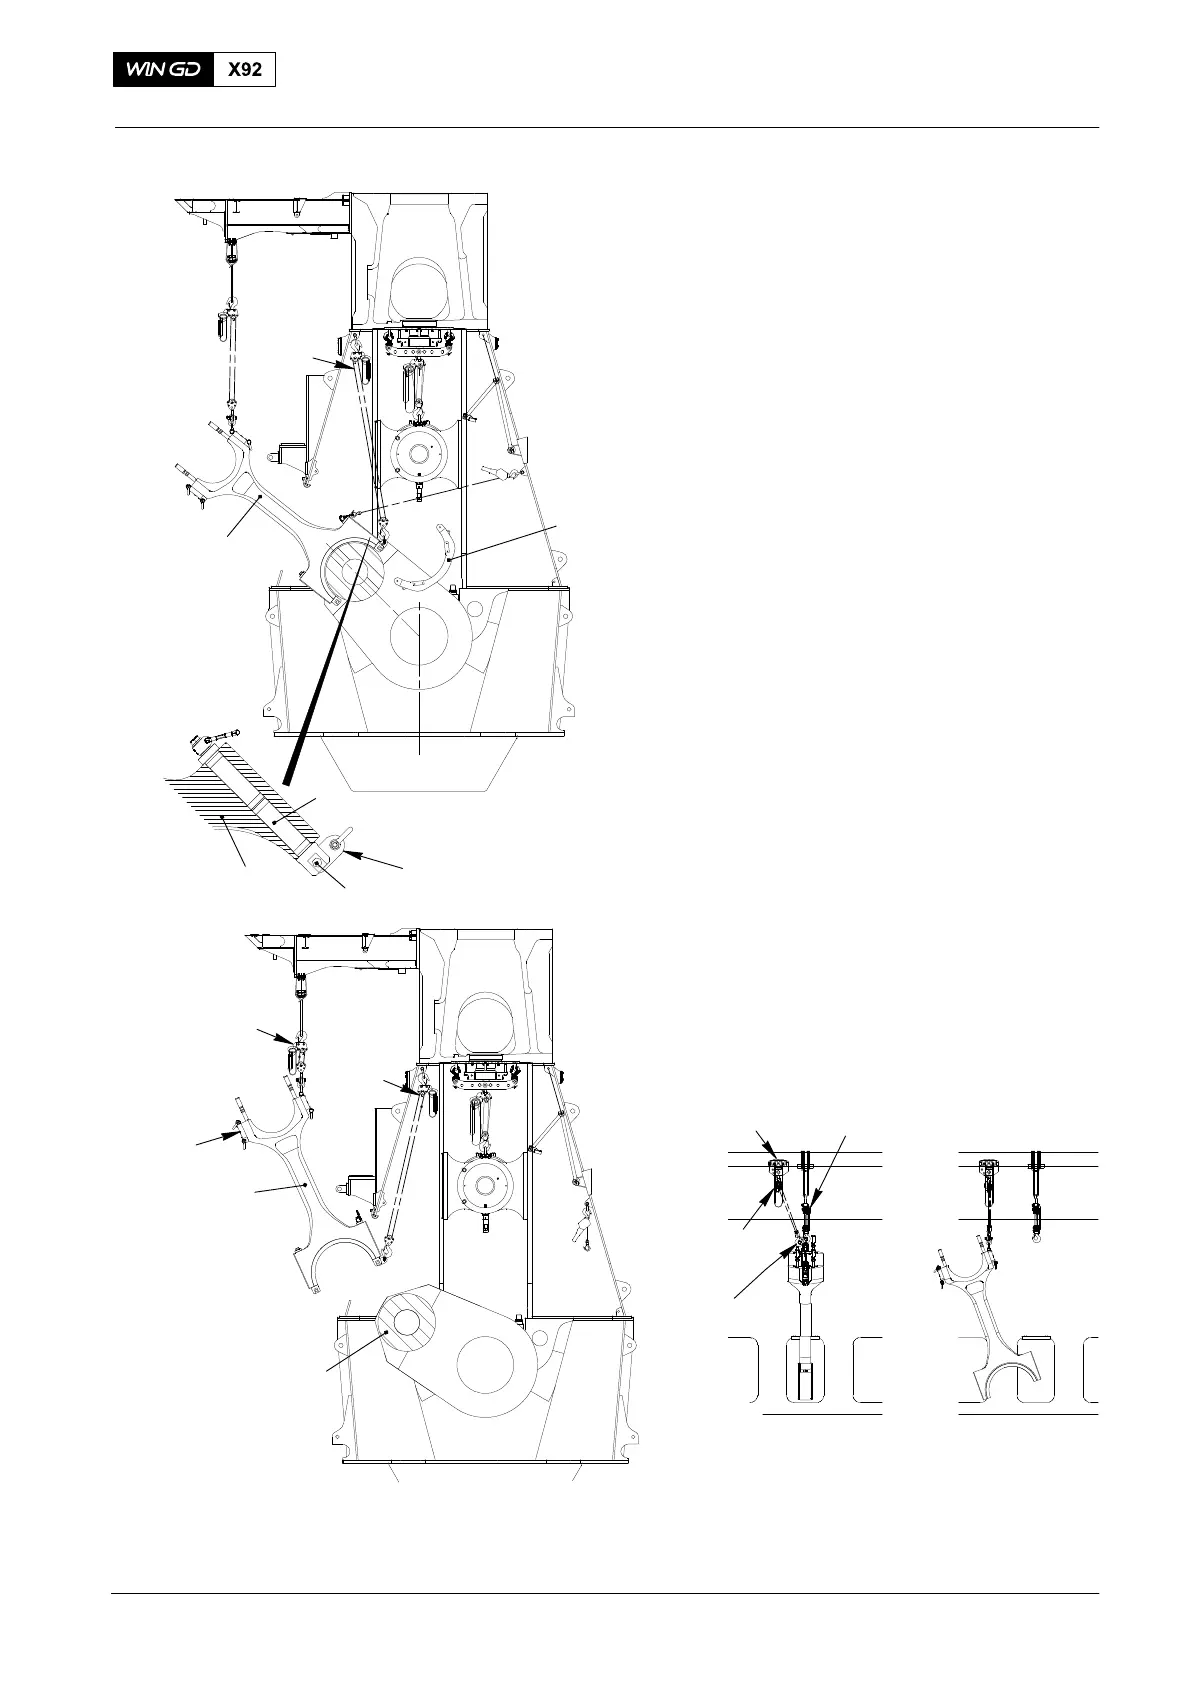
11) Use the turning gear to turn the
crankshaft for almost 90 degree and at
the same time guide the connecting rod
with chain block (H4) out of the column
door, see Fig. 4.
12) Attach hook of manual ratchet (H2) to
the swivel lug of rod (3, Fig. 1) and
apply a slight tension.
13) Prevent the bracket 94334 (100kg)
from falling with a suitable lifting device.
14) Remove the two bolts (5, Fig. 1) and
the bracket 94334.
15) Install connecting element 94334A on
the upper rod with bolt (5).
16) Attach hook of chain block (H3) to
connecting element 94334A.
17) Disconnect chain block (H2) from
connecting rod (1).
18) Use the chain blocks (H3) and (H4) to
Move the connecting rod (1) carefully
away from the crankshaft (2) and out of
the column, see Fig. 5.
19) Attach trolley 94015-008 with chain
block 94017-047 (H5) to the beam on
the gallery, see Fig. 6.
20) Attach another shackle 94019P to the
lifting tool 94337 and attach hook of H5
to it.
21) Take the connecting rod over with chain
block (H5) and move it away.
H4
94015−008
94017−047
H5
94019P
H5
Fig. 6
2015
Removal and Installation
H4
94334
1
3
H3
H2
94334A
5
Fig. 4
1
Fig. 5
H3
94337
1
WCH03037
H4
2