Maintenance
5583−1/A1
Winterthur Gas & Diesel Ltd.
4/ 11
3. Actuator and Fuel Pump − Calibration
The end position of the actuator are not factory set. Thus, calibration is always
necessary after a fuel pump actuator is replaced. Refer Figure 2
1) In E85, turn OFF the related power supply.
2) Remove the top cover from the actuator terminal box. Make sure no particles or liq-
uid can enter the box.
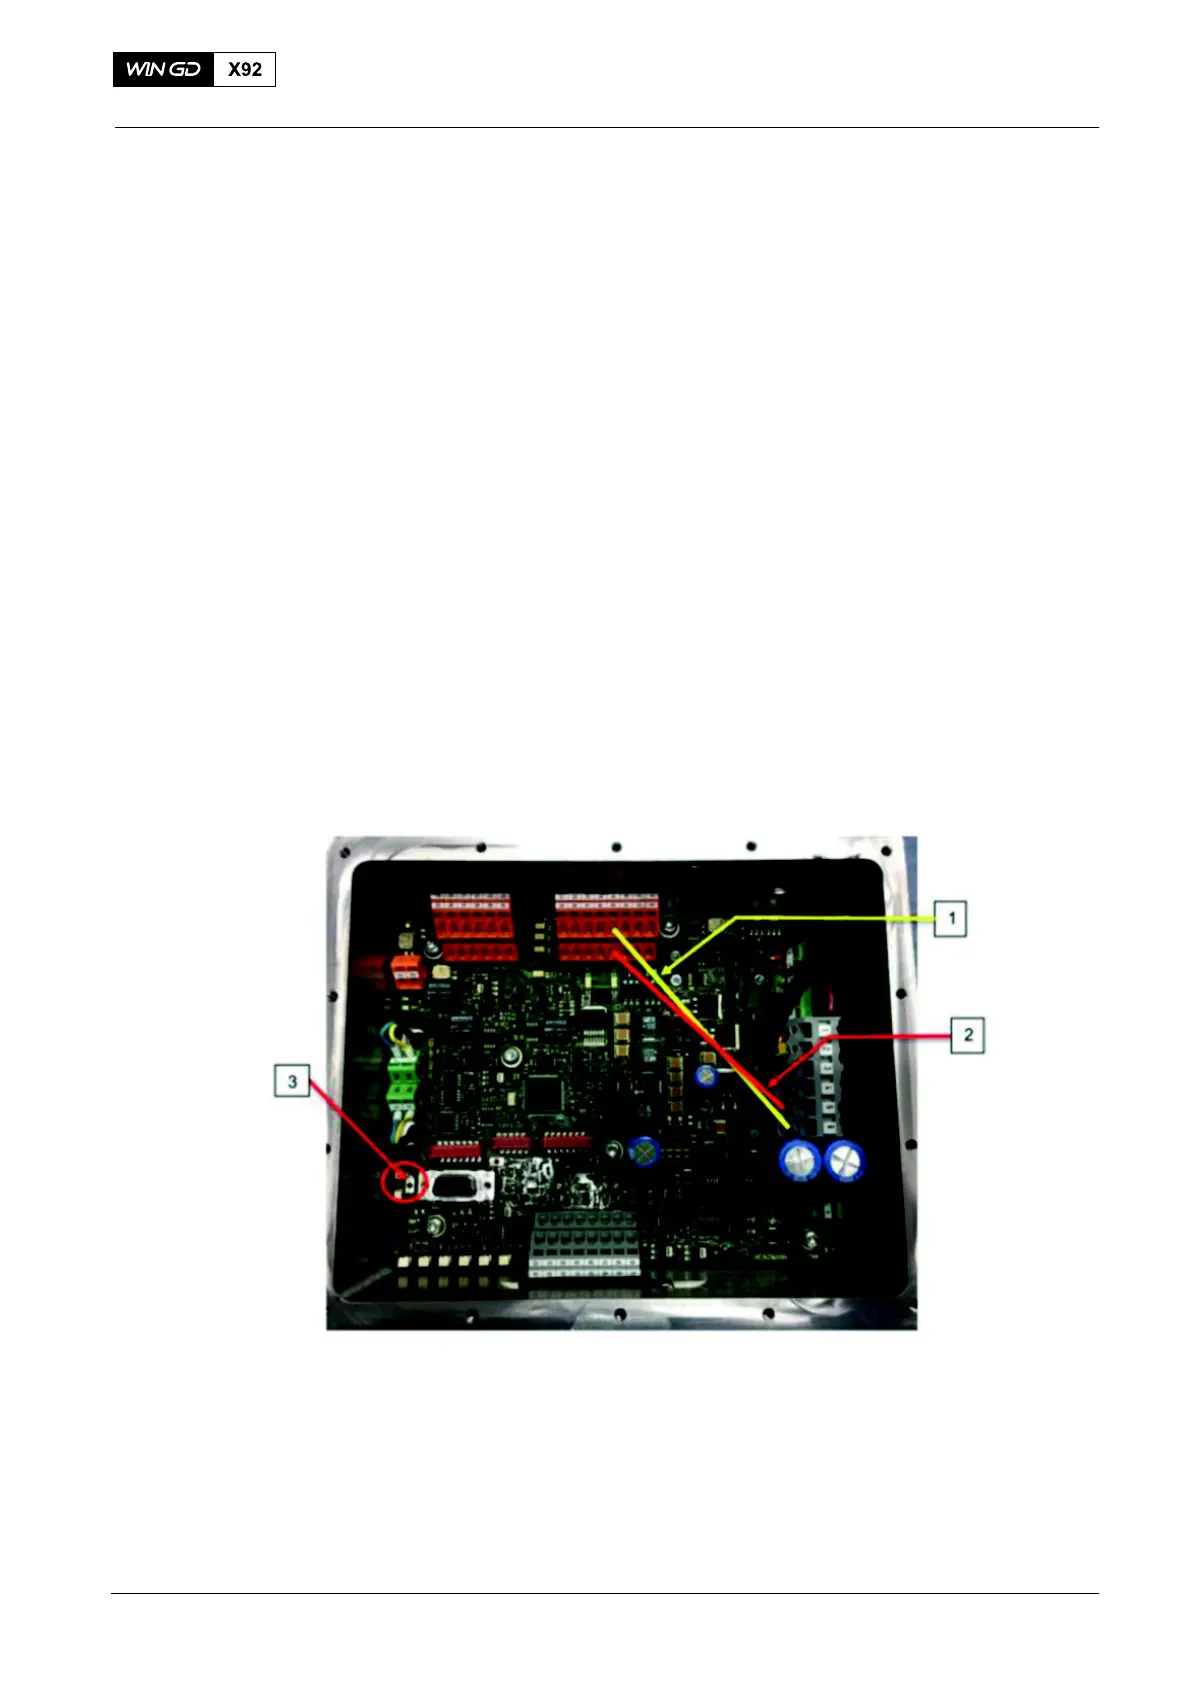
3) Put a bridging wire between terminals 6 and 35, (yellow wire 1).
4) Put a bridging wire between terminals 5 and 43, (red wire 2).
5) In E85, turn ON the related power supply.
6) Use an applicable tool to gently push the switch (3). The actuator automatically
moves to the maximum and minimum position (self−adjustment).
7) When movement of the fuel pump actuator stops, continue to the next step.
8) In E85, turn OFF the related power supply.
9) Remove the two bridging wires attached in step 3 and 4 above.
10) Attach the top cover, including sealing gasket to the actuator terminal box and tight-
en the screws properly.
11) Make sure that the cable glands are tight.
12) In E85, turn ON the related power supply.
Fig. 2
Fuel Pump Actuator: Connection to Fuel Pump
2020