Maintenance
8752−1/A1
Winterthur Gas & Diesel Ltd.
3/ 10
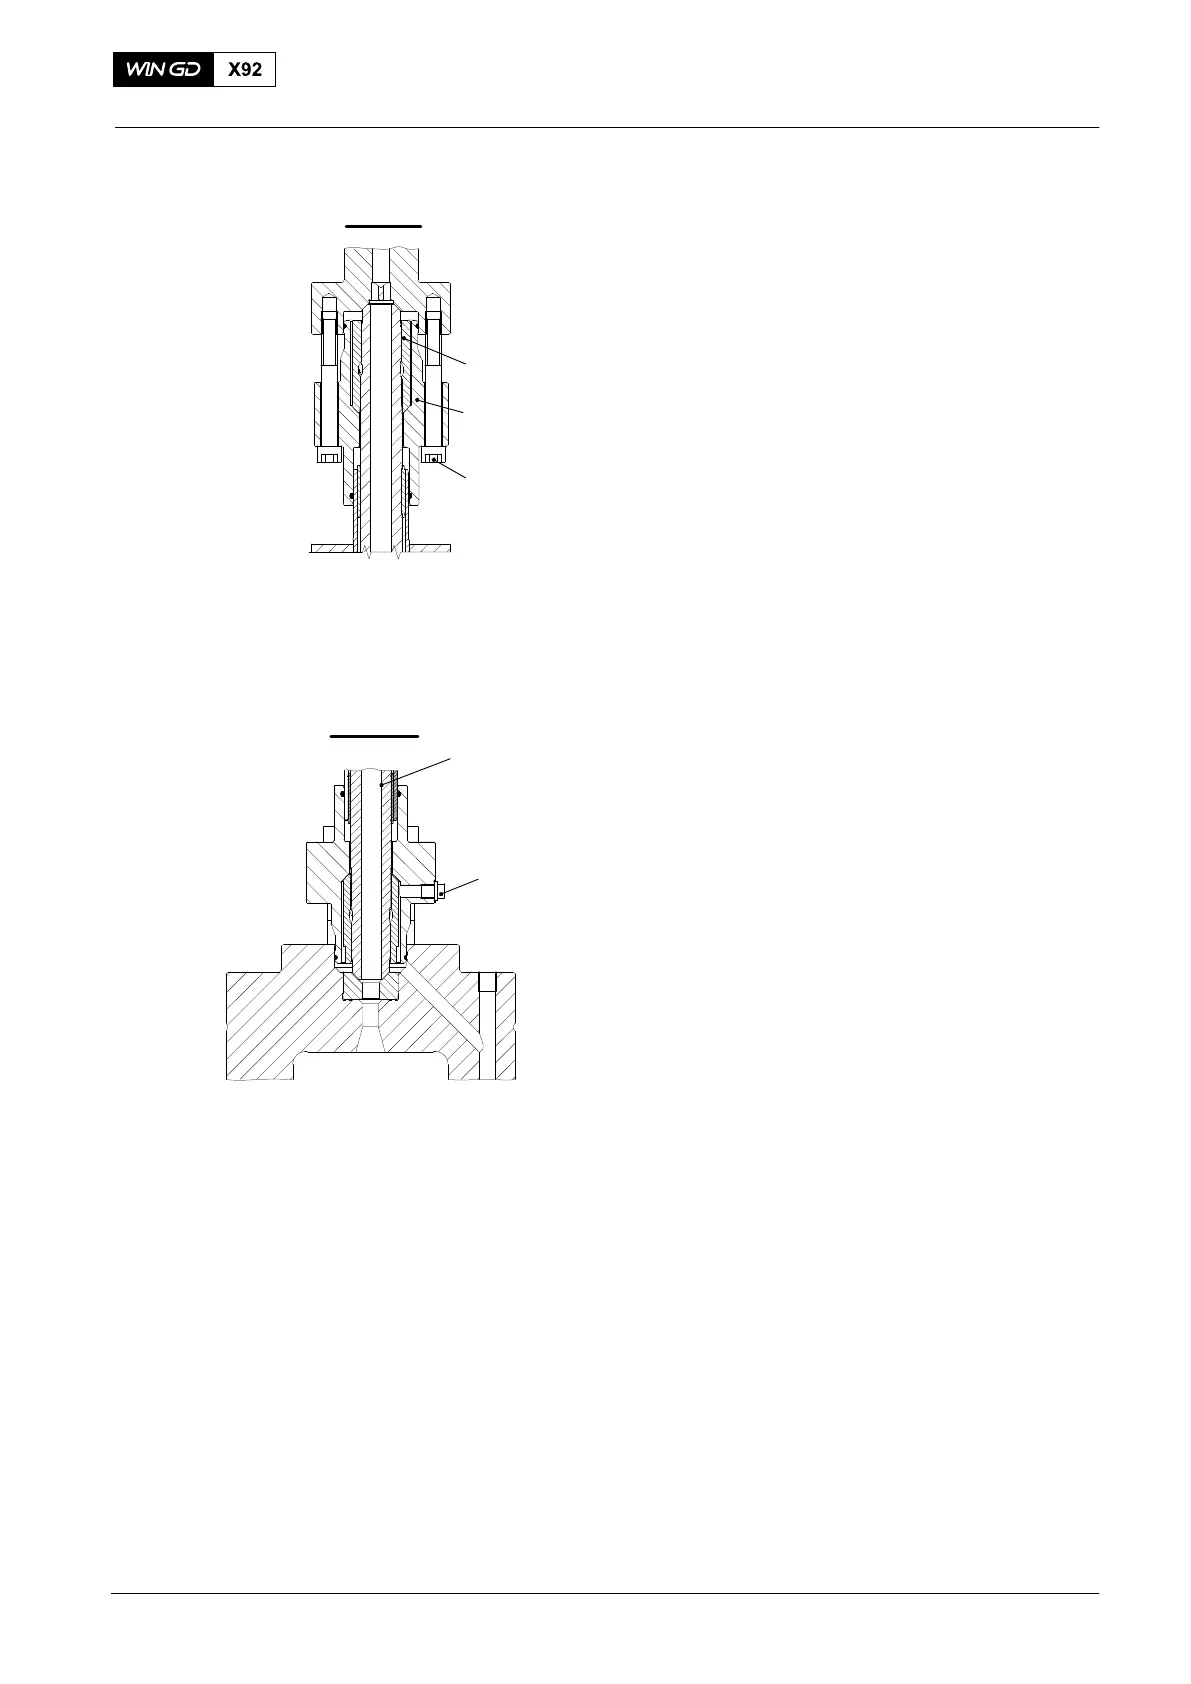
9) Loosen the four screws (3, Fig. 3) on
the flange (2) a maximum of three
turns.
10) Move the flange (2) down and make
sure that air goes into the HP fuel
pipe (1).
11) Open the screw plug (2, Fig. 4). If there
is no fuel, the HP fuel pipe (1) is fully
drained.
12) Tighten the screw plug (2).
2015
HP Fuel Pipe: Removal and Installation
Fig. 3
I - I
II
3
1
2
WCH02957
Fig. 4
1
WCH02957
III - III
2