CCrriittiiccaall IInnffoorrmmaattiioonn FFoorr CCoonnttrroolllleerr BBooaarrdd oorr CCoonnttrrooll
PPaanneell RReeppllaacceemmeenntt
Warning: Observe all precautions when handling ESD sensitive parts. See Handling ESD-
sensitive Parts.
Warning: Carefully remove cables and connectors. Make sure they are not damaged.
Warning: To avoid damaging the part or experience NVRAM mismatch issues, replace only one
of the following components at a time:
• Control panel
• Controller board
To replace a component and to test whether the problem is resolved:
1. Replace the affected component.
Warning: Do not perform a Power-On Reset (POR) until the problem is resolved. If a POR is
performed at this point, then the replacement part can no longer be used in another printer
and must be returned to the manufacturer.
2. Enter the Diagnostics menu. The menu allows you to temporarily use the replacement part.
Warning: Some printers perform a POR automatically if the Diagnostics menu is not opened
within five seconds. If a POR is performed at this point, then the replacement part can no
longer be used in another printer and must be returned to the manufacturer.
3. Use the Diagnostics menu to test the replacement part. Do a feed test to check if the problem is
resolved.
• If the problem is not resolved—Turn off the printer, and then install the old part.
• If the problem is resolved—Perform a POR.
• If NVRAM error occurs during the replacement, then see NVRAM mismatch failure service
check.
4. To replace the controller board and the control panel simultaneously on the machine, follow the
below procedure to avoid losing the printer’s NVRAM settings and damaging the printer.
a. Replace either the controller board or the control panel on the machine. Do not replace both
the parts at the same time.
b. Power on the printer and perform a POR.
c. After the printer has completed startup (printer will be either READY or post an error), power
off the printer and replace the second part.
Note: If the control panel display has failed, the printers’ startup cycle is complete after the
driver motor and fans shut down and the machine is quiet.
d. Power on the printer and allow the printer to go through a complete startup cycle and the
display changes to READY.
140
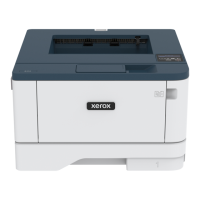
Xerox
®
B310 Printer
Service Manual
Parts Removal
 Loading...
