Phaser 8400/8500/8550/8560 Color Printer Service Manual 8-7
Service Parts Disassembly
Ink Loader (PL1.0.8)
1. Remove the Right Side Cover (page 8-5).
2. Remove the Left Side Cover (page 8-6).
3. Remove the Exit Cover (page 8-6).
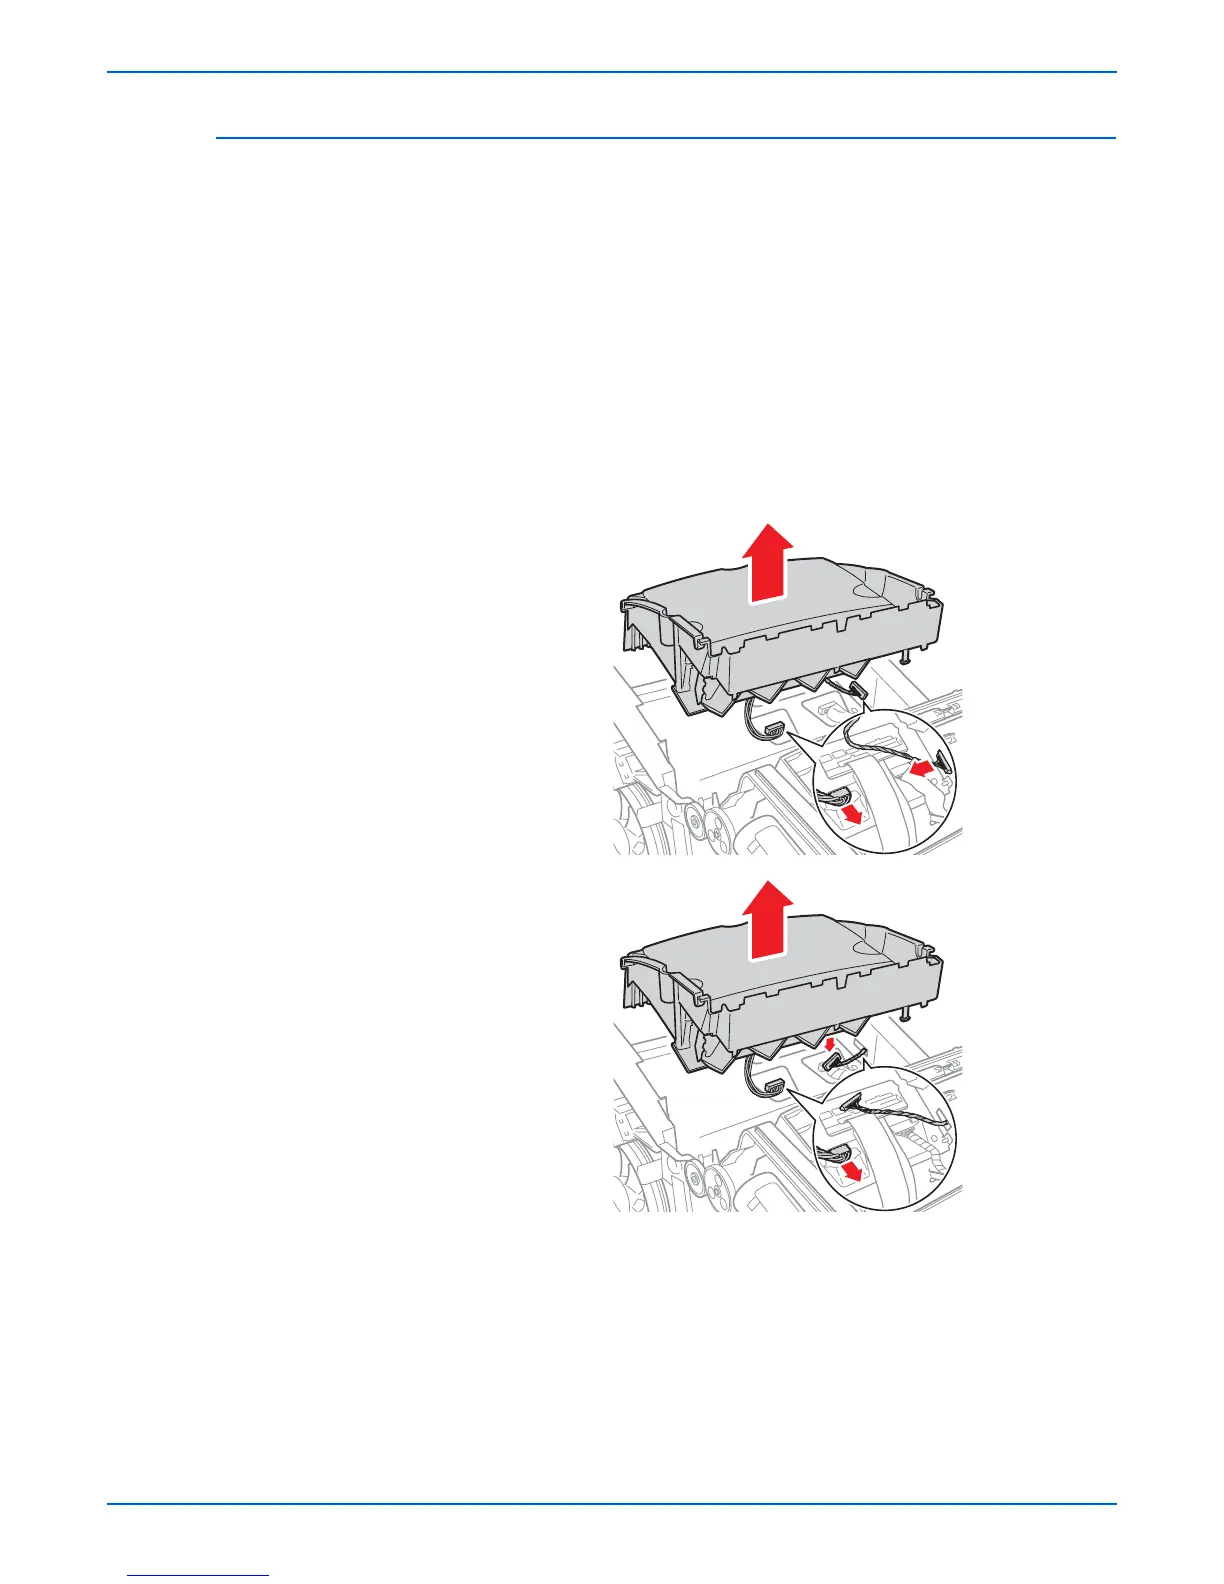
4. Lift the Ink Loader clear of the chassis and hold it in position against the
rear of the chassis to allow access to the connectors. For 8400, the Ink
Loader disconnects from the printer frame. For 8500/8550/8560, the
harness that plugs into the right side frame disconnects directly from the
Ink Loader.
Note
Hooks on the bottom of the Ink Loader allow it to hang on the rear of
the printer chassis while the connectors are removed.
5. Disconnect the 2 connectors from the printer and remove the Ink Loader.
ep
acemen
o
e
For the 8400, route the gray harness from the chassis between the
Ink Loader and printer side. The harness from the Ink Loader must be
routed towards the left side (see inset). For the 8500/8550/8560, the
harness comes from the side of the chassis and plugs directly into the
Ink Loader. After replacing the 8500/8550/8560 Ink Loader, reset the
ink stick count, using the Hidden Service Menu.
s8500-069
8400
8500/8550/8560
 Loading...


