EasyManuals Logo
Home>Xerox>Printer>Phaser 8500

Xerox Phaser 8500 Service Manual

Xerox Phaser 8500
376 pages
To Next Page IconTo Next Page
To Previous Page IconTo Previous Page
Page #311 background imageLoading...
Page #311 background image
Phaser 8400/8500/8550/8560 Color Printer Service Manual 8-41
Service Parts Disassembly
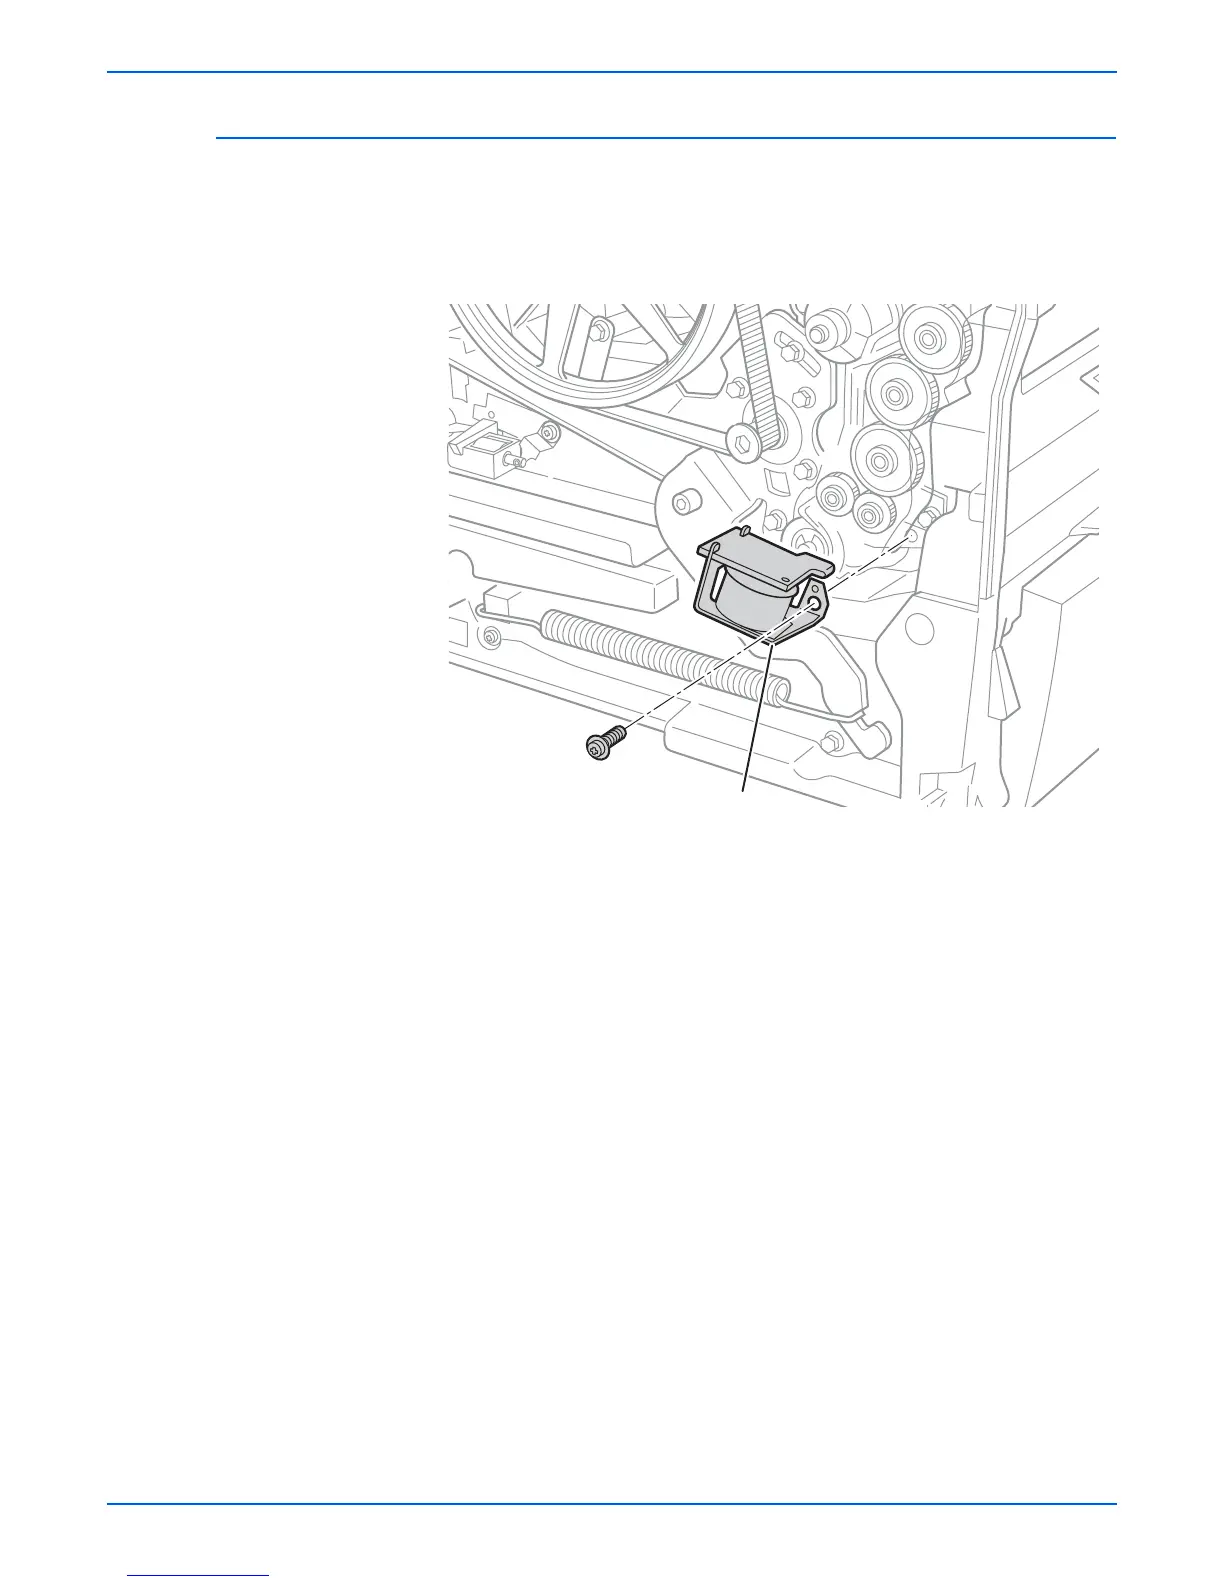
Tray 1 Pick Solenoid (PL4.0.3)
1. Remove the Left Side Cover (page 8-6).
2. Disconnect the solenoid harness.
3. Remove 1 screw from the solenoid, and remove the solenoid.
R
ep
l
acemen
t
N
o
t
e
Align the hole on the solenoid with the boss on the Media Drive.
Install and torque the screw to 12 in. lbs. Reconnect the harness.
s8500-106
Tray 1 Pick Solenoid

Table of Contents

Other manuals for Xerox Phaser 8500

Questions and Answers:

Question and Answer IconNeed help?

Do you have a question about the Xerox Phaser 8500 and is the answer not in the manual?

Xerox Phaser 8500 Specifications

General IconGeneral
BrandXerox
ModelPhaser 8500
CategoryPrinter
LanguageEnglish

Related product manuals