Phaser 8400/8500/8550/8560 Color Printer Service Manual 8-39
Service Parts Disassembly
Tray Lift Motor and Gear (PL4.0.6)
1. Remove the Electronics Module (page 8-46).
2. Remove Tray 2.
3. Disconnect the harness from the Tray Lift Motor.
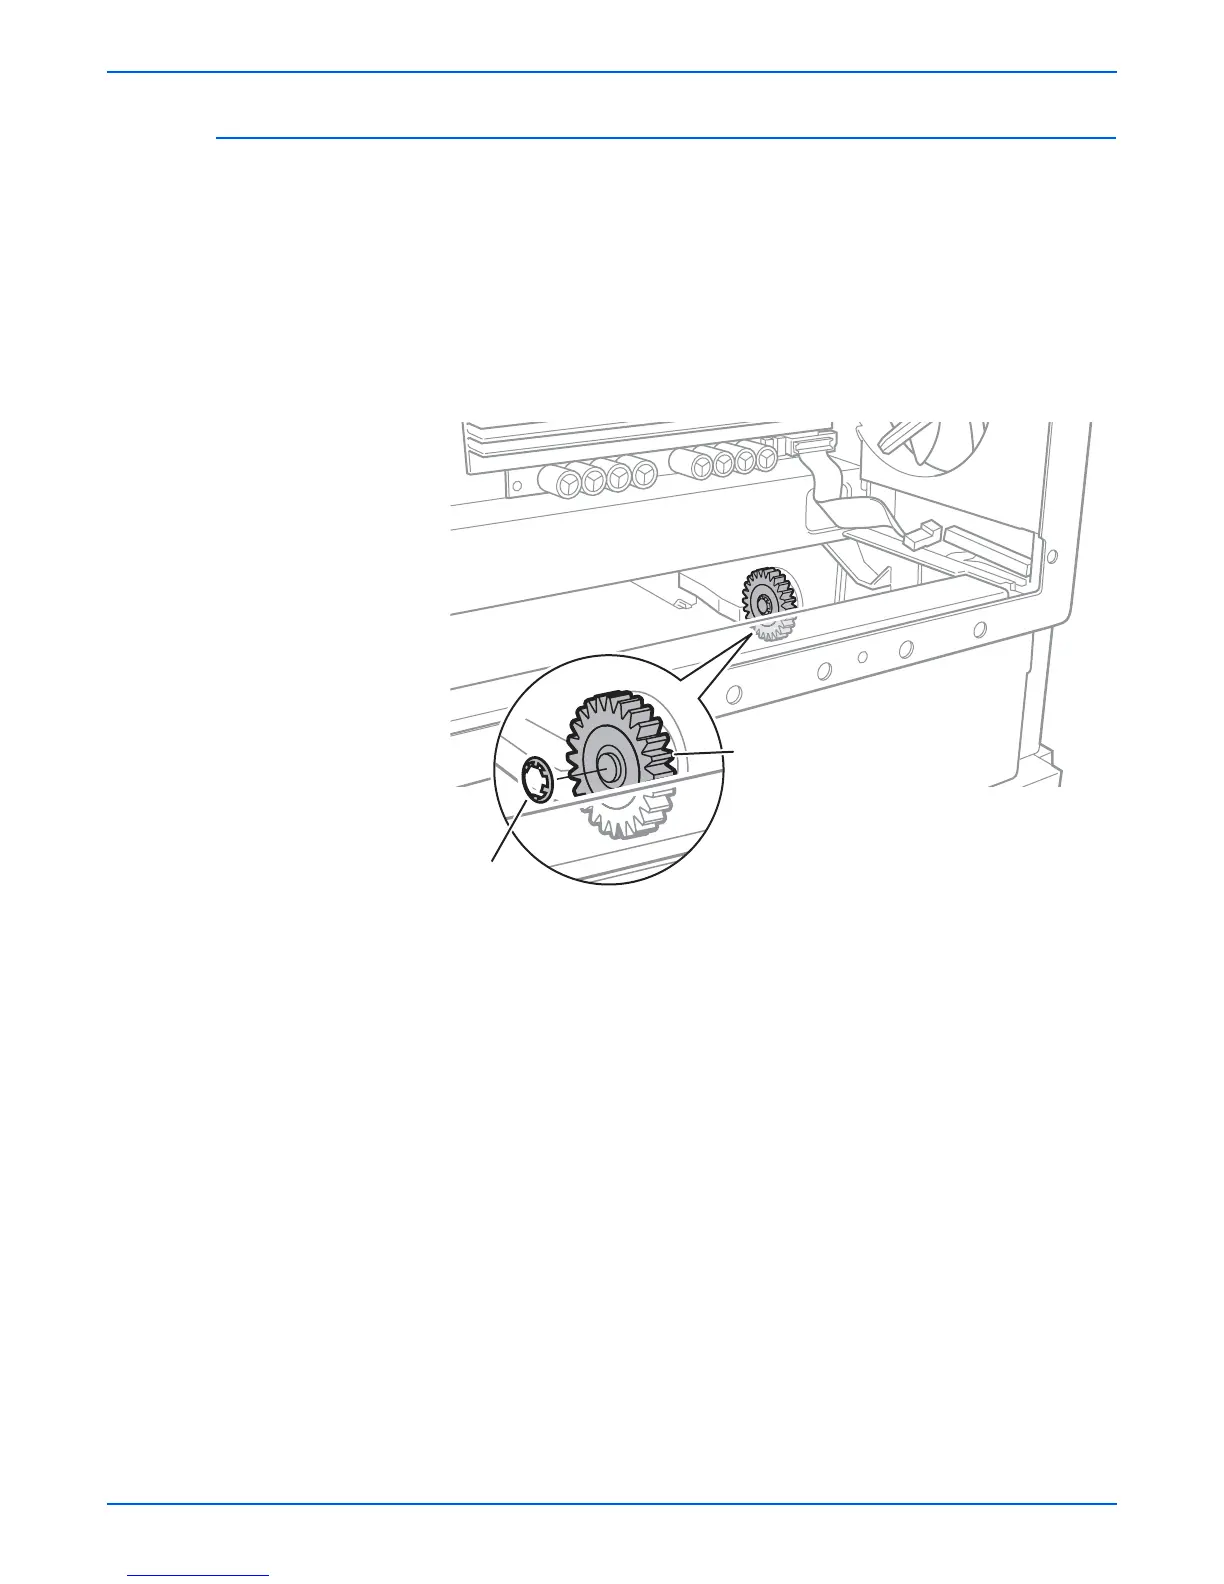
4. From the rear of the printer, inside the cavity, remove the push nut (this is
a press fit).
5. Remove the gear from the shaft.
6. Remove 2 screws holding the Tray Lift Motor to the printer frame.
7. Remove the Tray Lift Motor from the outside of the printer.
ep
acemen
o
e
Check that the two tabs of the bushing are seated in the chassis.
Install and torque the 2 Tray Lift Motor screws to 12 in. lbs. Position
the push nut so the fingers on the inside of the nut are pointed up
toward the end of the motor shaft. Place a box wrench or socket
wrench of the same size as the outer ring of the push nut over the nut
and press firmly to seat the nut on the shaft.
s8500-104
Push Nut
Lift Motor Gear
 Loading...


