8-22 Phaser 8400/8500/8550/8560 Color Printer Service Manual
Service Parts Disassembly
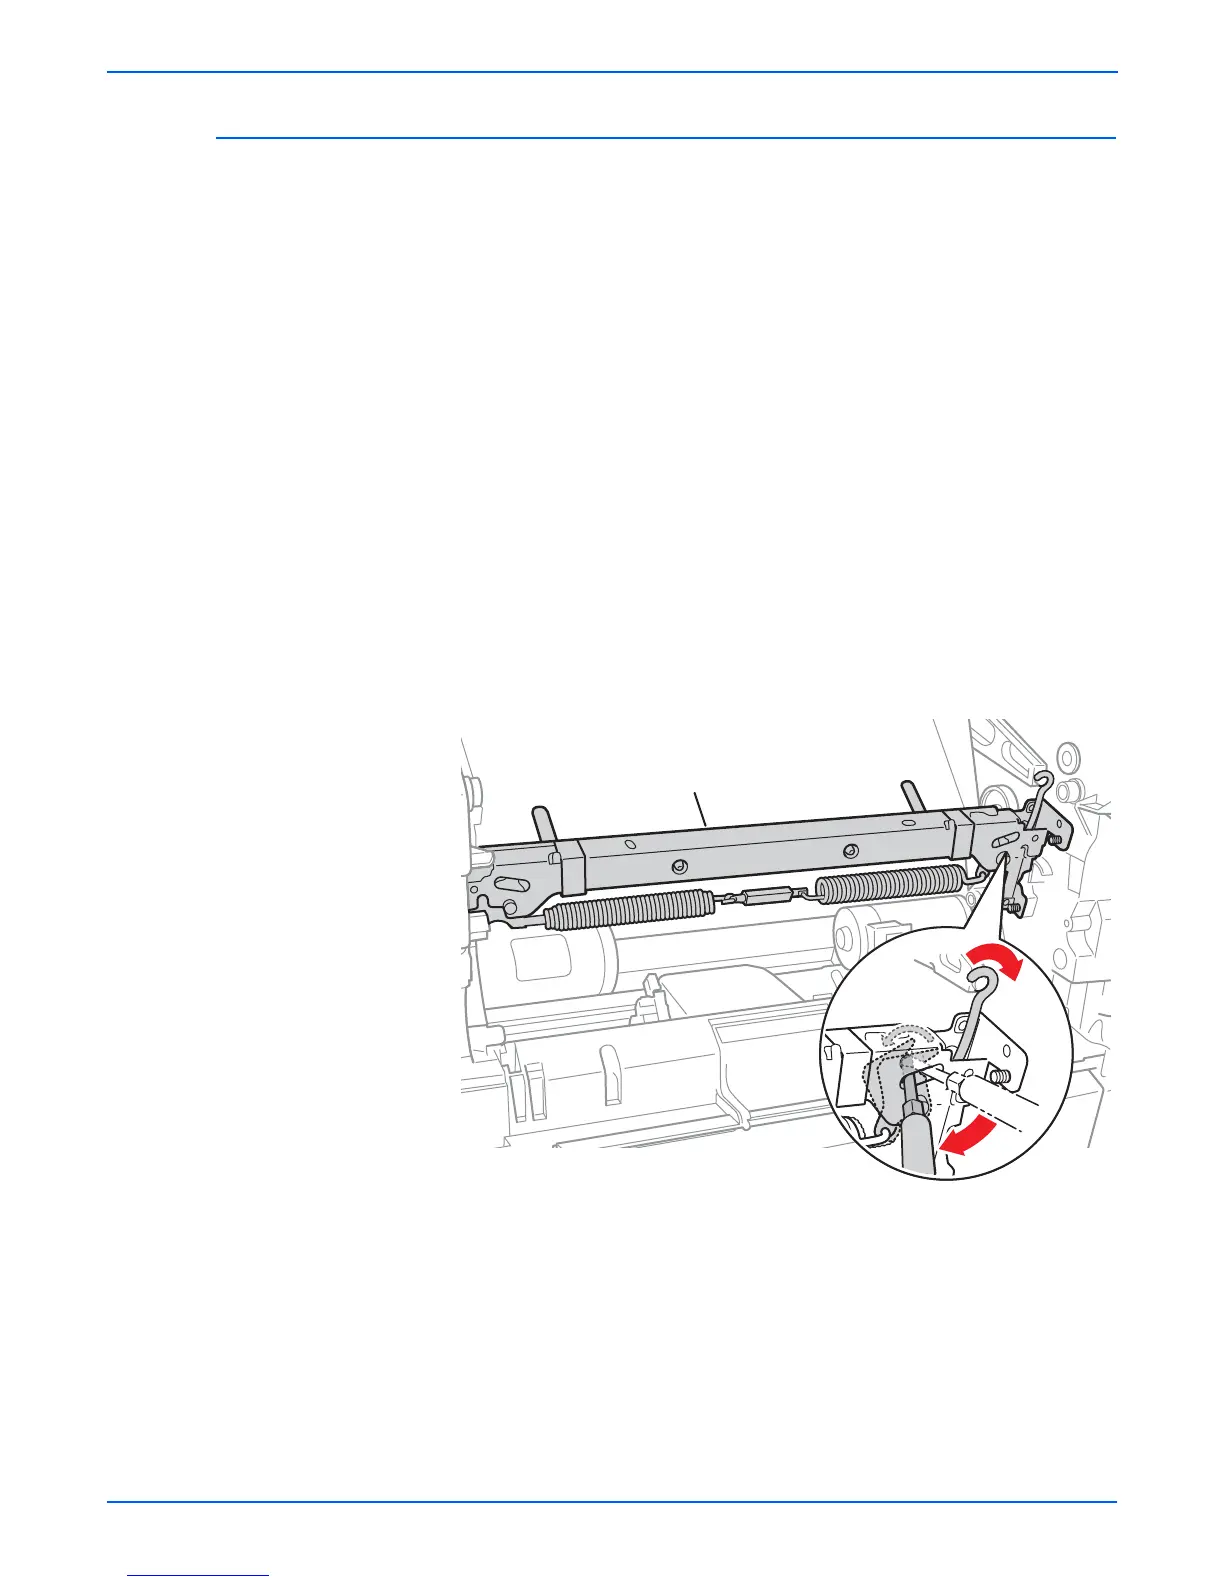
Transfix Load Module (PL2.0.15)
1. Remove the Front Door (page 8-4).
2. Remove the Ink Loader (page 8-7).
3. Remove the Preheater (page 8-20).
4. Remove the Media Drive (page 8-40).
5. Remove 4 screws, disconnect 2 connectors, and remove the Exit Module
(page 8-32).
6. Remove the Upper and Lower Duplex Guides (page 8-33).
7. Remove the Duplex Roller by removing the left KL-clip on the shaft and
sliding the left side bearing down the shaft toward the right. Then slide the
shaft toward the left to free the right end of the shaft. Finally, pull the shaft
out towards the right side.
8. Insert a T-20 Torxbit through the slotted hole in the Transfix Load Module,
engage the hole on the back of the module, and gently lever the module’s
spring cam toward the center of the printer to release/unhook the spring
hooks from the Transfix Load Arms. Slowly relax the lever to return the
spring cam to the relaxed position.
Caution
Ensure that you lever the spring cam towards the center. Applying the
pressure in the wrong direction can damage the Transfix Load Module.
Also, placing too much force in the leverage action could destroy the cam.
s8500-087
Transfix Load Module
 Loading...


