8-36 Phaser 8400/8500/8550/8560 Color Printer Service Manual
Service Parts Disassembly
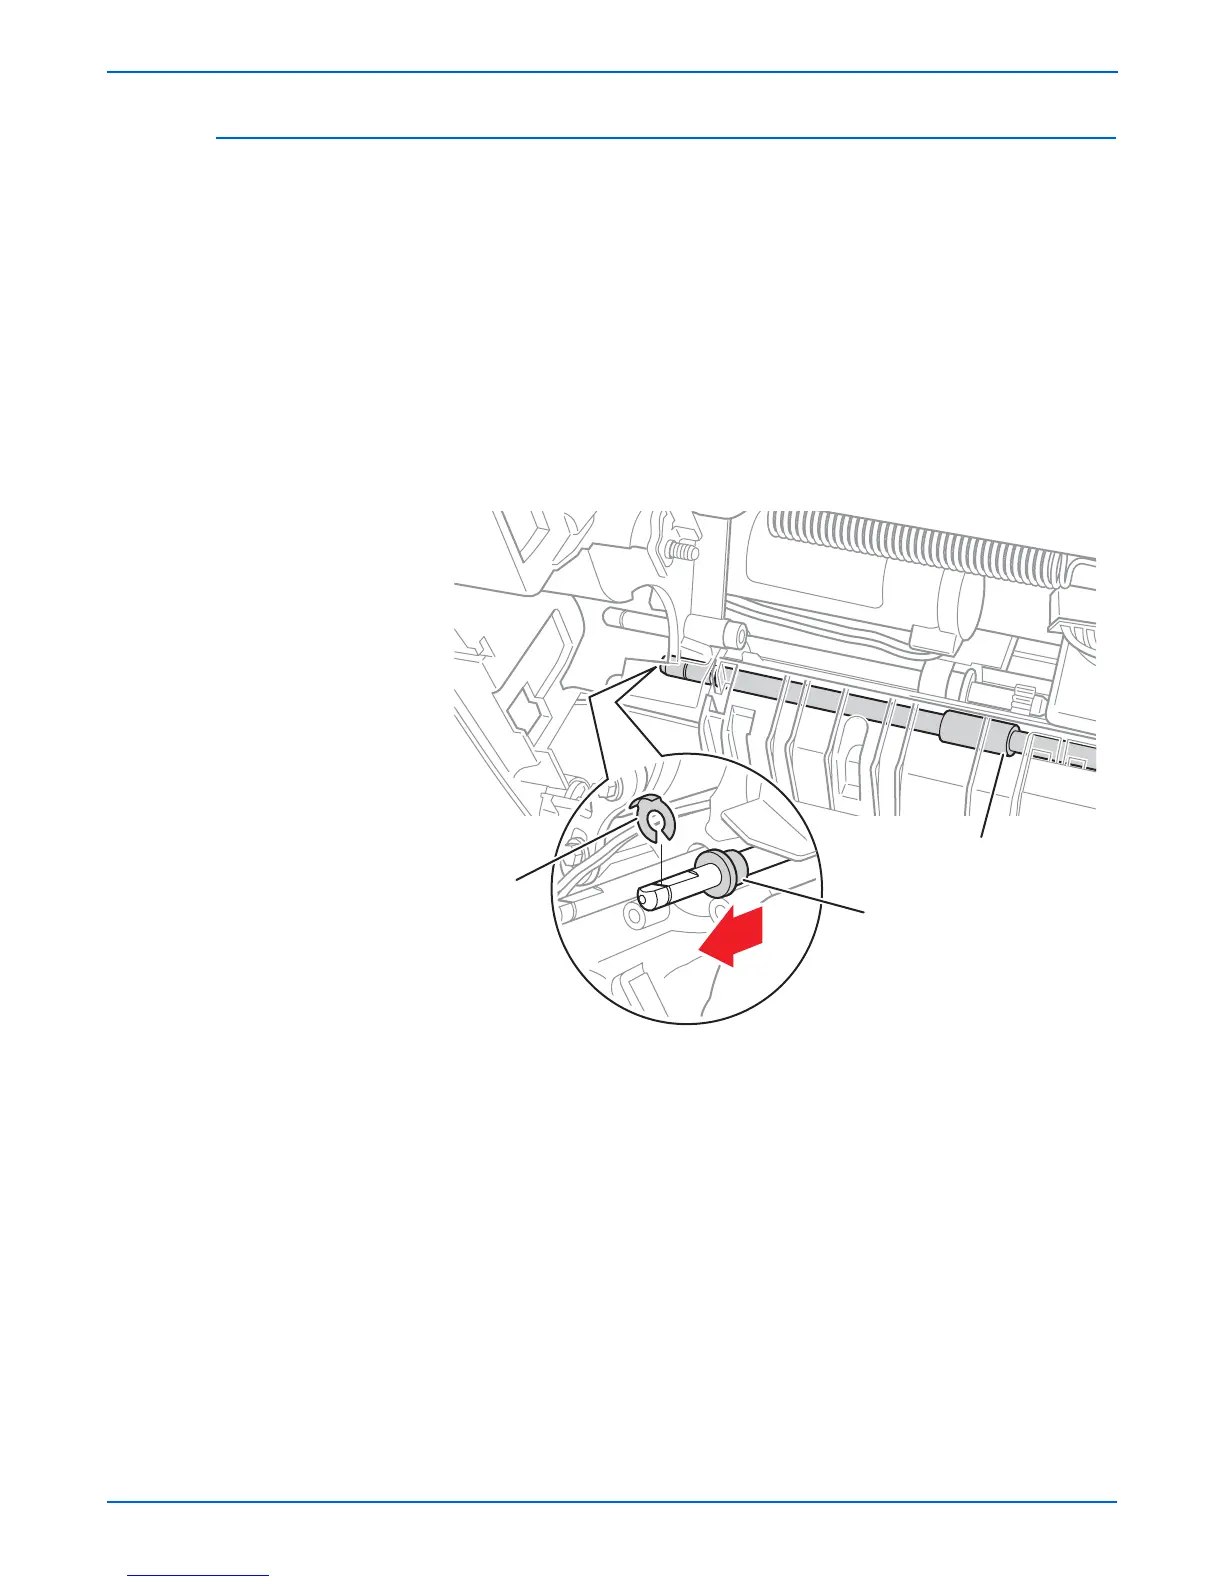
Take Away Roller (PL3.0.7)
1. Remove the Right Side Cover (page 8-5).
2. Remove the Left Side Cover (page 8-5).
3. Remove the Media Drive (page 8-40).
4. Remove the Lower Simplex Guide (page 8-33).
5. Remove the KL-clip from the right end of the shaft.
6. Remove the KL-clip and bushing from the left end of the shaft.
7. Move the Take Away Roller shaft to the left side to release it from the right
side frame, rotate the shaft forward, and remove it to the right.
o
e
Pressure from the idler rollers makes it difficult to move the Take Away
Roller shaft to the right during removal.
ep
acemen
o
e
First remove the tray. Next, rotate the Pick Roller Shaft until the clutch
seats. Working upwards, rotate the Take Away Roller and Duplex
Roller until all shafts seat properly. Check that the Media Drive is
correctly positioned on the side frame. Install and torque the 6 screws
to 12 in. lbs. Finally, check that all rollers rotate freely.
s8500-100
Take Away Roller
Bushing
KL-Clip
 Loading...


