8-32 Phaser 8400/8500/8550/8560 Color Printer Service Manual
Service Parts Disassembly
Paper Path
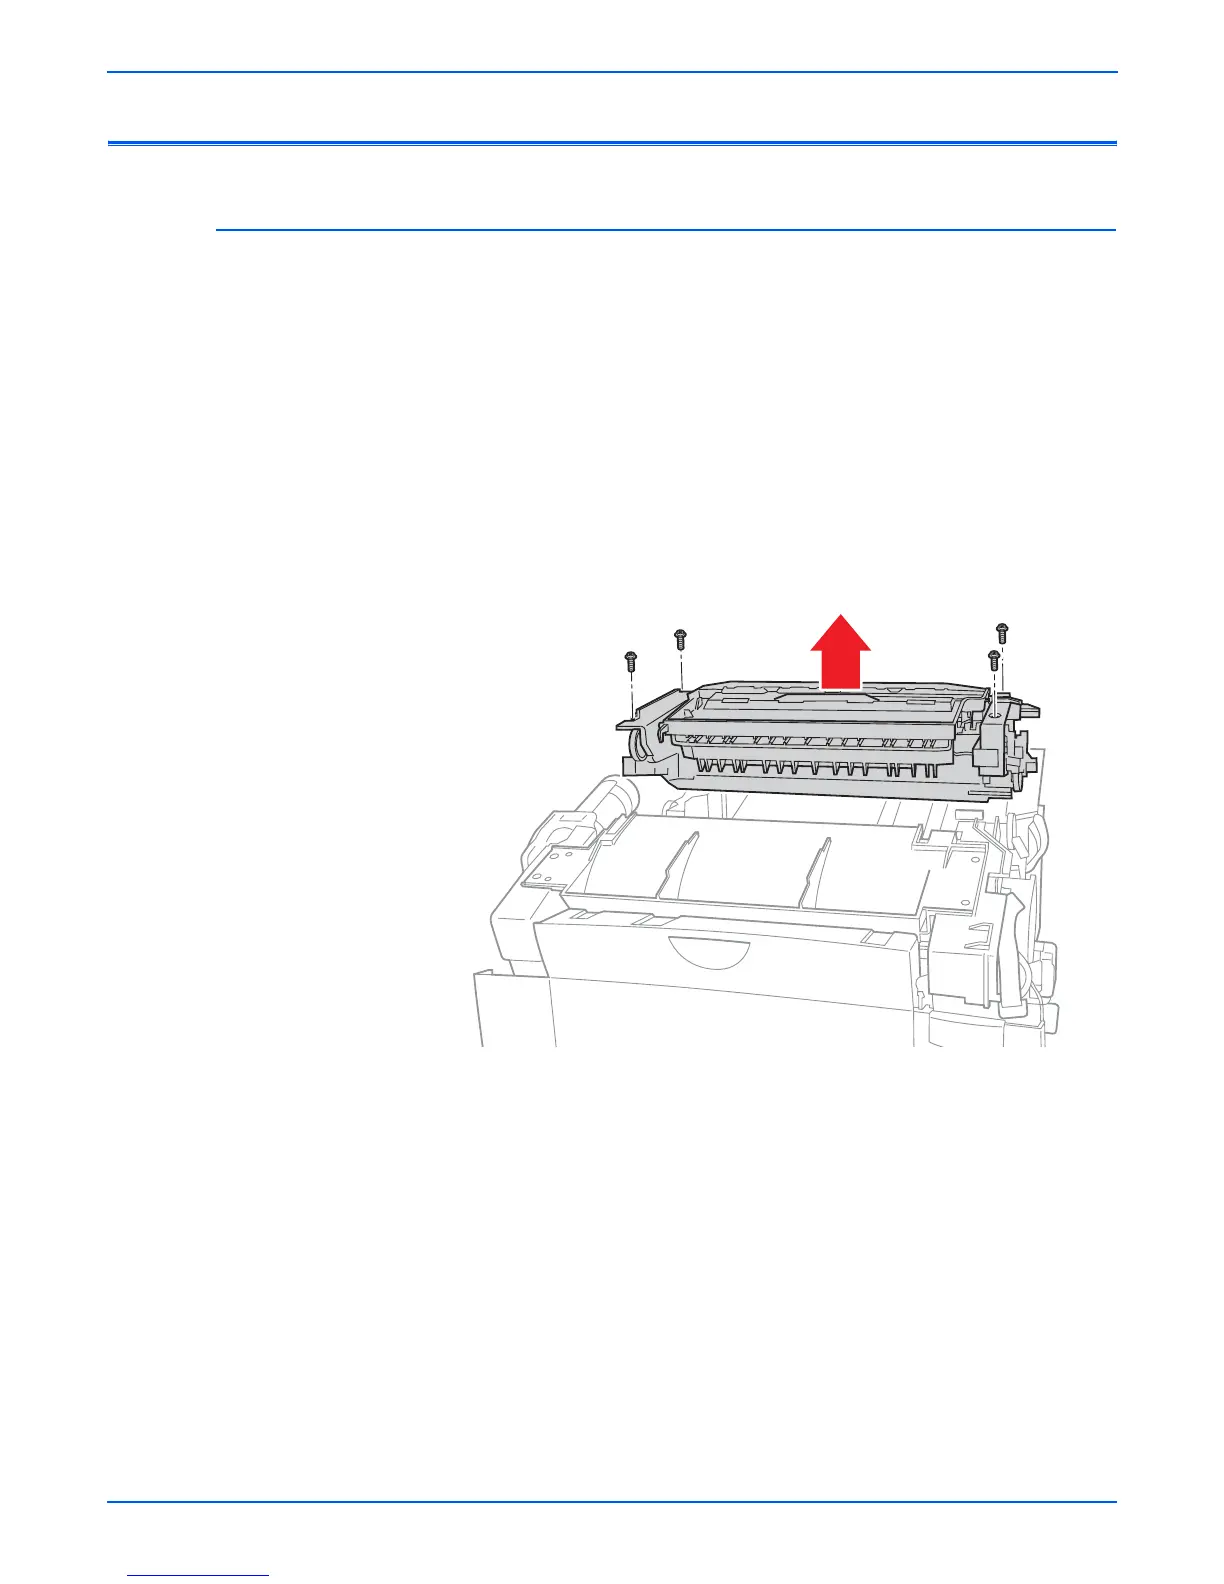
Exit Module (PL3.0.13)
Caution
The Drum Temperature Sensor harness is routed through the Exit
Module. Use care during removal to avoid damaging the sensor.
1. Remove the Exit Cover (page 8-6).
2. Remove 3 screws securing the Media Drive, and let the motor hang.
3. Disconnect 3 connectors: two on the right (I/O Board J680 and J870) and
one on the left.
4. Remove the 4 screws holding the Exit Module to the printer chassis and
remove the Exit Module.
o
e
You may need to remove the Media Drive to access the screw.
ep
acemen
o
e
Seat the Exit Module on the chassis. Torque the 4 screws to
15 in. lbs. After installing the Exit Module, perform the Wiper
Alignment (page 6-2). The printer may report error 7,009.4x if the
Wiper Assembly is misaligned.
s8500-132
 Loading...


