8-40 Phaser 8400/8500/8550/8560 Color Printer Service Manual
Service Parts Disassembly
Motors, Gears, Solenoids, Clutches, and Fans
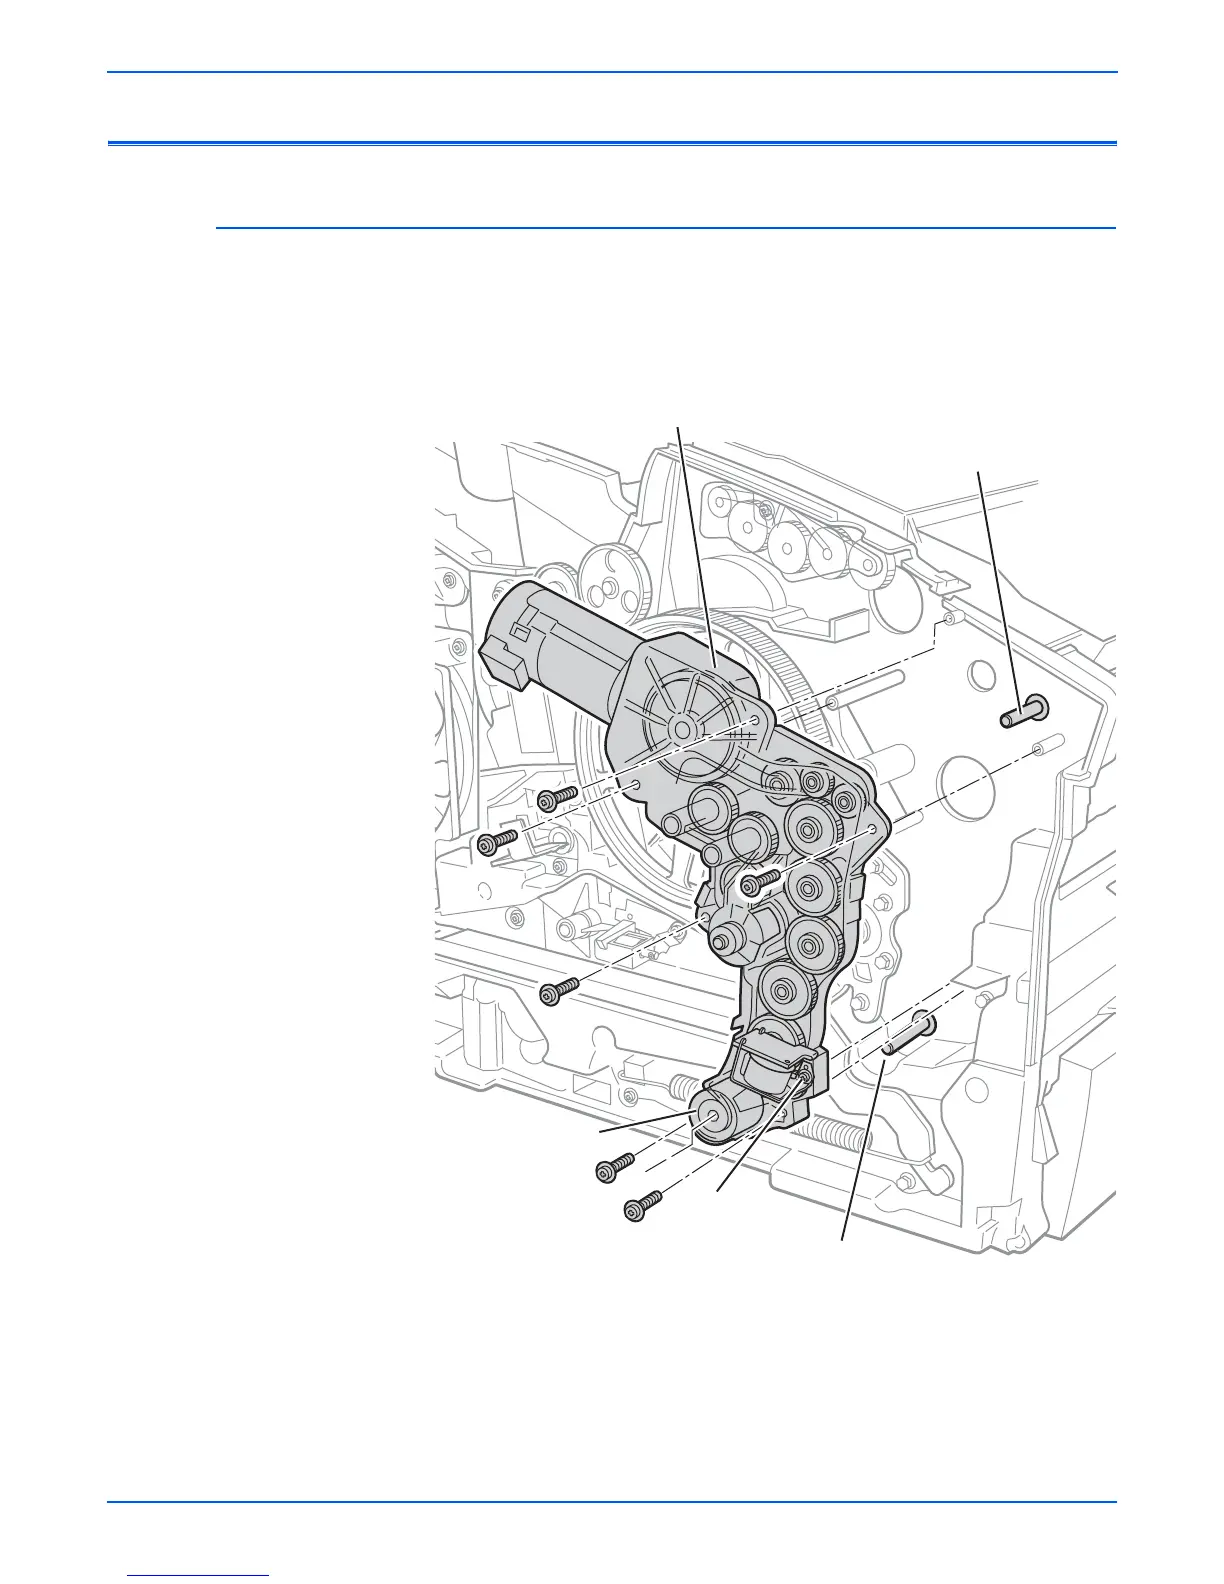
Media Drive with Two Clutches and Solenoid (PL4.0.5)
1. Remove the Left Side Cover (page 8-6).
2. Remove the Exit Cover (page 8-6).
3. Disconnect the fan, Media Drive motor, deskew clutch, pick clutch, and
Tray 1 Pick Solenoid harnesses.
4. Remove the 6 screws securing the Media Drive..
ep
acemen
o
e
Remove the tray, then rotate the Pick Roller Shaft until the clutch
seats. Working upwards, rotate the Take Away Roller and Duplex
Roller until all shafts seat properly. Check that the Media Drive is
correctly positioned on the side frame. Install and torque the 6 screws
to 12 in. lbs. Finally, check that all rollers rotate freely.
s8500-105
Duplex Roller Shaft
Pick Roller Shaft
Loosen Only
(Do Not Remove)
Media Drive Gearbox
Pick Clutch

 Loading...


