06/2014
4-27
WC 5022/5024
Repairs and Asdjustments
Version 1.0
REP 8.1.1 Drum Cartridge
Parts List on PL 8.1
Removal
WARNING
When turning OFF the power switch, check that the 'Data' lamp is OFF and that there is
no Job in progress.
Turn OFF the power switch and make sure that the screen display turns OFF.
Check that the power switch is OFF and unplug the power plug.
CAUTION
To prevent light fatigue, either wrap the removed Drum Cartridge by using a sheet of black
paper or store it in a black bag.
1. Prepare a sheet of black paper or a black bag.
2. Open the L/H Cover.
3. Open the Front Toner Cover.
4. Remove the Connector Cover. (Figure 1)
a. Remove the screw (long).
b. Remove the Connector Cover.
Figure 1 j0lj40801
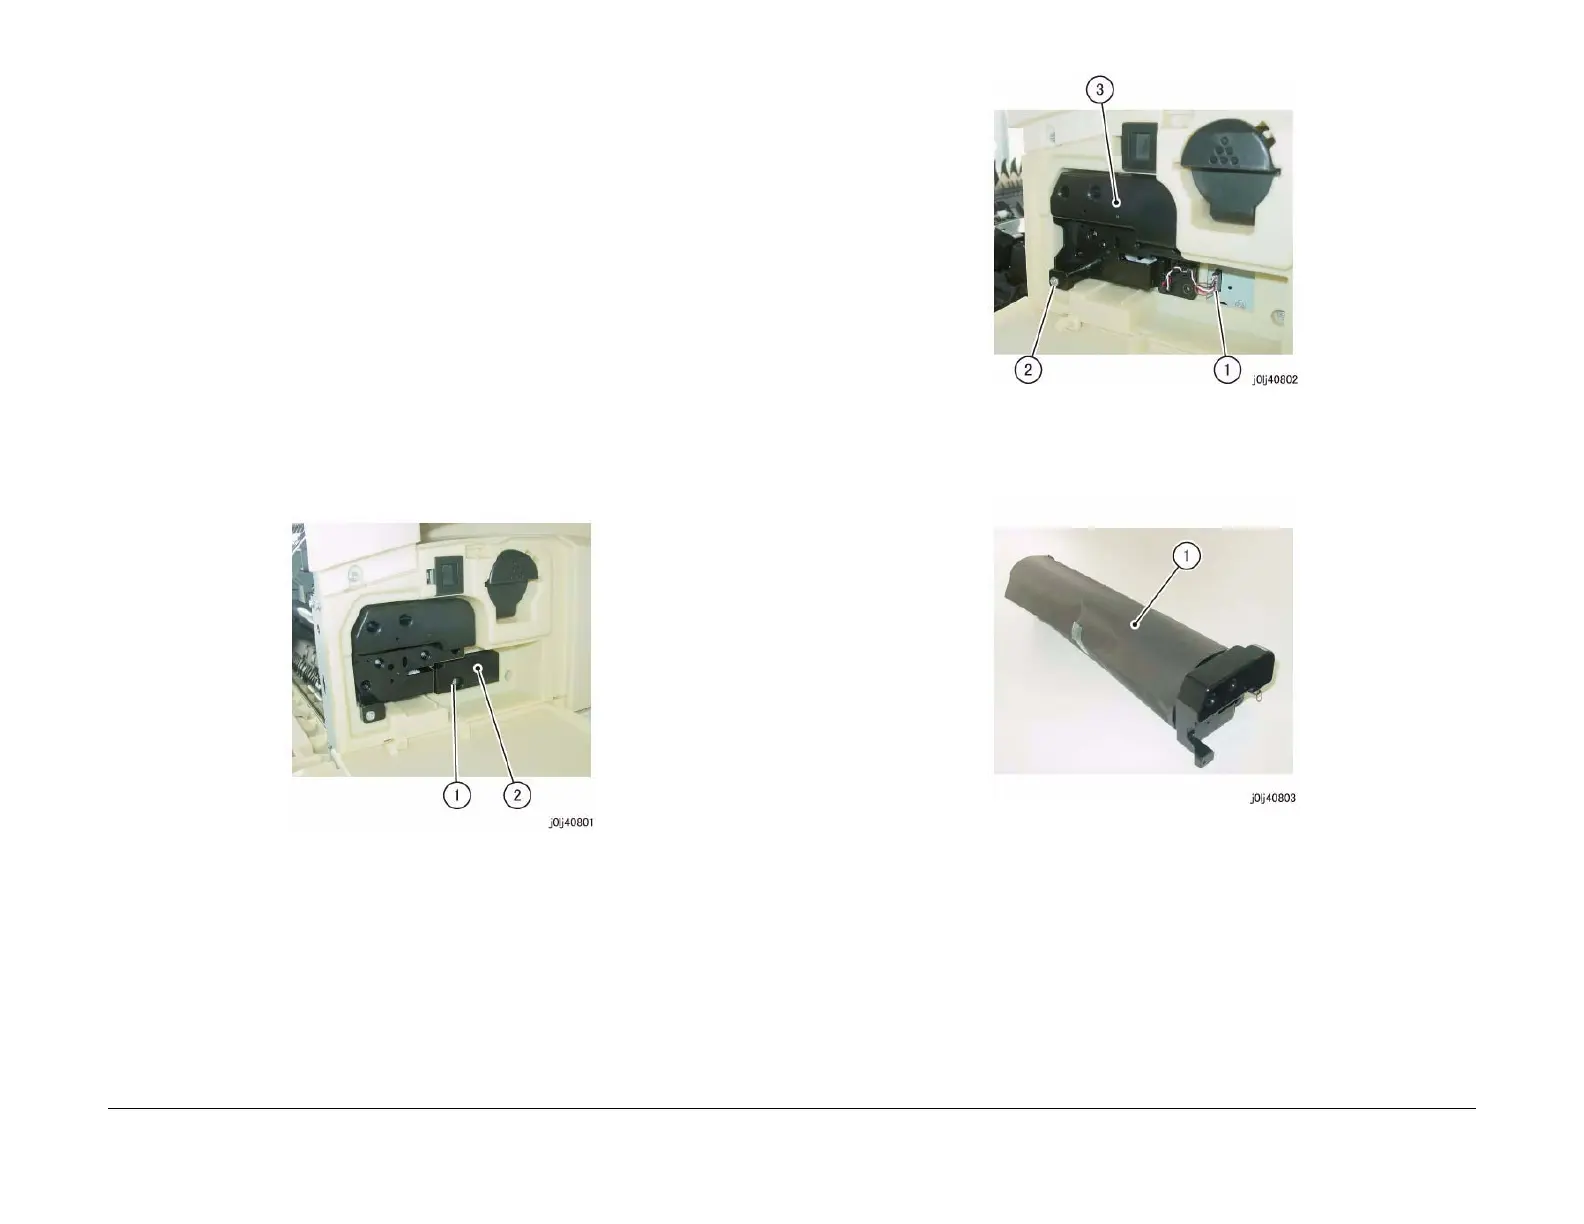
5. Remove the Drum Cartridge. (Figure 2)
a. Disconnect the connector.
b. Remove the screw (long).
c. Hold onto the handle and pull out the Drum Cartridge.
Figure 2 j0lj40802
6. Wrap the removed Drum Cartridge by using a sheet of black paper or store it in a black
bag. (Figure 3)
Figure 3 j0lj40803
Replacement
1. To install, carry out the removal steps in reverse order.
2. When installing the Drum Cartridge, align the Lower Plate of the Drum Cartridge to the
Guide of the Frame.
(Figure 4)
 Loading...


