06/2014
4-44
WC 5022/5024
Version 1.0
Repairs and Asdjustments
REP 11.3.1 Tray 3 Feed/Retard/Nudger Roll
Parts List on PL 11.3
Removal
WARNING
When turning OFF the power switch, check that the 'Data' lamp turns OFF. Press the
<Job Status> button to check that there are no jobs in progress/waiting in the queue.
Turn OFF the power switch and make sure that the screen display turns OFF.
Check that the power switch is OFF and unplug the power plug.
NOTE: The Feed/Retard/Nudger Rolls must be replaced at the same time.
1. Remove Tray 3 and Tray 4.
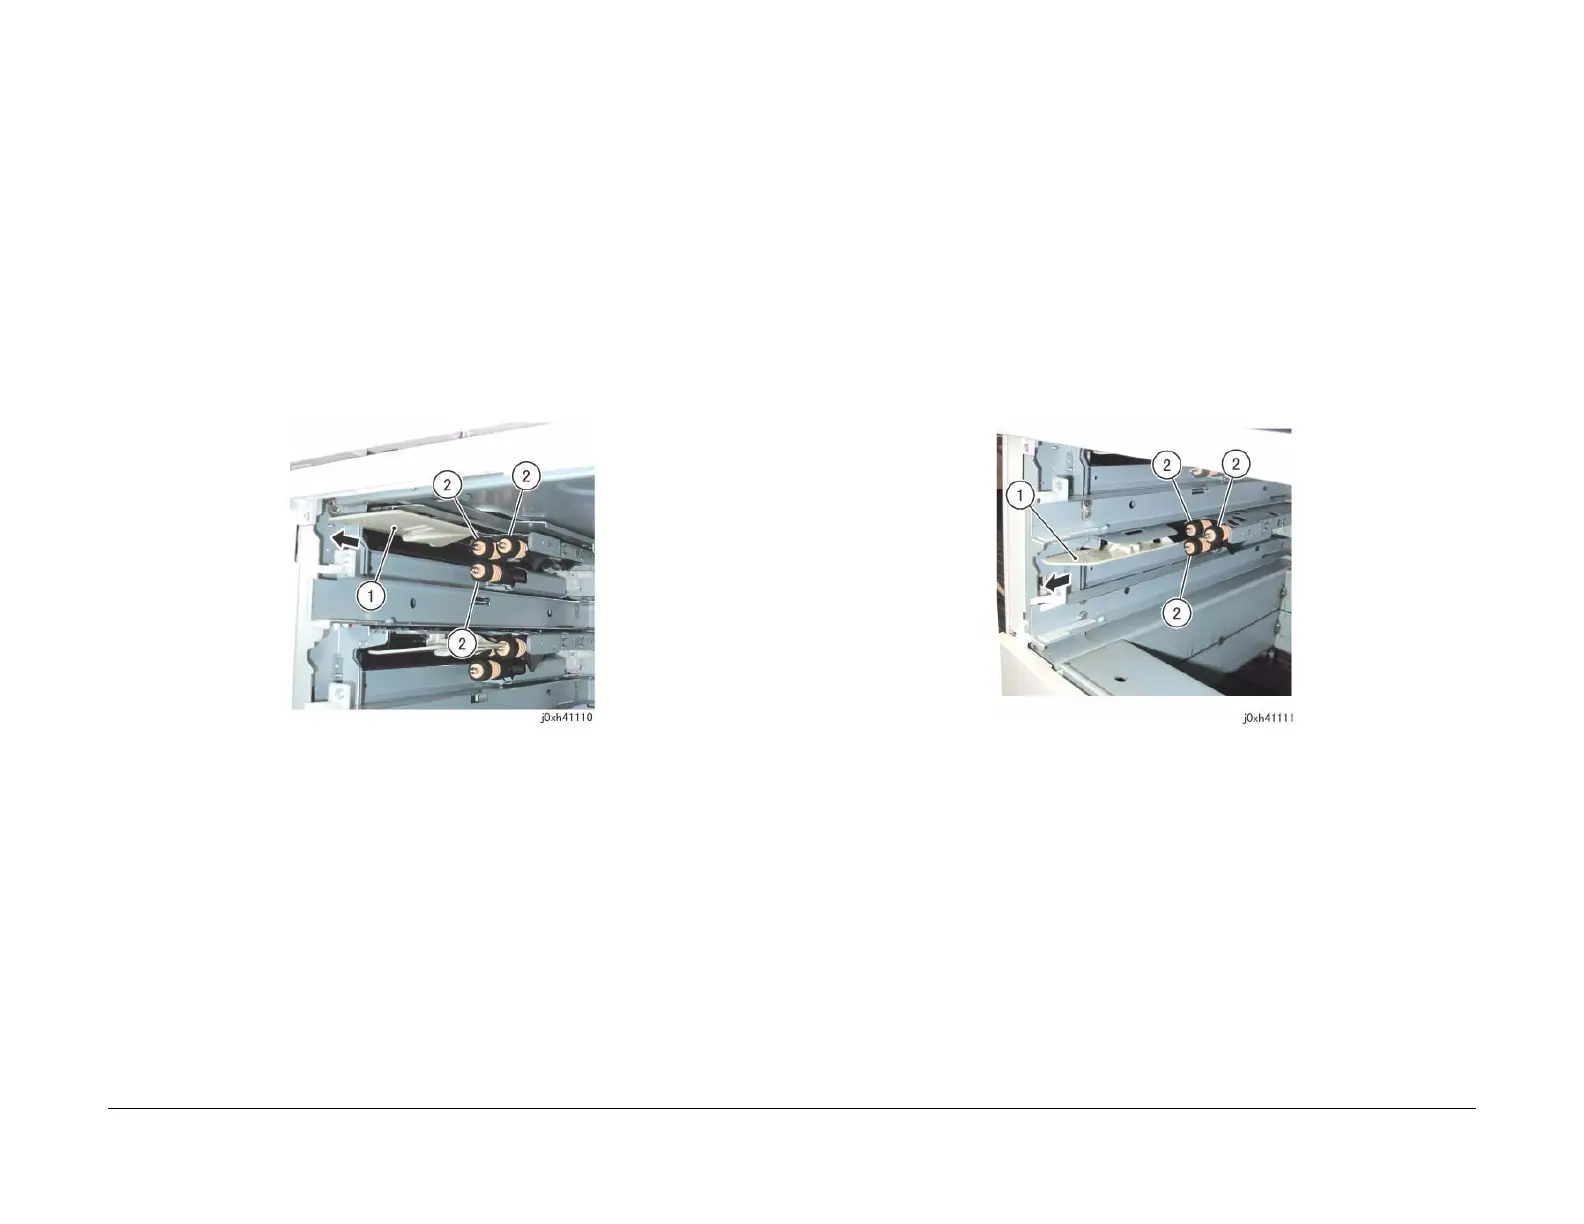
2. Remove the Tray 3 Feed/Retard/Nudger Roll. (Figure 1)
a. Slide the Front Chute towards you.
b. Remove the Tray 3 Feed/Retard/Nudger Roll.
Figure 1 j0xh41110
Replacement
1. To install, carry out the removal steps in reverse order.
2. After a replacement, enter the CE Mode and use [Initialize HFSI Counter] to clear the
HFSI counter.
• 'Chain Link: 950-808'
Refer to [6.5.2.7 HFSI Counter Clear / Initialize].
REP 11.3.2 Tray 4 Feed/Retard/Nudger Roll
Parts List on PL 11.3
Removal
WARNING
When turning OFF the power switch, check that the 'Data' lamp turns OFF. Press the
<Job Status> button to check that there are no jobs in progress/waiting in the queue.
Turn OFF the power switch and make sure that the screen display turns OFF.
Check that the power switch is OFF and unplug the power plug.
NOTE: The Feed/Retard/Nudger Rolls must be replaced at the same time.
1. Remove Tray 3 and Tray 4.
2. Remove the Tray 4 Feed/Retard/Nudger Roll. (Figure 1)
a. Slide the Front Chute towards you.
b. Remove the Tray 4 Feed/Retard/Nudger Roll.
Figure 1 j0xh41111
Replacement
1. To install, carry out the removal steps in reverse order.
2. After a replacement, enter the CE Mode and use [Initialize HFSI Counter] to clear the
HFSI counter.
• 'Chain Link: 950-809'
Refer to [6.5.2.7 HFSI Counter Clear / Initialize].
 Loading...


