A
B
A – Back B – Front
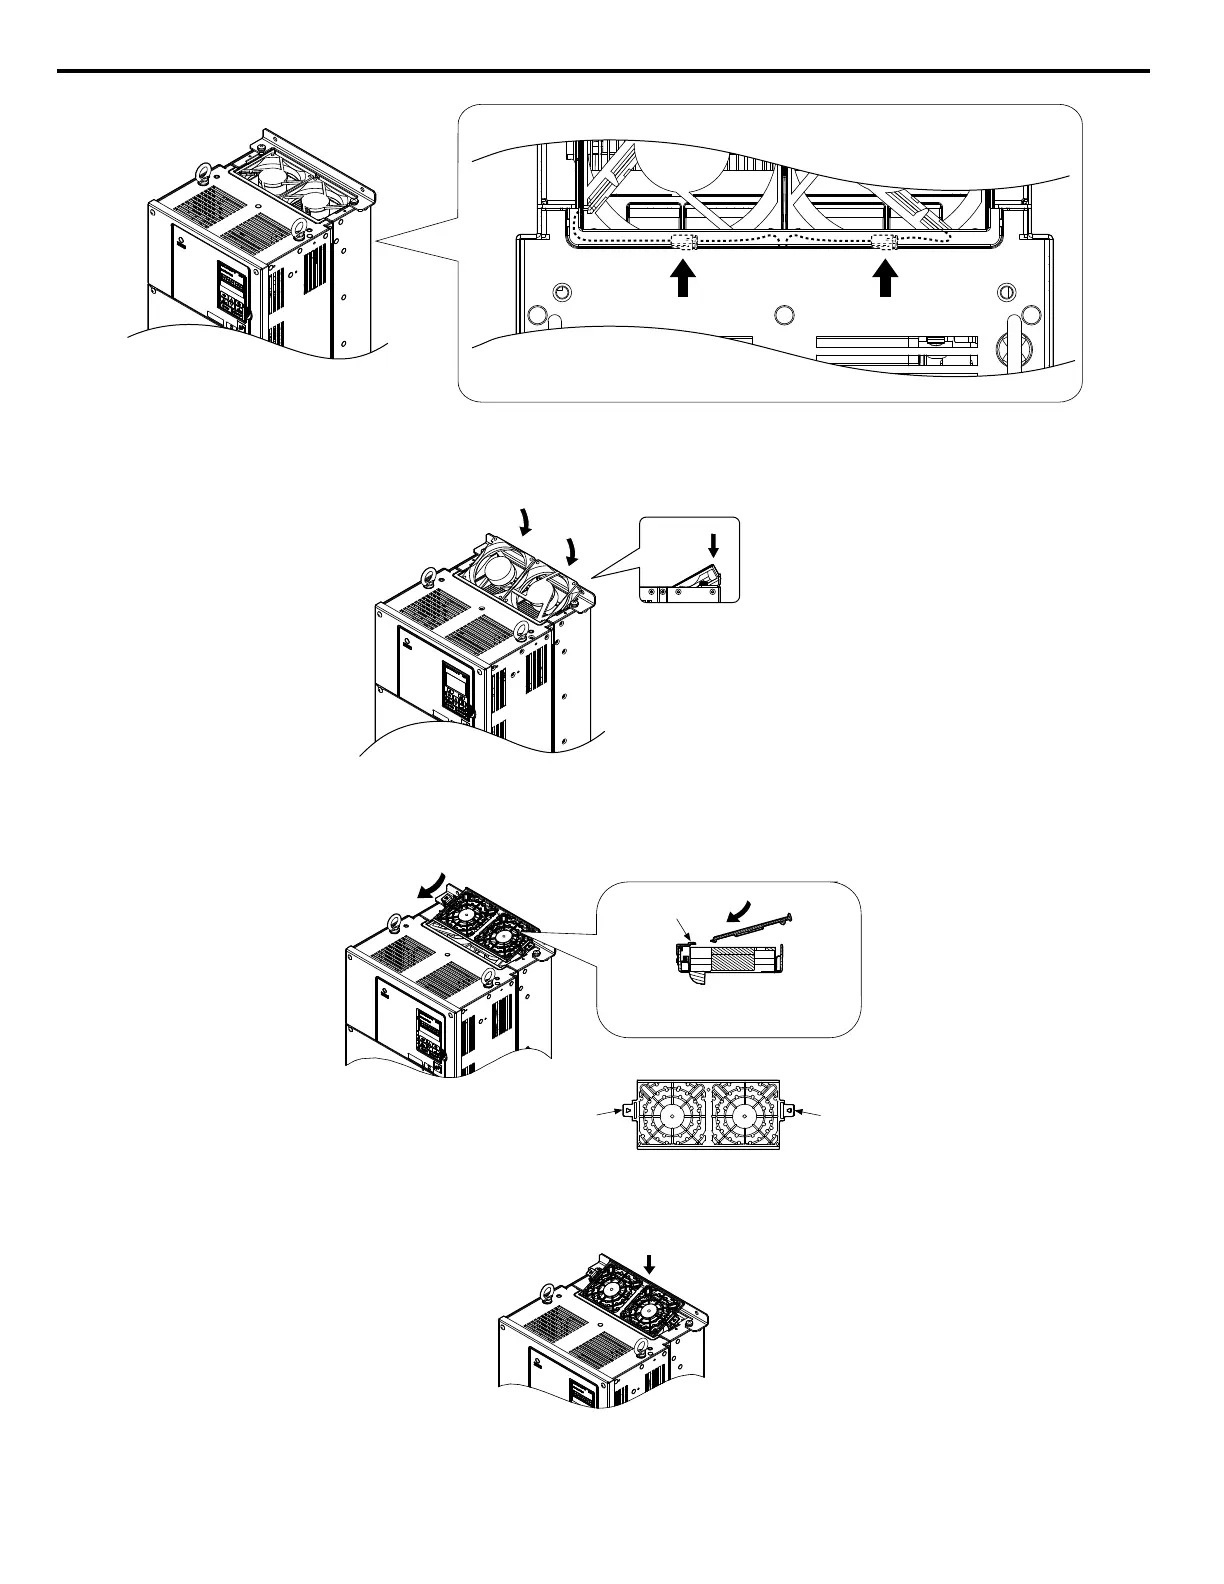
Figure 7.10 Cooling Fan Power Supply Connectors: 2A0110, 2A0138, 4A0058, 4A0072, 5A0041, and 5A0052
3.
Install the replacement fan into the drive.
Insert the fan at an angle so that
it tilts towards the front of the
drive. Next press down on the
back of the fan that still protrudes
from the drive so that the fan
snaps into place.
Figure 7.11 Install the Cooling Fan: 2A0110, 2A0138, 4A0058, 4A0072, 5A0041, and 5A0052
4.
Tilt up the back end of the fan finger guard and slide the fan finger guard into the opening near the front of the drive,
then guide the fan finger guard into place.
Insertion area
Front of drive Back of drive
Front of drive
Fan finger guard Back of drive
Hook Hook
Cross-Section
Figure 7.12 Reattach the Fan Cover: 2A0110, 2A0138, 4A0058, 4A0072, 5A0041, and 5A0052
5.
Press in on the hooks of the left and right sides of the fan cover and guide the fan finger guard until it clicks into place.
Figure 7.13 Reattach the Fan Finger Guard: 2A0110, 2A0138, 4A0058, 4A0072, 5A0041, and 5A0052
6.
Turn on the power supply and set o4-03 to 0 to reset the Maintenance Monitor cooling fan operation time.
7.4 Drive Cooling Fans
352
YASKAWA SIEP YAIP1U 01C AC Drive - P1000 Technical Manual
 Loading...
