Stratus OCT User Manual PN 2660021134133 A
Acquire Scans
3-7
scanned, and you see nothing but noise in the live scan image. The 2 mm axial “window”
must be positioned to bracket the retina, making it visible in the scan image.
• Once you bring the retina into range for the
first scan, it is likely to be visible
subsequently. Still, you are likely to adjust Z offset from scan to scan to center the
retinal scan image.
• During patient module positioning, the Stratus OCT beeps when it begins to scan the
r
etina. If the retinal image is already visible on the monitor, you can skip step 1 below.
To bring the scan image into view along the Z-axis, follow these steps:
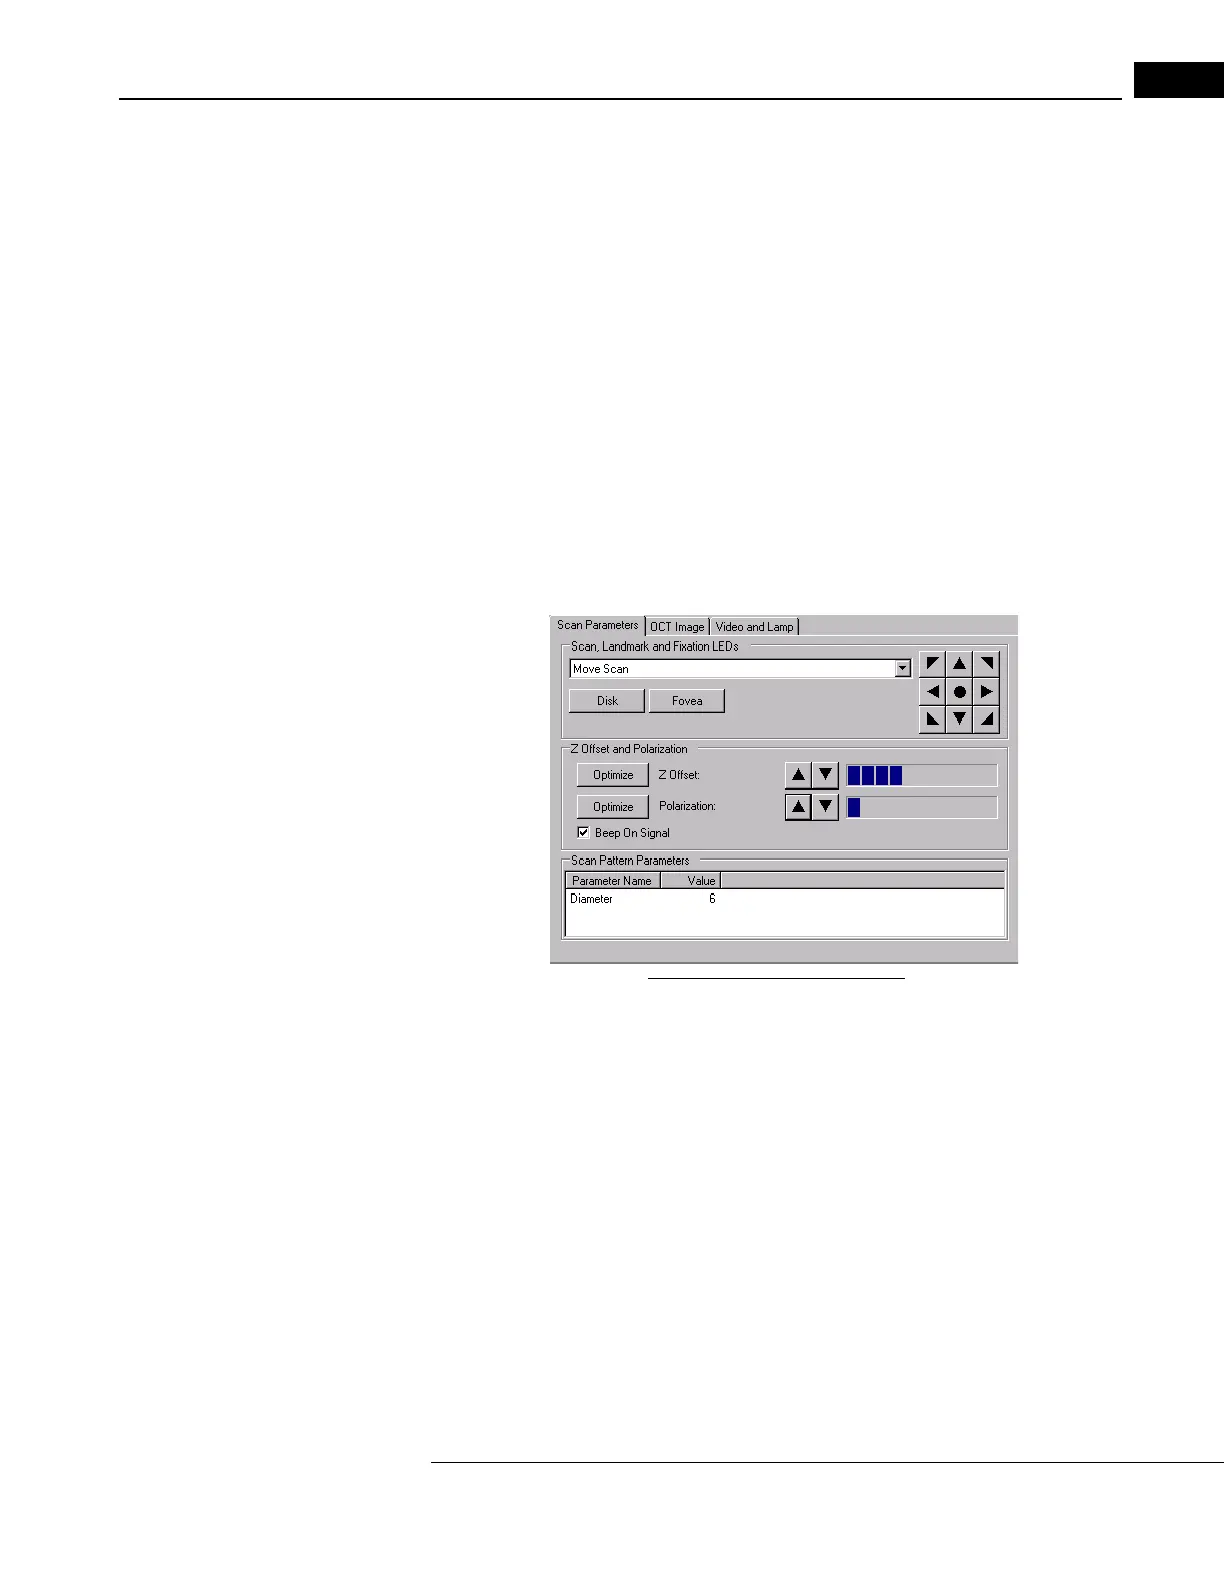
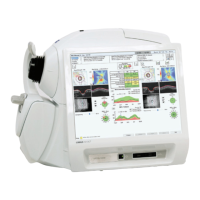
1. Click the O
ptimize Z-offset button on the Scan Parameter Tab (pictured below).
2. Click the Z
-offset arrow buttons (to the right of the Optimize button) to bring the
entire retinal scan image into view.
• Sh
ift-click (hold down the Shift key and click) the arrows to move in larger increments.
• The up arrow searches posteriorly (lower in
the scan image), and the down arrow
searches anteriorly (higher in the scan image).
Figure 3-4 Scan Parameter Tab
• These methods are operative in both Alignment and Acquisition Scan Modes
(see page 3-4), but they are usually done in scan alignment mode right after
positioning the patient module.
• It is not necessary for the retinal scan image to be
centered. The important issue is
that none of the image be cut off.
Optimize Polarization
Polarization is adjustable so you can optimize
the interferometer signal strength by
matching the polarization of light reflected from the retina. This optimizes the scan image,
which results in more yellow and red color in the image. It is necessary to adjust Z offset
before polarization so the retina is visible in the color scan image while you adjust
polarization.