Export and Import Scan Data
Stratus OCT User Manual PN 2660021134133 A
9-10
physician. Instead, anonymous patient records include a unique Patient Export ID
and the originating clinic’s Site ID. You will then have the further option of obscuring
the date of birth: either fully, partially or not at all.
8. When finished making your selections, click OK to
begin exporting data. To abort
export, click Cancel. Note that if you are exporting a large set of data, it can take
minutes to stop the export process after clicking Cancel.
Note: Stratus OCT enables you to export cleared archive data. If the cleared data is
on a network archive, the data will be exported from the archive automatically. If
the file server is not connected, you will be prompted to connect with it. If the
cleared data is on a DVD archive, you will be prompted to insert the archive disk by
its label. If more than one archive DVD is required, you must attend the instrument
during export and insert the indicated archive disk(s) when prompted.
9. When you click OK in the Export Options dialog box, export b
egins. The Progress
dialog box shows export progress. It can take several seconds to several minutes for
the Stratus OCT to finish writing to the disk, depending on the number of exams you
selected for export.
• At any time, you can click the Cancel but
ton to abort export and no data will be
exported.
10.When the export process is complete, a Notice dialog will prompt you to write the
la
bel on the export DVD disk. Label the disk as instructed and click OK.
Import Data
To import data, follow these steps:
1. If you are importing data from removable media, insert the media containing export
da
ta created with Stratus OCT software version 2.0 or later, or with Stratus Review
Software, into its drive. If you are importing from any other path on the network or
hard drive, skip to step 2.
2. From the M
AIN WINDOW, select Import from the Data menu (click Data > Import). The
I
MPORT WINDOW opens. Proceed to step 3. below unless the Import Options dialog
appears automatically.
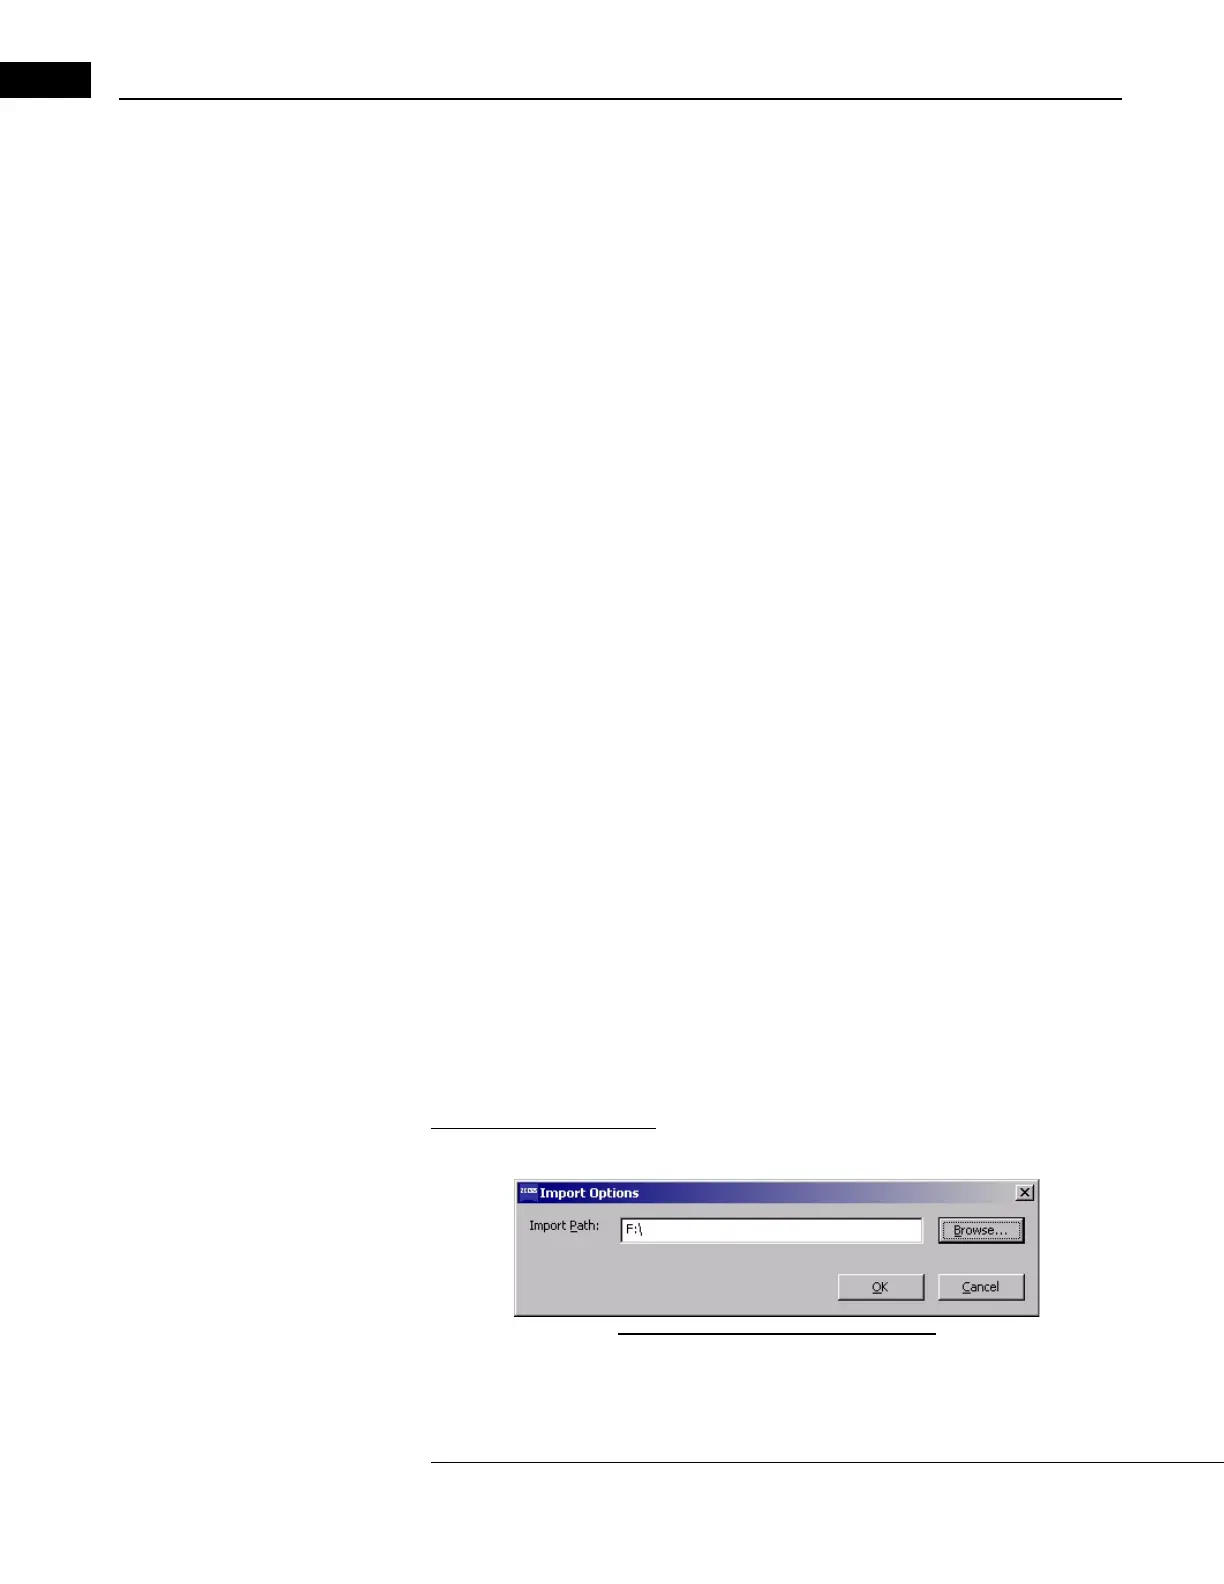
Specify the Import Path
The first time you initiate import, an Import Options dialog box appears as below.
Figure 9-7 The Import Options Dialog
•In the Import Path field, the last selected import source path appears. You can
import data from removable media, from the local hard drive (if an export