6253 DC Voltage Current Source/Monitor Operation Manual
1.4.3 Changing Power Voltage, and Checking or Replacing Power Fuse
1-8
1.4.3 Changing Power Voltage, and Checking or Replacing Power Fuse
The power voltage of the 6253 can be changed manually.
This section describes the procedure for changing the power voltage, and checking or replacing the power
fuse.
CAUTION:
1. If the power is melted, it indicates any problem with the 6253. Contact an ADC
CORPORATION sales representative.
2. Always use the same fuse type and rating to prevent fire.
Changing the power voltage
1. Turn OFF the POWER switch on the front panel.
2. Remove the power cable from the AC power outlet.
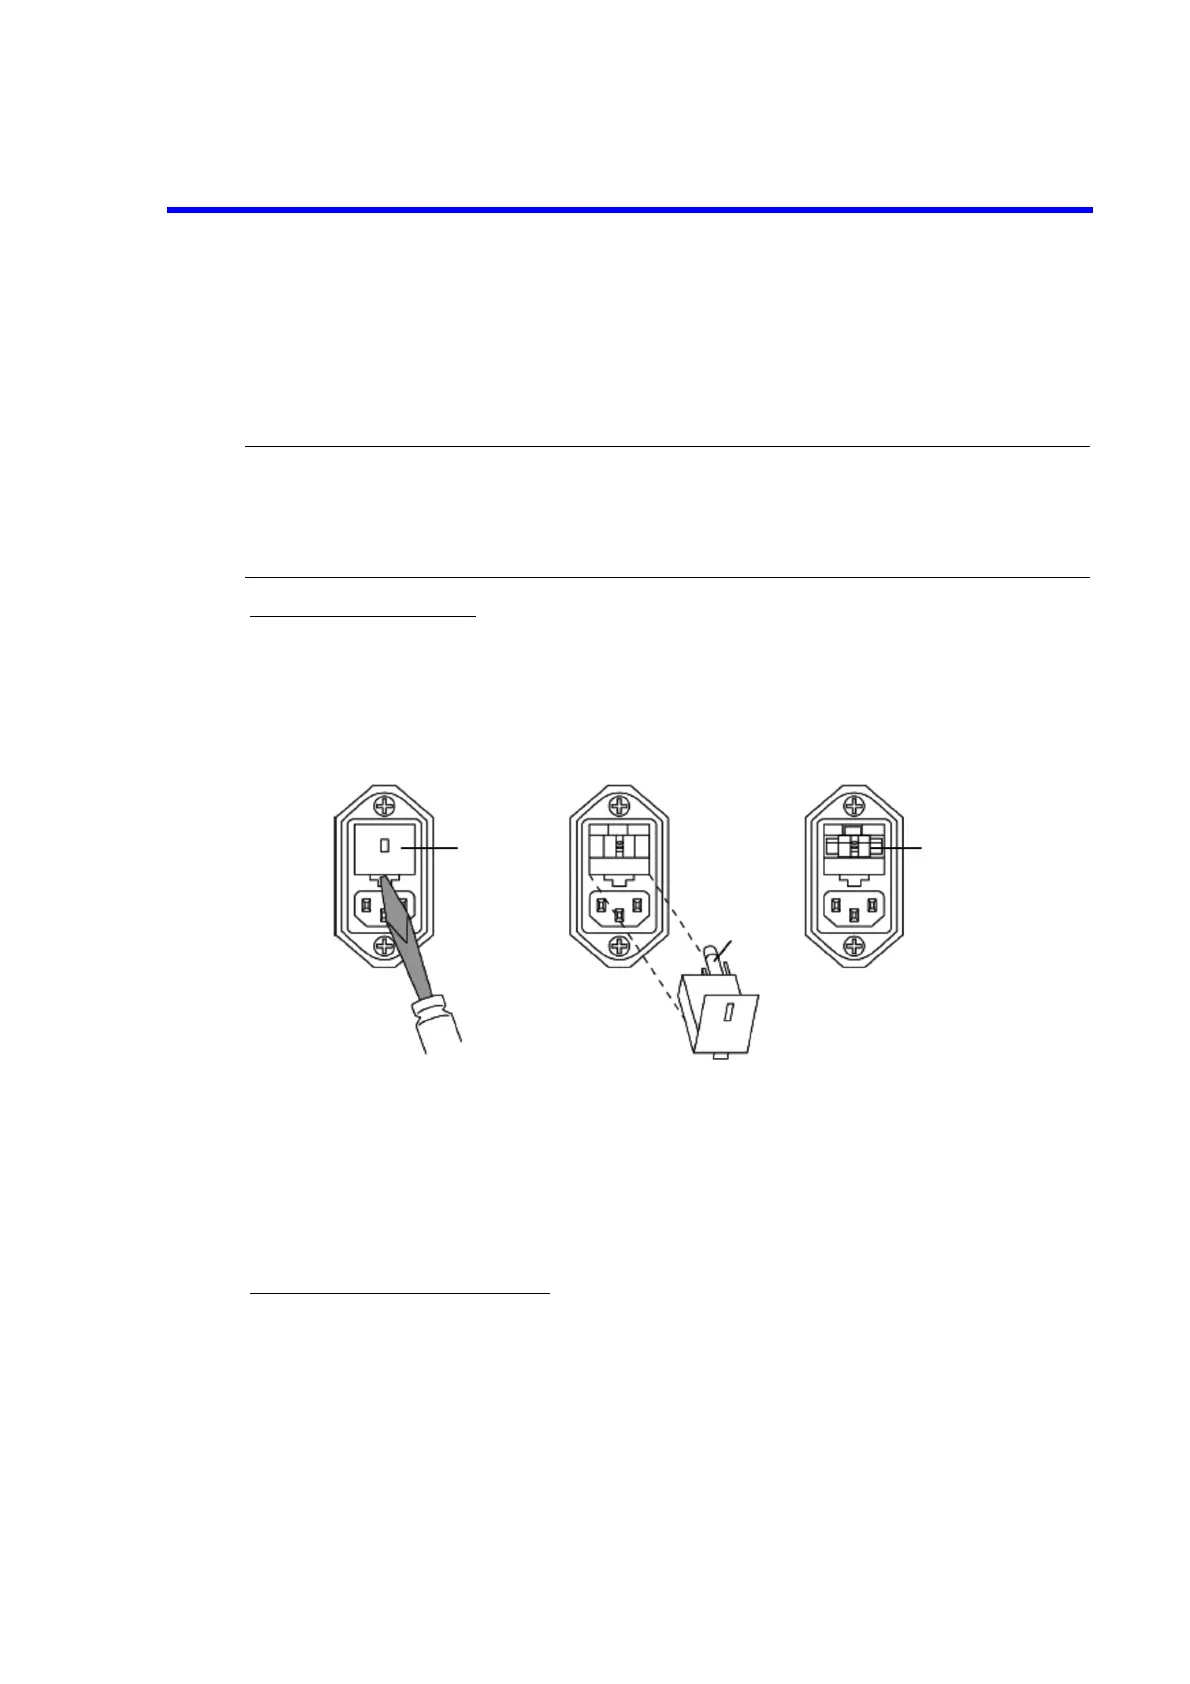
3. Remove the fuse holder on the rear panel with a flathead screwdriver.
Figure 1-4 Changing Power Voltage, and Checking or Replacing Power Fuse
4. Pull out the voltage selector.
The selectable voltage values: 100 V, 120 V, 220 V and 240 V are printed on the
voltage selector.
5. Insert the voltage selector in the right direction so that voltage to be used faces to
the front.
Checking or replacing the power fuse
6. Check if the fuse inside the fuse holder that was removed by Step 3 has been
blown. When it has been melted, replace it to a new one and insert to the fuse
holder. When you wish to change the power voltage, replace the fuse to another
that matches the power voltage to be used.
7. Insert the fuse holder back to the original position on the rear panel until it makes
a clicking sound.
Fuse
holder
Power
fuse
Voltage
selector