Preventive Maintenance and Troubleshooting
Preventive maintenance
115
• Clean the needle guide and nearby surfaces of the injector. Dust and dirt
accumulate in these areas and can be picked up easily by the syringe
needle and carried into the inlet.
• Clean the sample vial inserts for the turret.
• Clean the surface of the injector. Vacuum off any dust that builds up
around the vents of the electronics assembly.
• Realign and tighten the screw, standoffs, and mounting posts of the
injector bracket.
• Tighten the screws and standoffs of the tray bracket.
• Be sure all the cables are attached securely to the back of the power
supply.
• Be sure the tray is positioned over the alignment pin and locked in place.
Turret exchange
If you need to remove or exchange your turret, use the following instructions
for proper replacement.
1. Turn off the controller if the injector is installed.
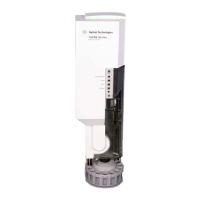
2. Open the tower door. Unscrew and remove the knurled nut from the top of
the turret. (See Figure 66).
3. Rotate the turret so that the open section faces the back of the tower and
the arrow on top of the turret points directly back. Push the stripper arm
toward the back, lift the turret up so that it clears the center shaft, and
remove it from the front of the tower.
4. To install the replacement turret, align the pin on the motor shaft with the
slot located on the underside of the turret.
5. Push the stripper arm to the back of the tower, insert the turret with the
open section facing the back of the tower with the arrow pointing back,
and install the turret with the pin seated in the slot. Seat the turret on the
shaft, rotating it gently, if necessary, until it drops completely into
position. The top of the threaded shaft should be almost level with the top
of the turret, and the stripper arm should clear the top by approximately
1 mm as the turret is rotated.
6. Replace the knurled nut, and tighten it firmly (finger-tight).
 Loading...


