Preparing for Operation
Preparing sample vials
31
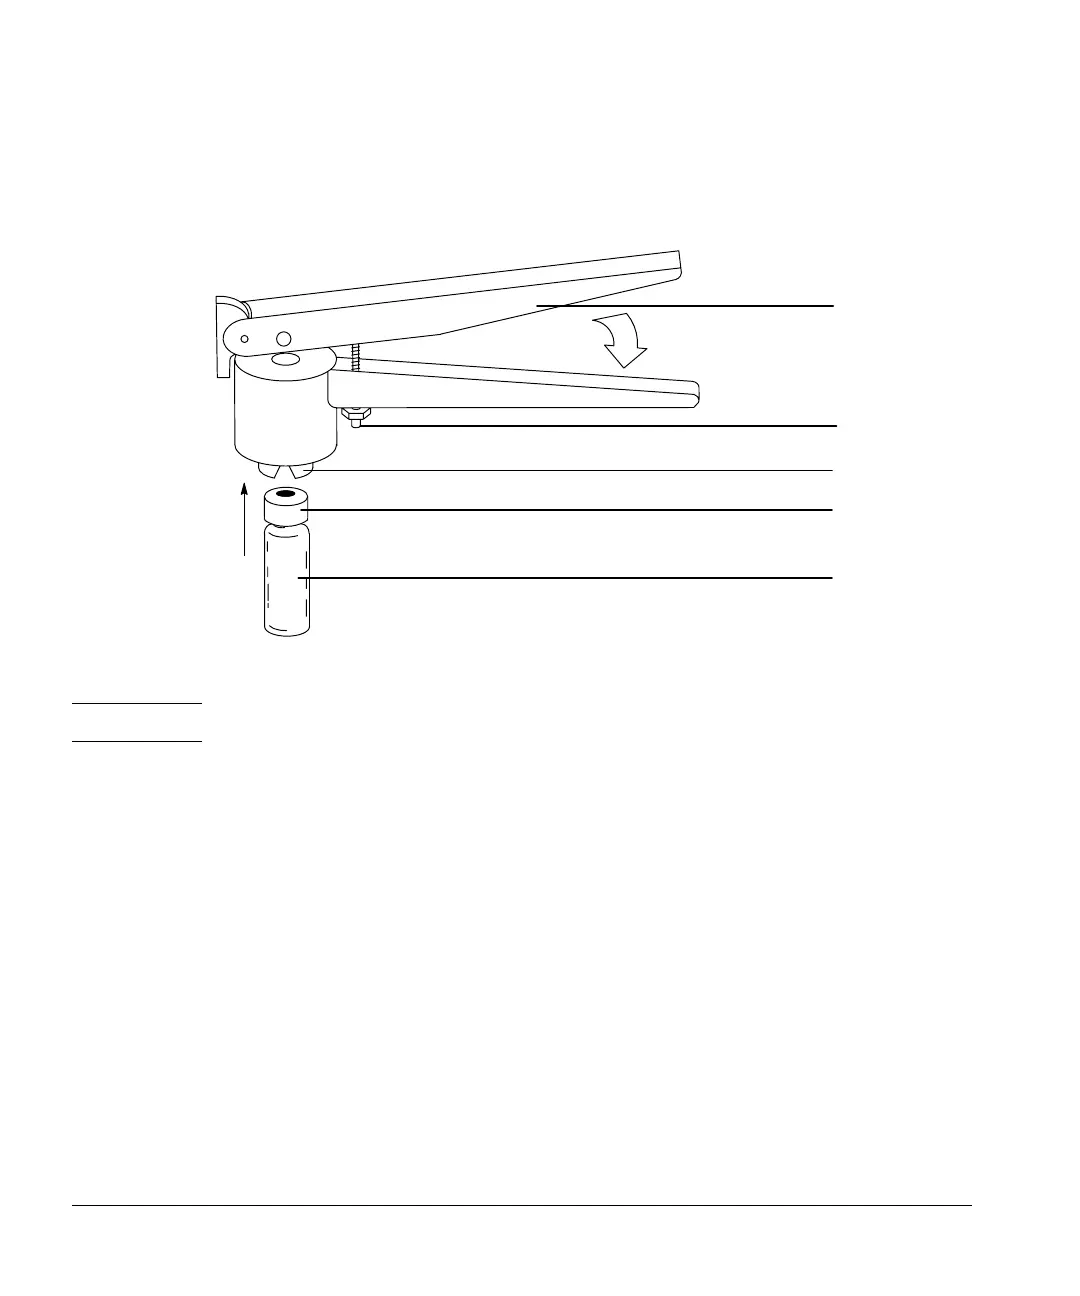
3. Lift the vial into the crimper, and squeeze the handle until the bottom grip
reaches the adjuster screw.
Figure 22. Crimping caps
Caution Vials that do not have properly crimped caps may cause sampler errors.
When a tray is not installed, you may be able to use sample vials with no caps,
snap-on caps, or screw-on caps depending on your application. If a tray is
installed, sample vials must have crimp caps or Target
®
DP
™
screw-cap vials.
Check that your vial is crimped as follows:
1. Cap has no metal folds or wrinkles on the part of the cap that wraps under
the neck of the vial.
• If there are folds or wrinkles, flatten any wrinkles by turning the vial
about 10° and crimping it again. Adjust the crimper for a looser crimp
by turning the adjusting screw clockwise.
2. Cap is too tight to turn by hand.
• If the cap is loose, adjust the crimper for a tighter crimp by turning the
adjusting screw counterclockwise. Crimp the cap again.
Handle
Adjuster screw
Jaws
Crimp cap
Sample vial