Agilent X-Series Signal Generators User’s Guide 171
Basic Digital Operation (Option 653/655/656/657)
Using Waveform Markers
Viewing a Marker Pulse
When a waveform plays (page 154), you can detect a set and enabled marker’s pulse at the rear
panel event connector/Aux I/O pin that corresponds to that marker number. This example
demonstrates how to view a marker pulse generated by a waveform segment that has at least one
marker point set (page 168). The process is the same for a waveform sequence.
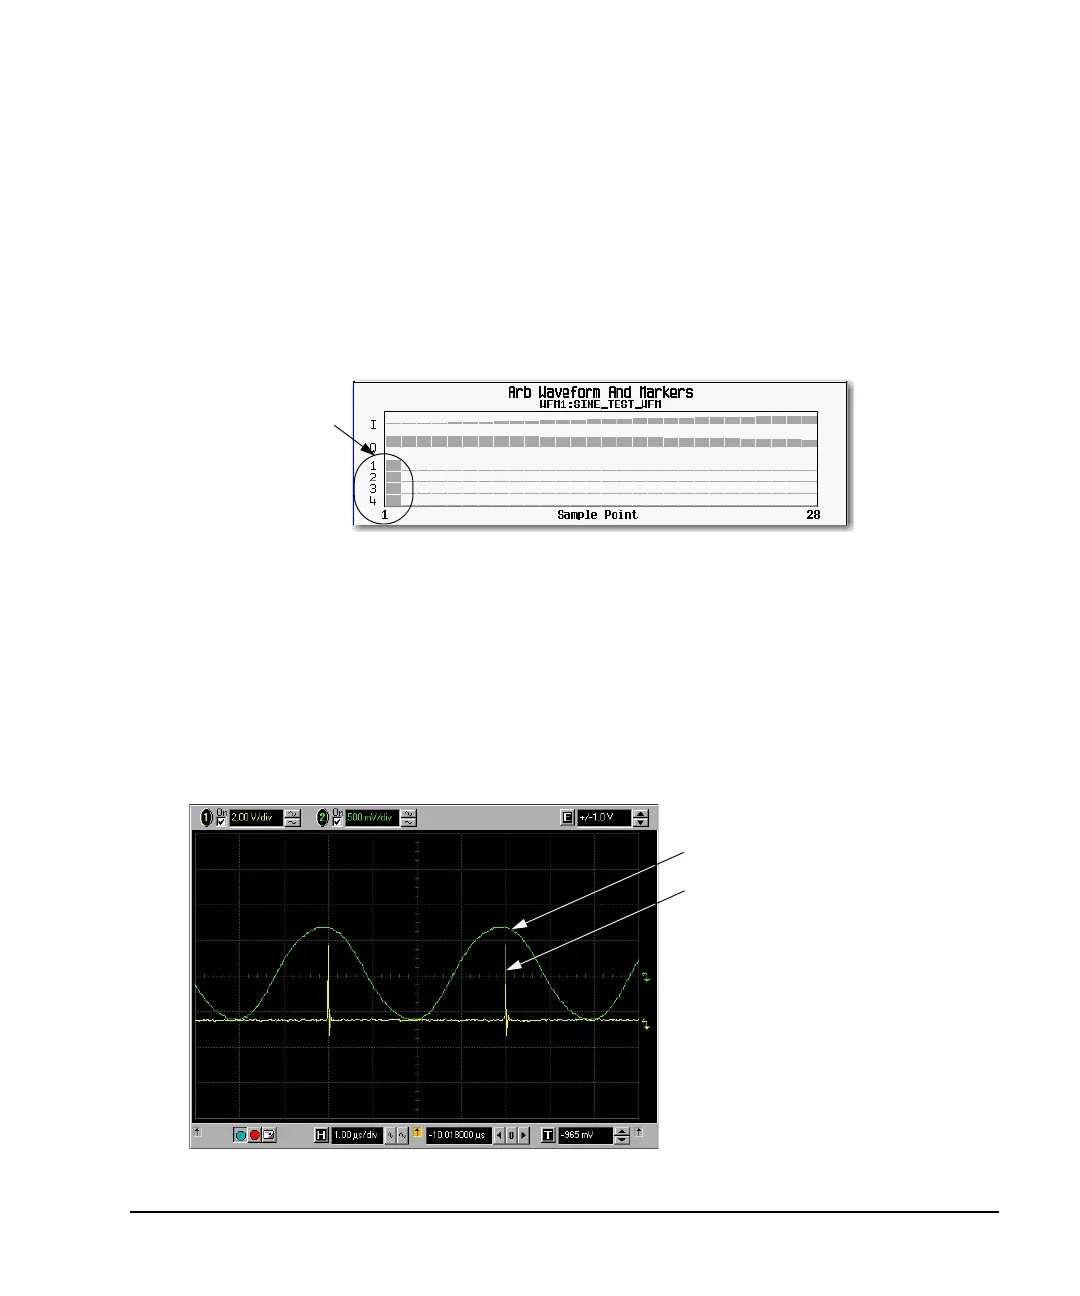
This example uses the factory–supplied segment, SINE_TEST_WFM in the dual ARB Player.
Factory–supplied segments have a marker point on the first sample point for all four markers, as
shown.
1. In the first Arb menu (page 147), press Select Waveform.
2. Highlight the SINE_TEST_WFM segment and press Select Waveform.
3. Press ARB Off On to On.
4. Connect the signal generator’s rear panel Q OUT output to the oscilloscope’s channel 1 input.
5. Connect the signal generator’s rear panel EVENT 1 output to the oscilloscope’s channel 2 input.
When marker 1 is present, the Agilent MXG/EXG outputs a signal through EVENT 1 as shown in
the following example.
Marker points on
first sample point of
waveform segment
How to view markers is described on page 167
Q OUT
Marker pulse on the Event 1 signal.
 Loading...