Chapter 3 Software Navigation
Part Number: 0160-6411, Rev A, 02/2019 Page 79 of 314
Software Release: cOS 5.00
Adjusting the Overlay Effect
Overlay images display on all treatment screens to provide a visual representation of the
selected treatment parameters. The default setting is for solid overlay images to display on all
treatment screens. However, you can adjust the overlay effect from the Overlay Fade Settings
Screen so that the overlay images blink fast, blink slow, fade fast, fade slow, or are hidden.
To select the overlay effect on the Surface Mapping Review Screen, select the desired setting
from the Visualize Overlay Effect drop-down menu. To select the overlay effect on the Incision
Review, Incision Adjustment, and Final Review Screens, select the desired setting from the
Customize Overlay Effect drop-down menu. To select the overlay effect on the Treatment
Progress Screen, select the desired setting from the Laser Treatment Overlay Effect drop-down
menu.
If Automatically Turn On Overlay Effect is set to “Yes” on the Overlay Drag Settings Screen, then
the selected overlay effect automatically displays on the treatment screens. To turn off the
overlay effect and revert to the default (i.e., solid) overlay images, press the button at the
bottom of the treatment screen.
If Automatically Turn On Overlay Effect is set to “No” on the Overlay Drag Settings Screen, then
the default (i.e., solid) overlay images display on the treatment screens, and you must press the
button to turn on the selected overlay effect.
NOTE
You can manually hide the overlay images by pressing and holding the button.
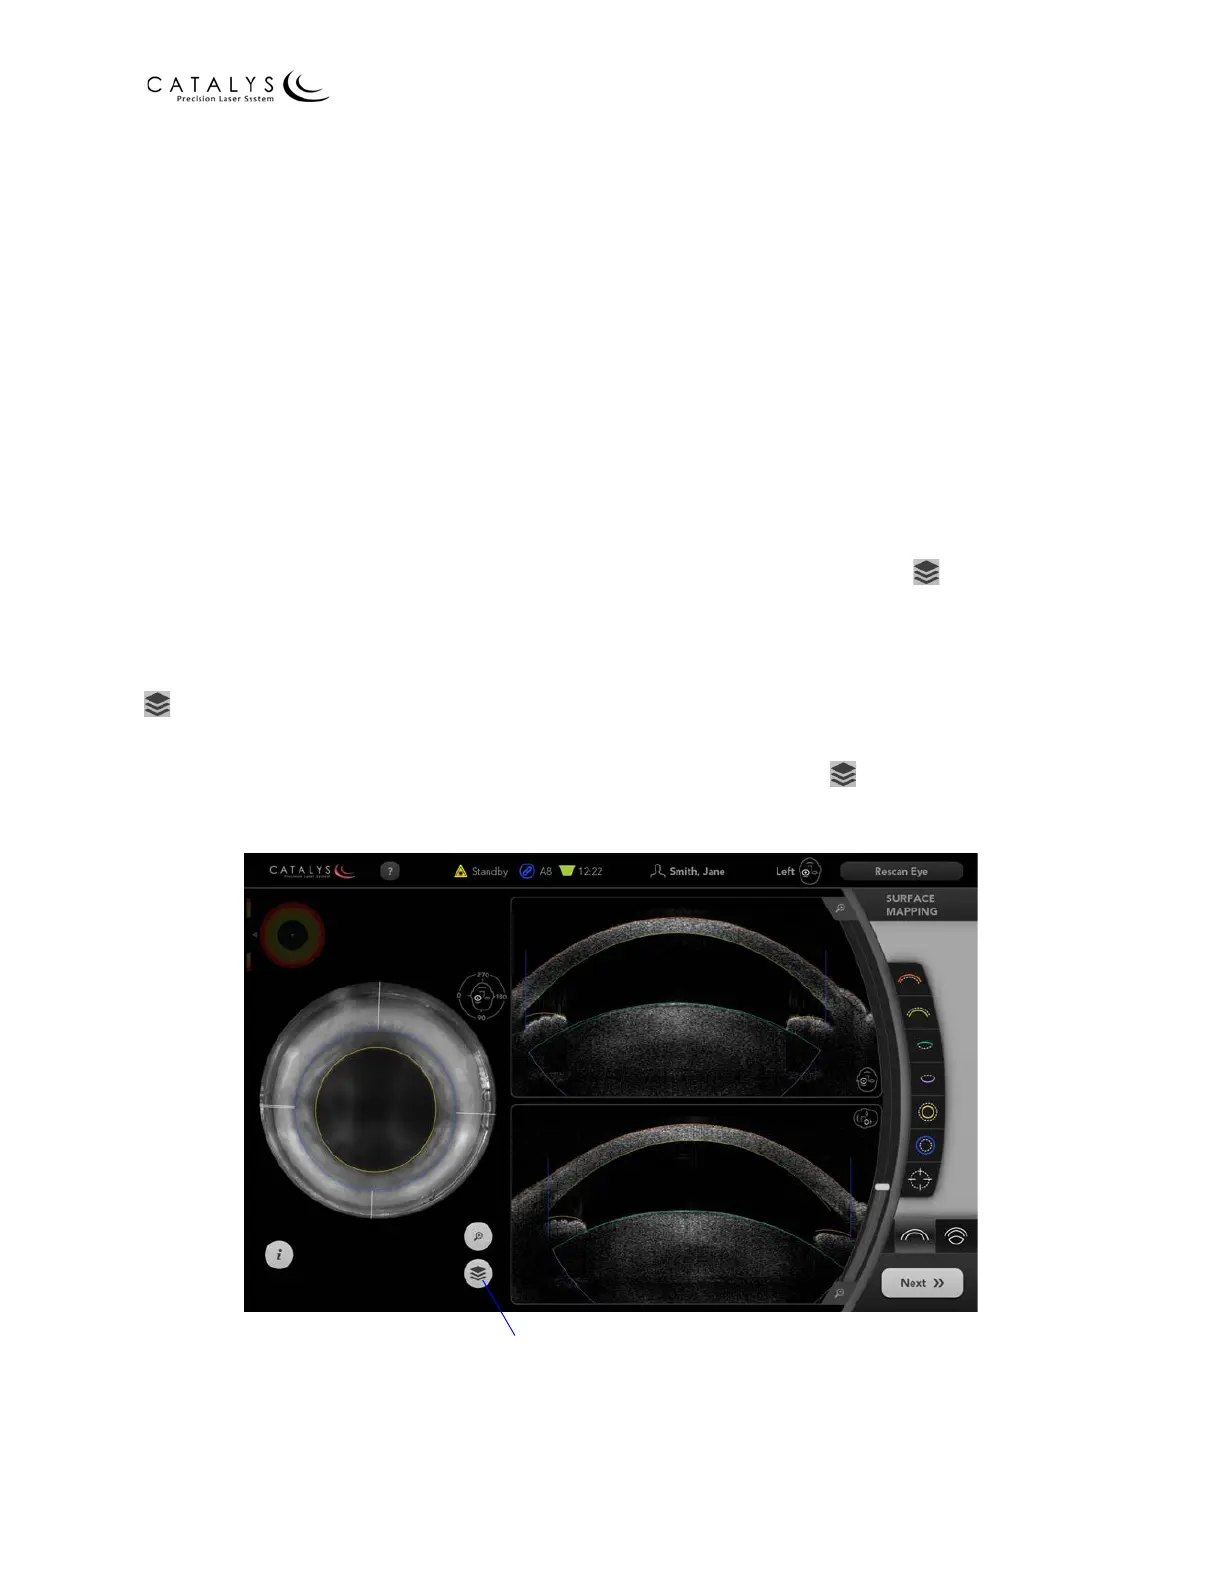
Figure 3.30 Sample Treatment Screen with Solid Overlay Images
Press once to toggle overlay
effect on/off or press and hold
to hide overlay images