Version 7.2 359 Mediant 1000B Gateway & E-SBC
User's Manual 17. Control Network
Item # Description
To support the connectivity status feature, you must enable the keep-alive mechanism
for the Proxy Set that is associated with the IP Group (see ''Configuring Proxy Sets'' on
page
346).
The green-color state also applies to scenarios where the device rejects calls with the
IP Group due to low QoE (e.g., low MOS), despite connectivity.
5 Links to Web pages relating to commonly required SBC configuration:
Classification: Opens the Classification table where you can configure Classification
rules (see ''Configuring Classification Rules'' on page 647).
Number Manipulation: Opens the Outbound Manipulations table where you can
configure manipulation rules on SIP Request-URI user parts (source or destination) or
calling names in outbound SIP dialog requests (see ''Configuring IP-to-IP Outbound
Manipulations'' on page 683).
Routing: Opens the IP-to-IP Routing table where you can configure IP-to-IP routing
rules (see ''Configuring SBC IP-to-IP Routing Rules'' on page 656).
SBC Settings: Opens the SBC General Settings page where you can configure
miscellaneous settings.
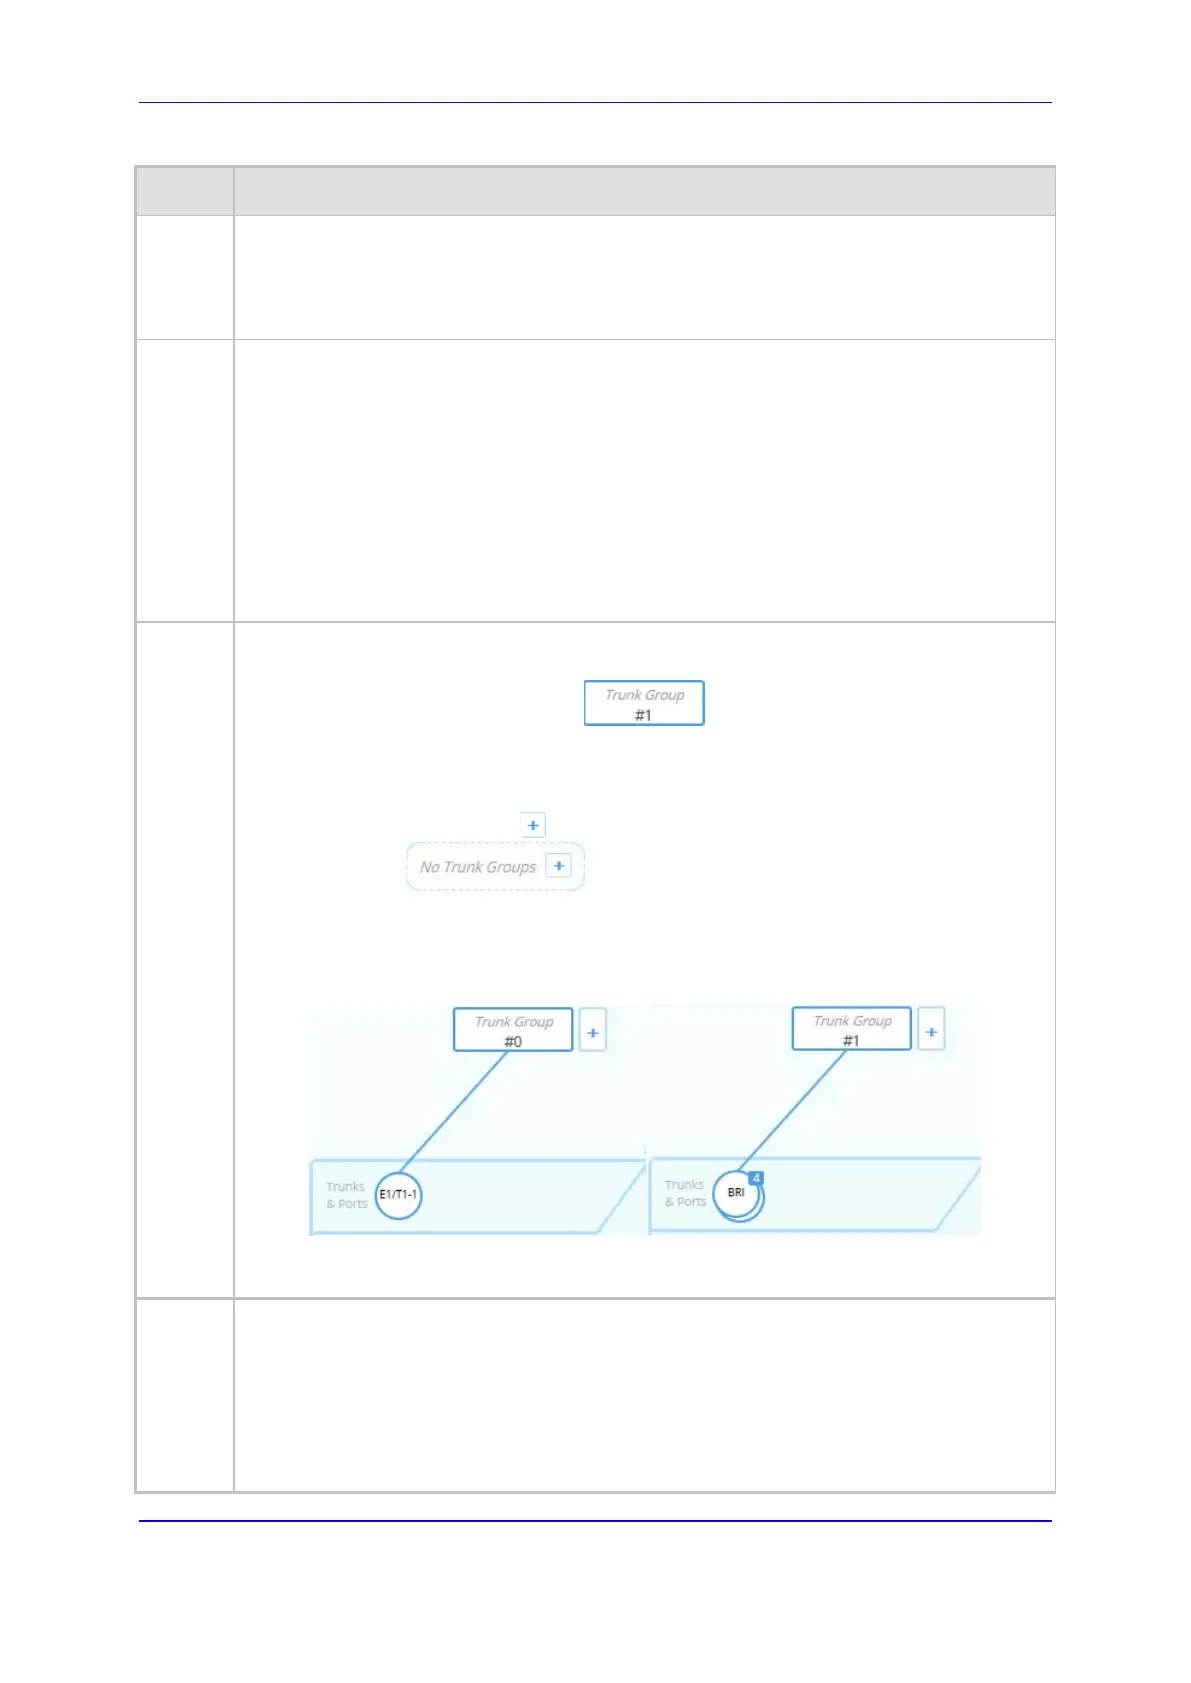
6 Configured Trunk Groups. Each Trunk Group is displayed using the following "Trunk
Group"-titled icon, which includes the row index number:
To edit or delete the Trunk Group, click the icon, and then from the drop-down menu,
choose Show List to open the Trunk Group table.
To add a Trunk Group, do the following:
1 Click the Add Trunk Group plus icon. The icon appears next to existing Trunk
Groups or as when there are no Trunk Groups.
The Trunk Group table opens, allowing you to configure a Trunk Group.
2 Configure the Trunk Group as desired, and then click Apply; the Trunk Group table
closes and you are returned to the Topology View, displaying the new Trunk Group and
a line connecting it to the associated port, as shown in the example below:
For more information on configuring Trunk Groups, see Configuring Trunk Groups on page
465.
7 Displays the device's hardware configuration concerning telephony (Tel/PSTN) trunks and
ports (e.g., FXS, FXO, BRI and E1/T1). It also displays the number of ports. The ports are
displayed as round icons, as shown in Item #6 above.
To configure a trunk (BRI or E1/T1), do the following:
1 Click the icon, and then from the drop-down menu, choose Trunk Settings; the Trunk
Settings page appears.
2 Configure the trunk as desired.

 Loading...


