R5906848 /04 DP2K SLP Series 135
2. Clean with lens cleaner together with a clean lens cleaning cloth to remove the dust and contamination. Use
big wipes.
3. Use a dry lens cleaning cloth to remove left liquid or stripes. Polish with small circles.
4. If there are still fingerprints on the surface, wipe them off with lens cleaner together with a clean lens cleaning
cloth. Polish again with a dry one.
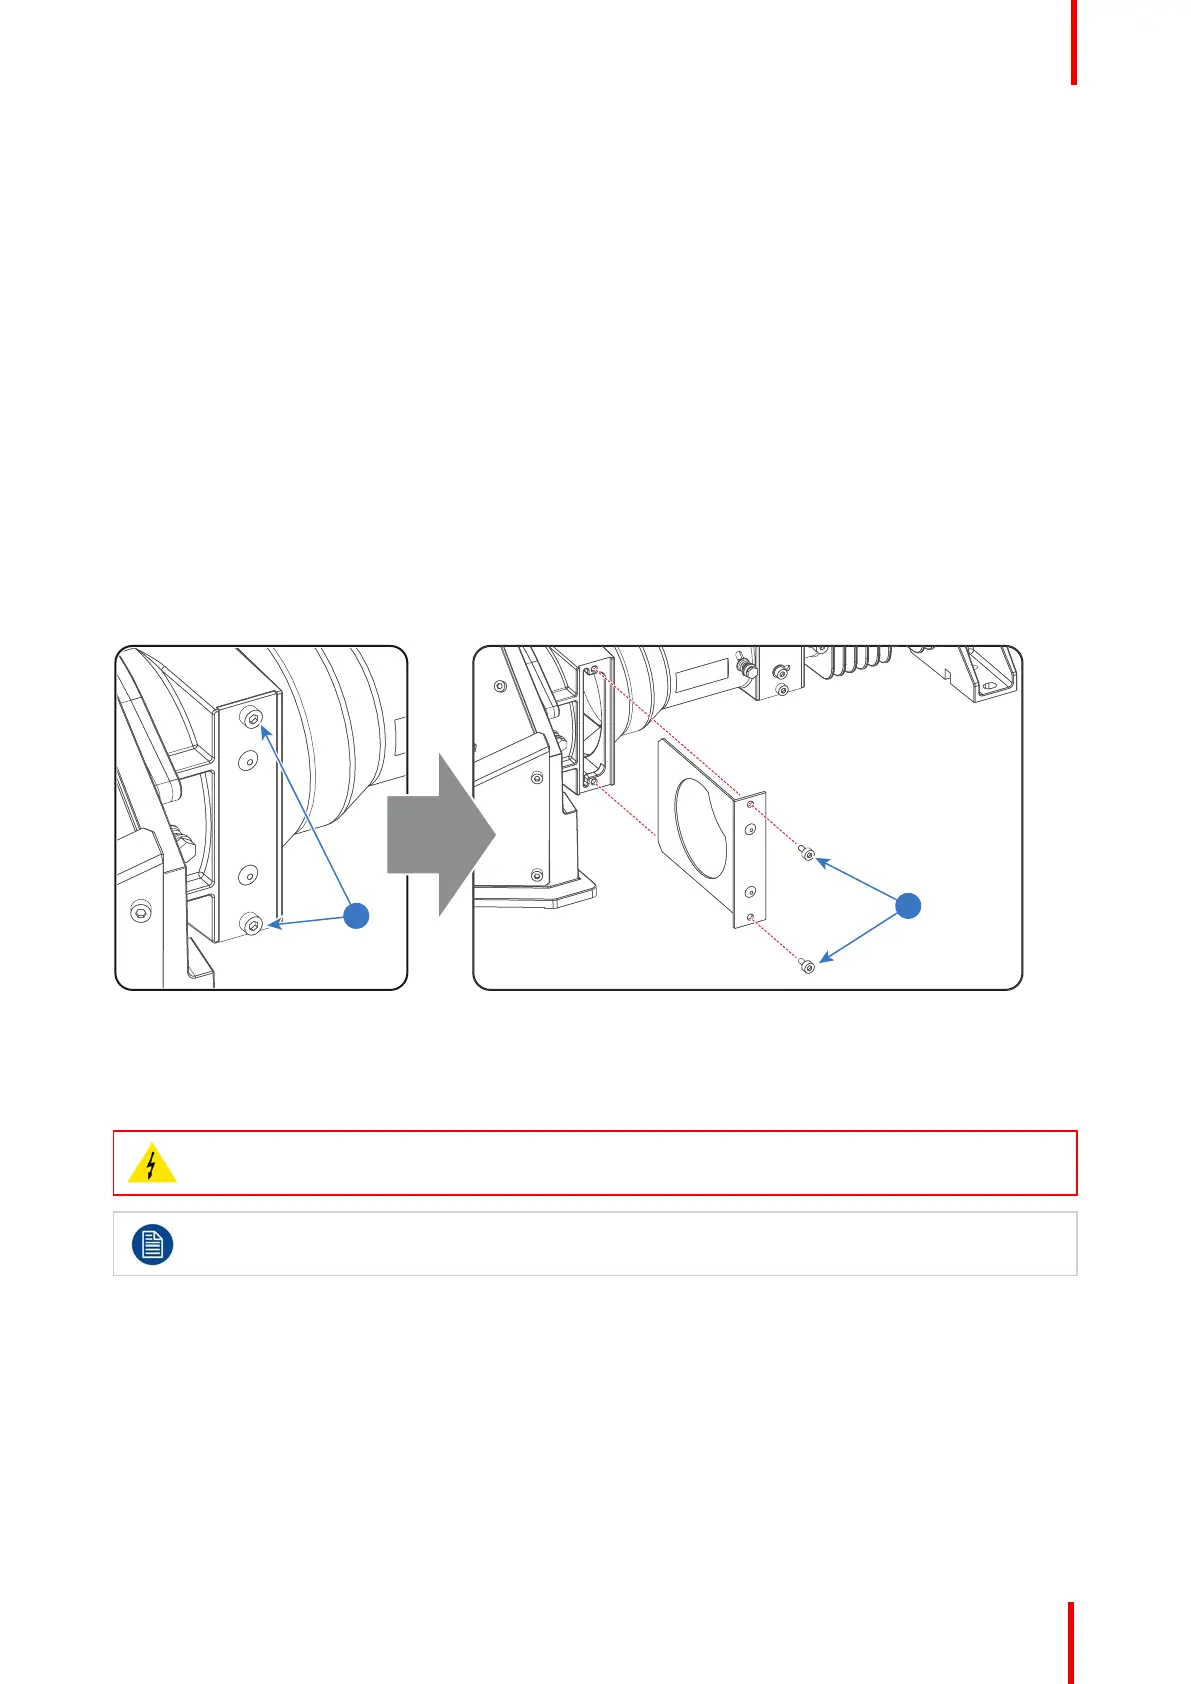
10.19 Replacing the High Contrast plate
Required tools
2.5mm Allen wrench.
How to replace the High Contrast plate?
1. Remove the two fixation screws of the High Contrast plate (reference 1 Image 10-30). Use a 2.5mm Allen
wrench.
2. Remove the High Contrast plate and insert the new one.
3. Fasten the High Contrast plate with two screws (reference 1 Image 10-30). Use a 2.5mm Allen wrench.
Image 10-30
10.20 Replacing the Light Sensor module (CLO)
WARNING: Disconnect the power cord from the projector and wait a few minutes (to discharge the
capacitors) prior to start with this procedure.
This procedure assumes that the left side projector cover and the side plate of the Light Processor
compartment are already removed.
Required tools
• 5.5mm nut driver.
• 5.5mm open-end wrench.
How to replace the Light Sensor of the Light Pipe?
1. Disconnect the wire unit (reference 1 Image 10-31 or Image 10-32) of the Light Sensor module.
Light Pipe

 Loading...


