R5906848 /04 DP2K SLP Series 141
• 3mm Allen wrench.
• 5.5mm nut driver.
How to diagnose the Integration Rod of the projector?
1. Remove the left cover of the projector and the side cover plate of the Light Processor compartment.
2. Switch on the projector and project a white test pattern. See user manual of the projector to do so. Make sure
that the projected white test pattern is focused.
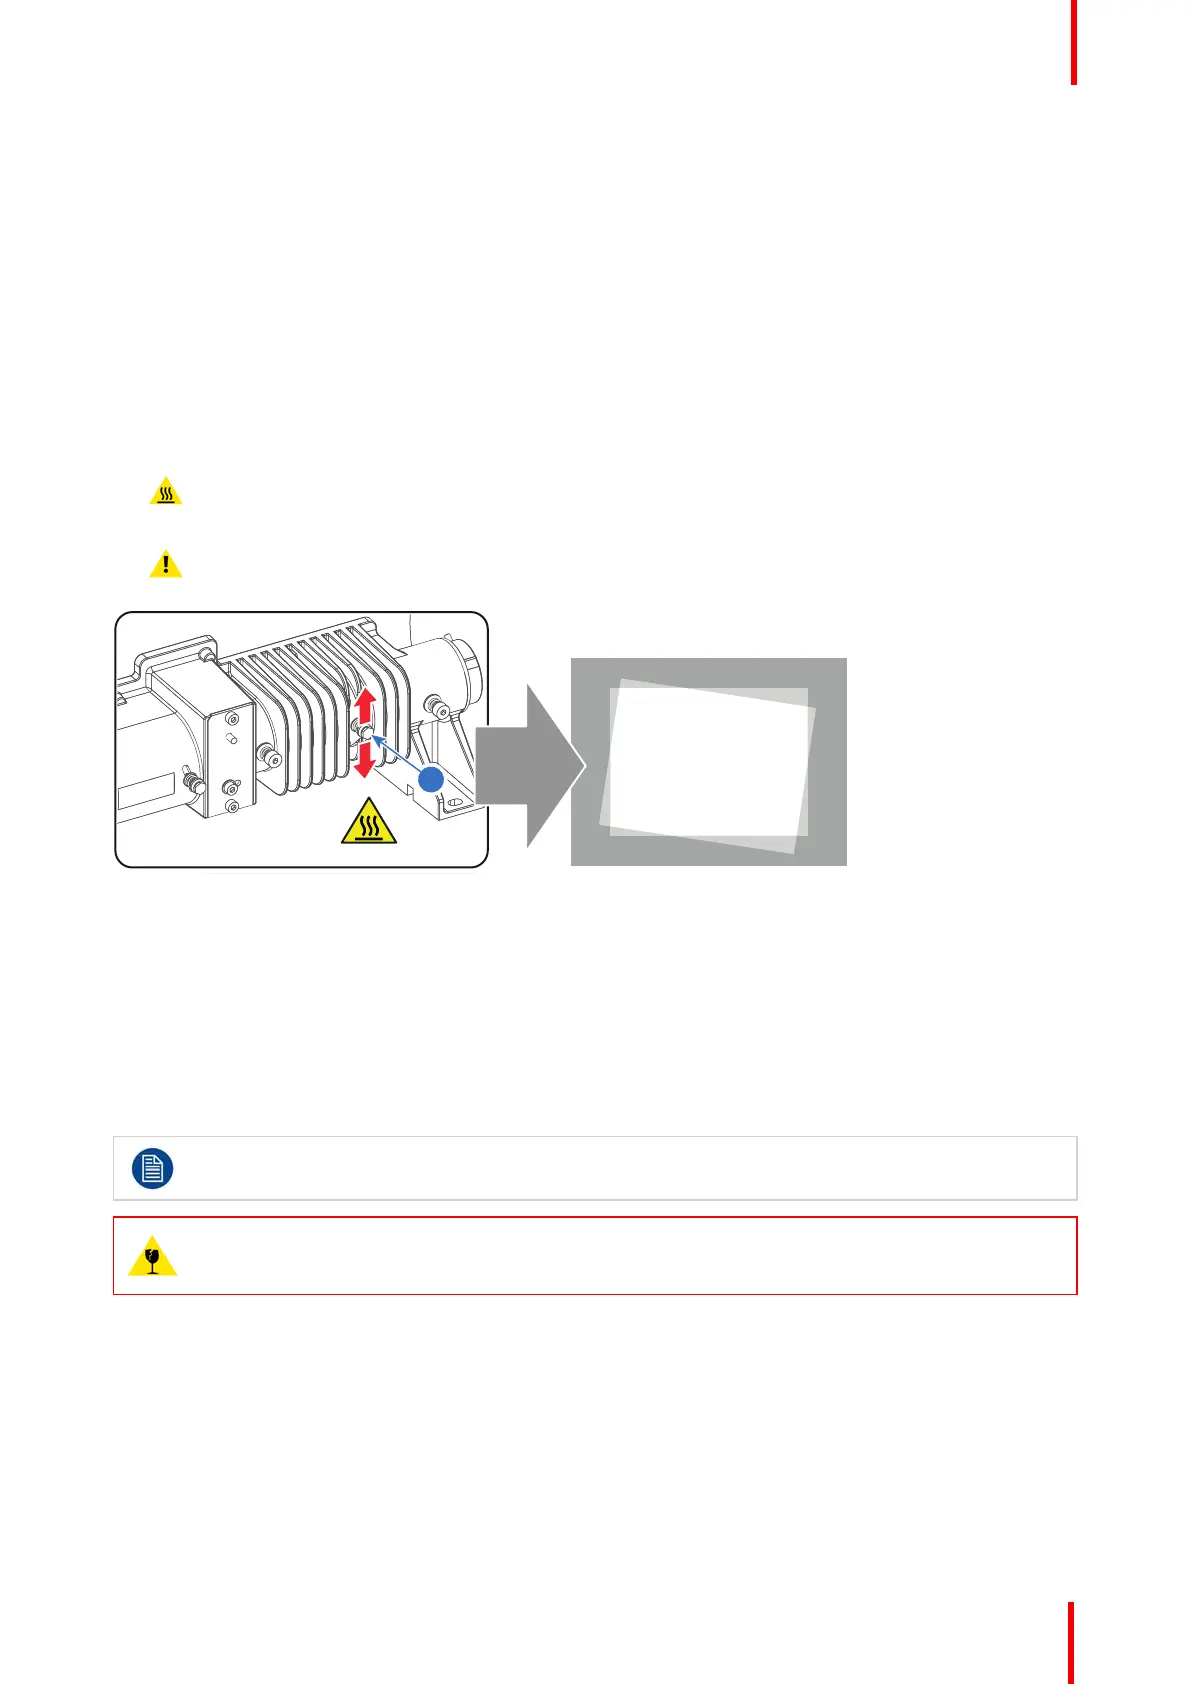
3. Loosen the adjustment screw (reference 1 Image 11-3) a few turns. Use a 5.5mm nut driver. Do not remove
the adjustment screw.
4. Gently move the adjustment screw of the Integration Rod assembly up and down while watching the projected
image.
Warning: The adjustment screw of the Integration Rod is hot. To prevent burn injuries use 5.5mm nut
driver for moving the Integration Rod.
Caution: Maximum ten (10) seconds are allowed of minimum light output on a non-adjusted
Integration Rod. Otherwise, the DMD’s may be damaged.
Image 11-3
5. Do you see spots in the projected image rotate along with the movements of the Integration Rod?
► If yes, these spots are caused by damages to the Integration Rod. Replace the Integration Rod assembly.
► If no, Integration Rod is OK. Re-adjust and secure the Integration Rod and reinstall the side cover plate and
projector cover.
11.3 Removal of the Mask plate and Rod heatsink
This procedure assumes that the Light Pipe is removed from the projector.
CAUTION: Take into account that the Mask plate and Rod heatsink are mounted very close to the
Rod entrance. The Rod is extremely fragile! Avoid touching the Rod at all times. An minor collision
is sufficient to cause irreversible damage to the Rod.
Required tools
• TX10 Torx driver.
• Cotton gloves.
• 2.5mm Allen wrench.
How to remove the Mask plate and Rod heatsink from the Light Pipe entrance?
1. Remove the two fixation screws (reference 4 Image 11-4) of the Mask plate (reference 5 Image 11-4). Hold the
Mask plate into position. Use a TX10 Torx driver.
Integration Rod

 Loading...


