R5906848 /04 DP2K SLP Series192
6. Secure tightly the motor unit using a 2.5mm Allen wrench as indicated in Image 16-35. Bond the head of
screws not to loosen those.
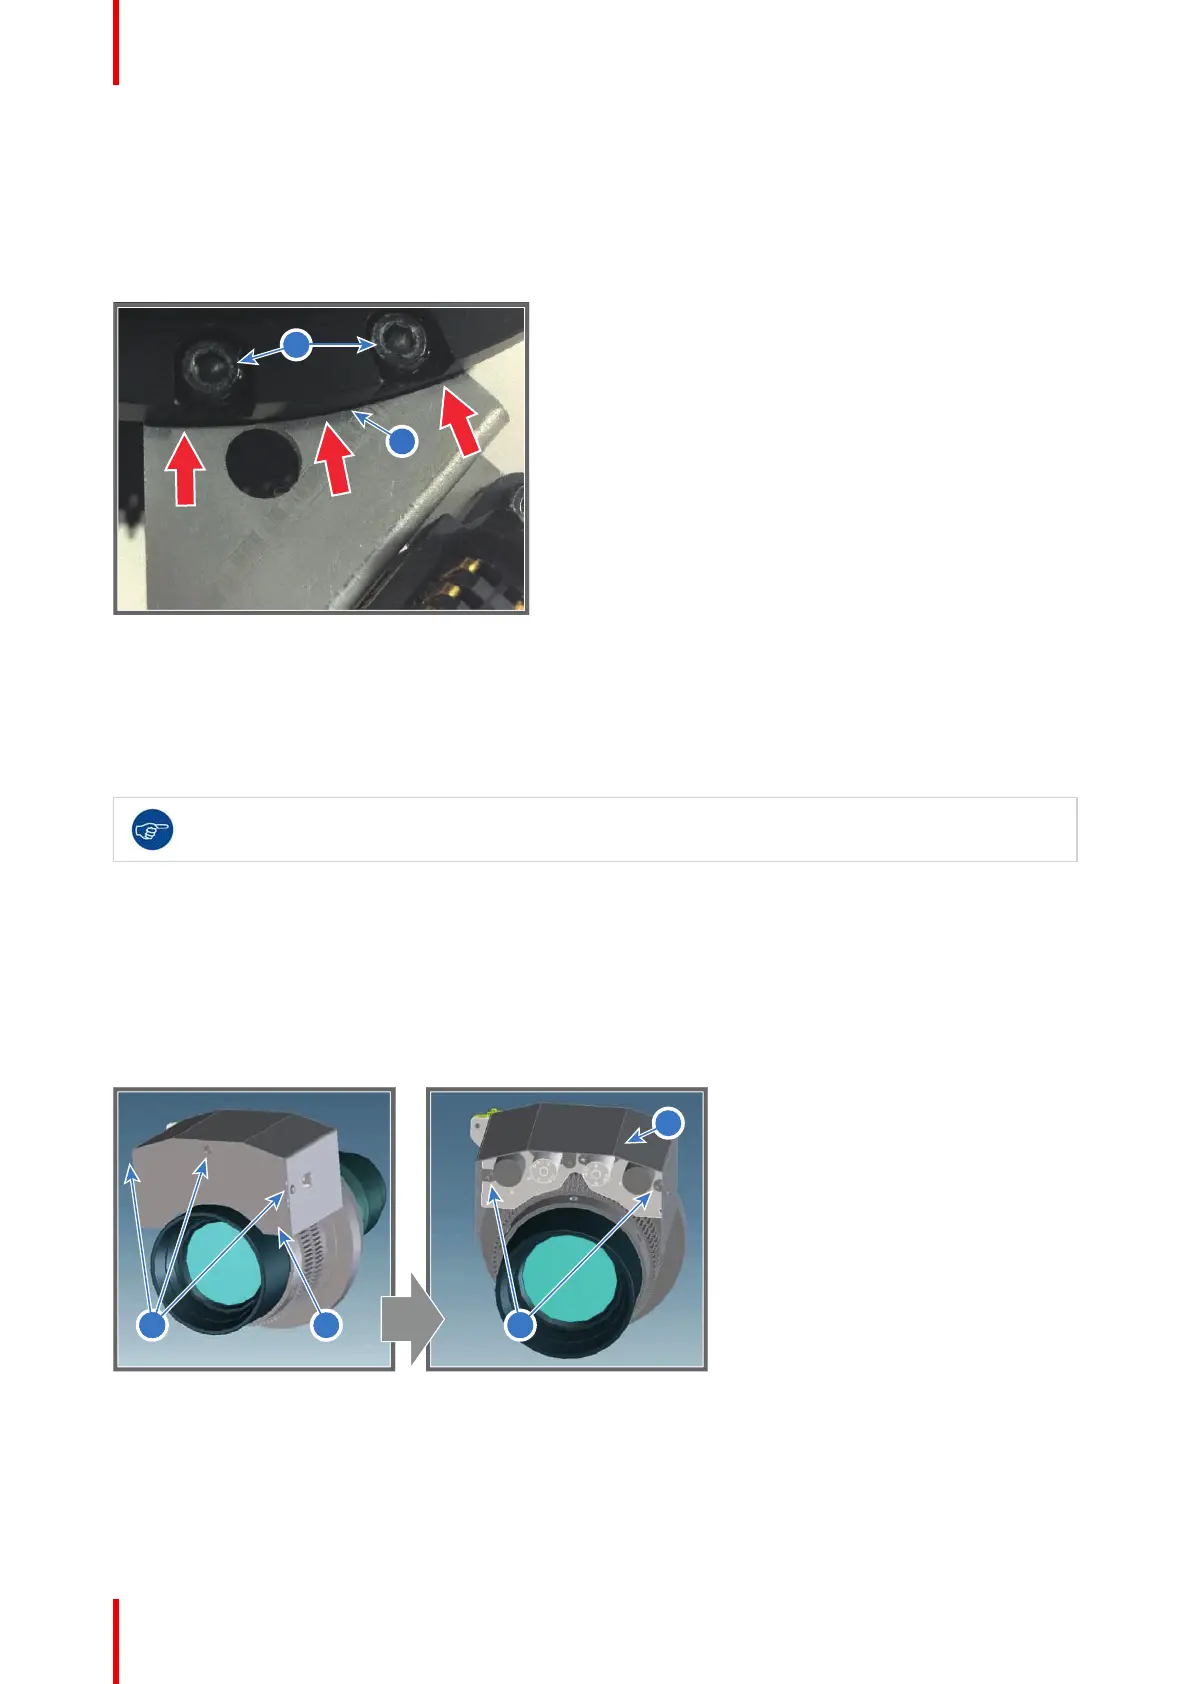
7. Attach the connector plate to the lens mount and secure it tightly with 2 hex socket screw M3x3 (reference 1
Image 16-36). Use a 2.5mm Allen wrench. While securing adjust position of the connector plate along the
black line drawn on the plate as indicated with reference 3 in Image 16-36. Bond the head of screws not to
loosen those.
Image 16-36
16.14 Replacement of the motor assembly for 0.69"
DC2K lenses (Type 'F')
To know which type of lens motor assembly is mounted on the projection lens see chapter
“Available lenses”, page 174.
How to replace the lens motor assembly?
1. Remove the lens from the projector.
2. Remove the front cover (reference 2 Image 16-37) of the lens motor assembly by releasing the three screws
(reference 1 Image 16-37) as illustrated.
3. Remove the top cover (reference 4 Image 16-37) of the lens motor assembly by releasing the two screws
(reference 3 Image 16-37) as illustrated.
Image 16-37
4. Detach the lens motor assembly from the projection lens by releasing the three screws (reference 5 Image 16-
38) as illustrated.
Lens Holder

 Loading...


