R5906848 /04 DP2K SLP Series 145
Image 11-7
Image 11-8
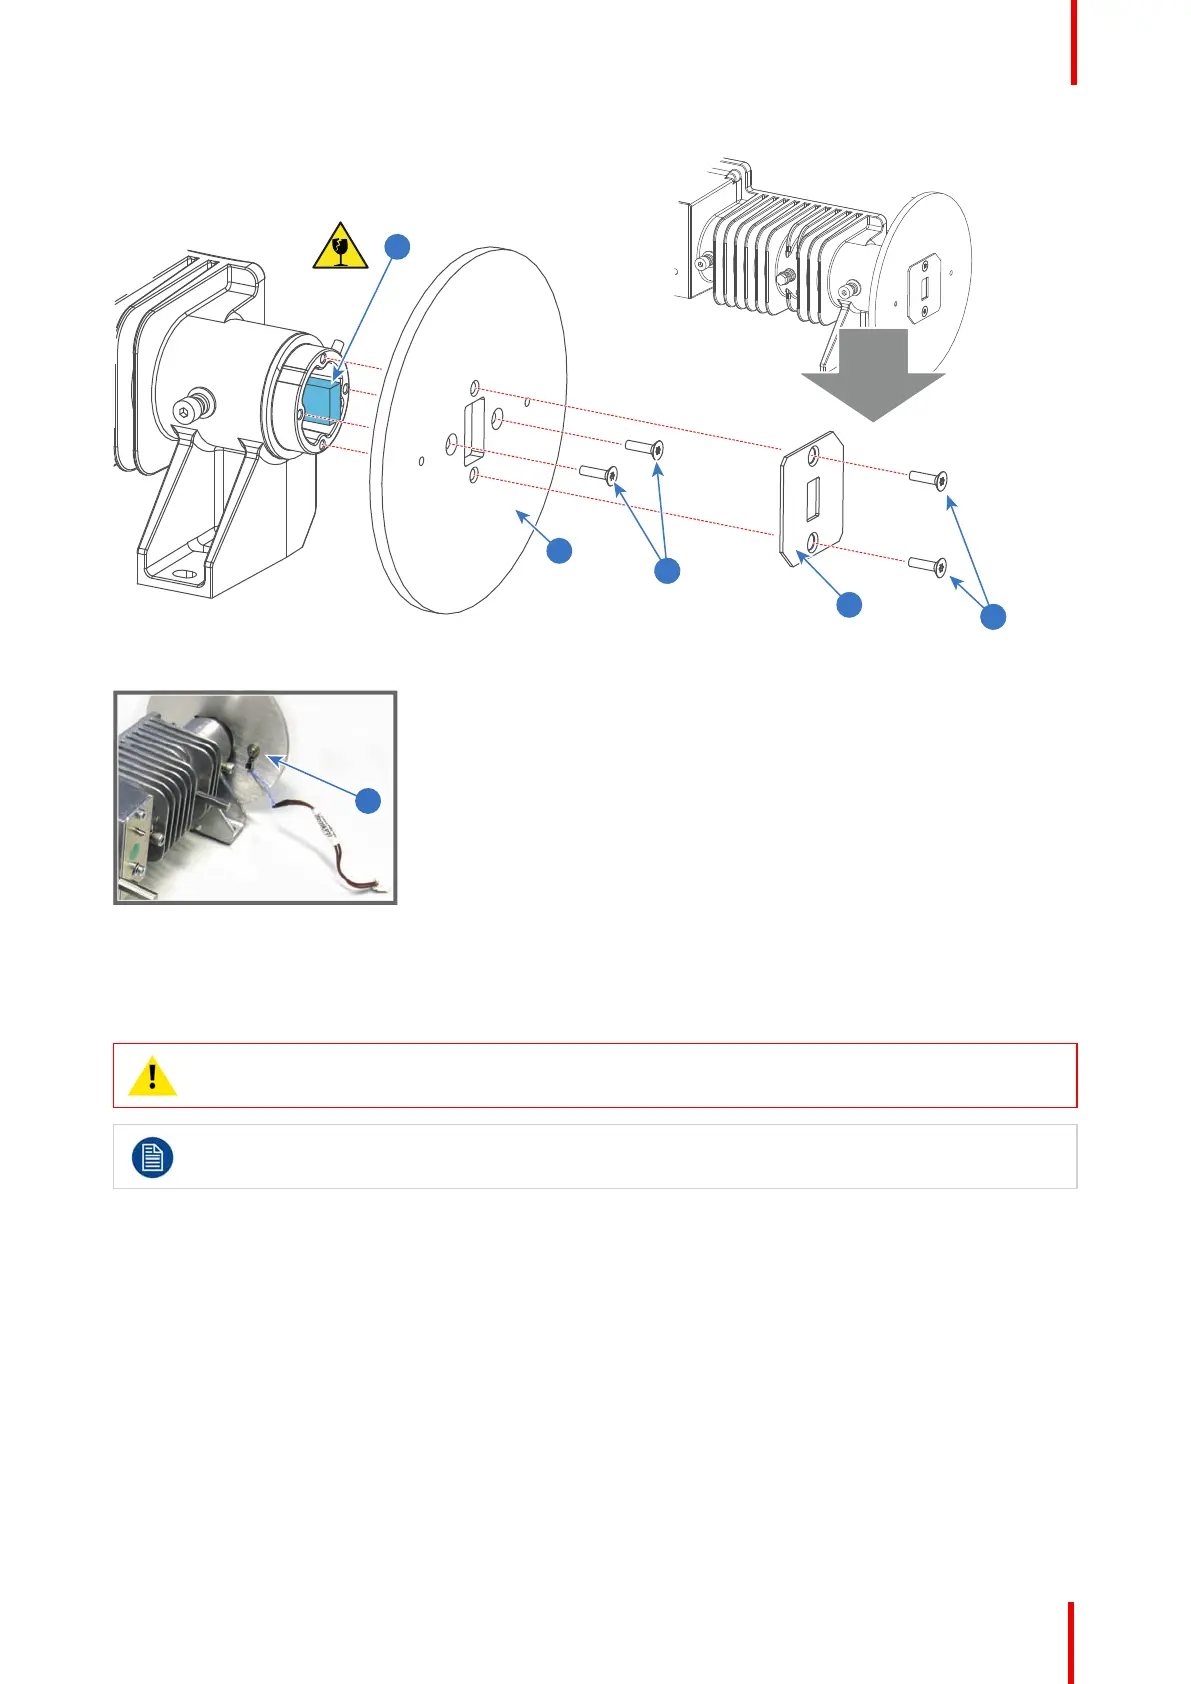
11.6 Adjusting the Integration Rod
CAUTION: Only qualified and authorized personnel may perform this procedure.
To adjust the Integration Rod the left cover of the projector and the side cover plate of the Light
Processor compartment have to be removed.
Required tools
5.5mm nut driver.
How to adjust the Integration Rod of the projector?
1. Loosen the adjustment screw (reference 1 Image 11-9) a few turns. Use a 5.5 mm nut driver. Do not remove
the adjustment screw.
2. Start up the projector but do not activate the light source yet.
3. Set up the projector to display a full white internal pattern with a maximum contrast and a maximum
dimming. Do not activate the light source yet. Make sure that you have a 5.5 mm nut driver within reach for
the next steps.
Integration Rod

 Loading...


