R5906848 /04 DP2K SLP Series226
Image 18-20
7. Reconnect the wire (reference 2 Image 18-19) with the Button Module and engage the wire into the two cable
clamps (reference 1 Image 18-19).
8. Install the circular connector (reference 4 Image 18-19) and fasten the nut (reference 3 Image 18-19).
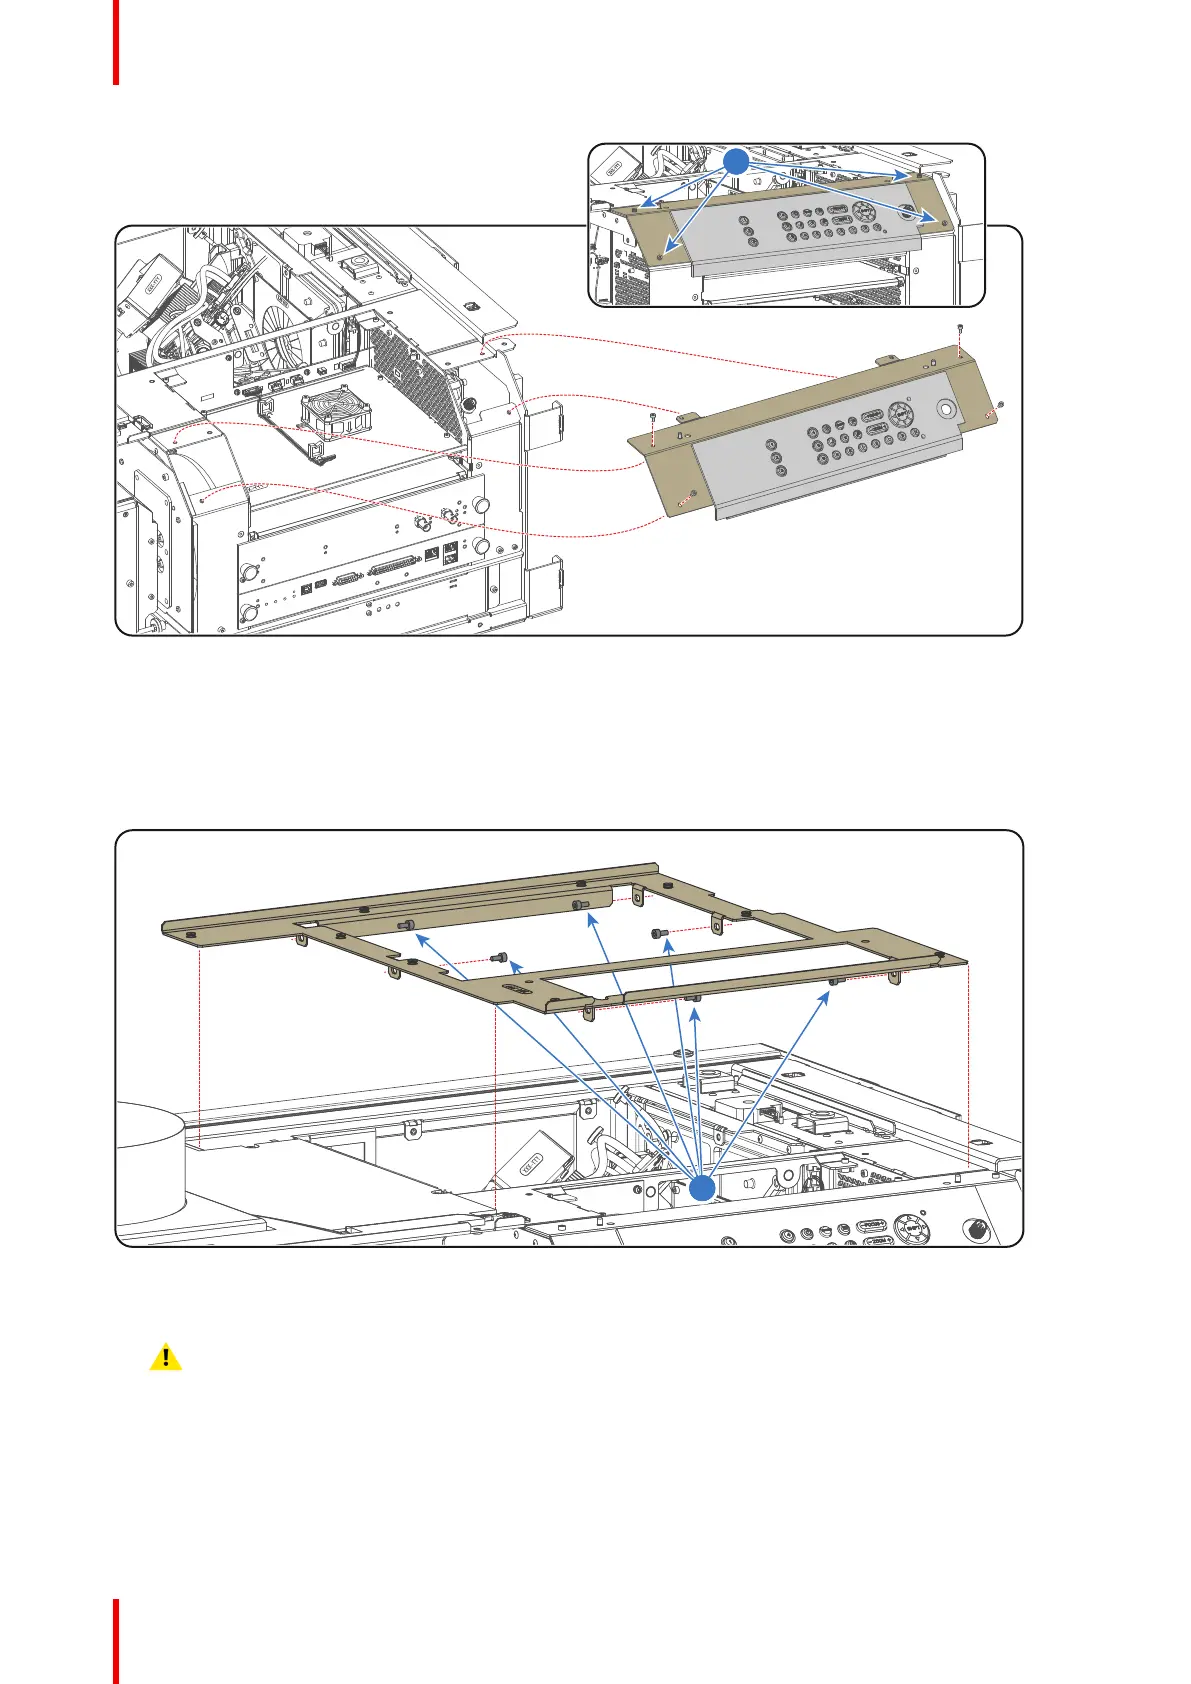
9. Place the top frame in its position on top of the projector.
Image 18-21
10. Secure the top frame with 6 fixation screws (reference 3 Image 18-22) as illustrated. Use a 3mm Allen wrench.
Caution: Take care not to drop the screws inside the projector.
Card Cage

 Loading...


